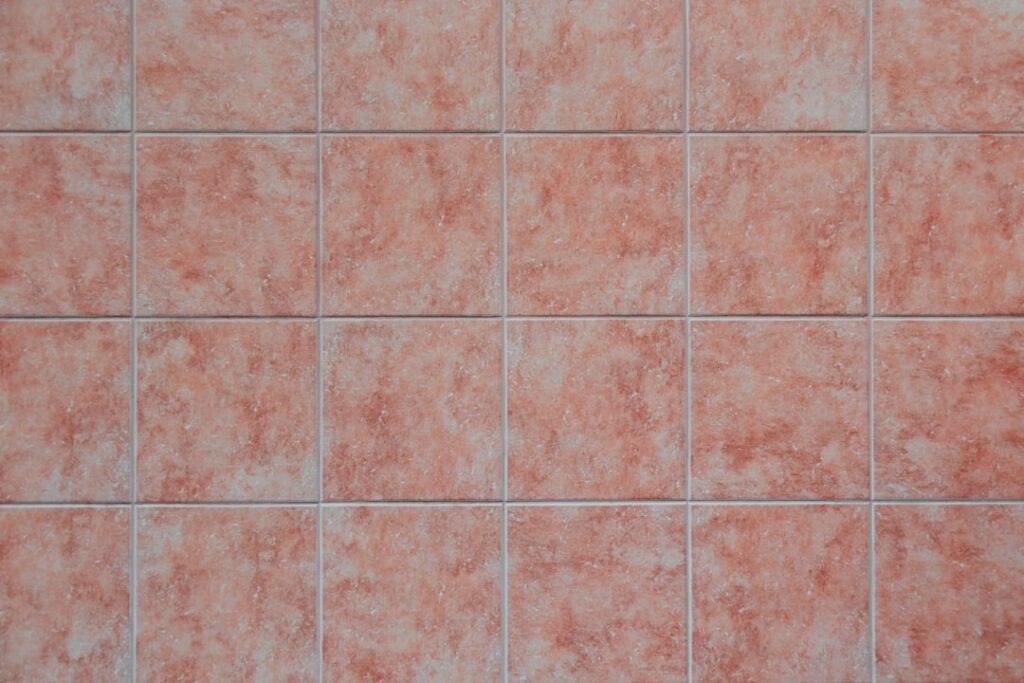
Few materials bring warmth to a room the way fired clay does, and the small-format version is having a real moment. A 4×4 terracotta tile delivers that earthy, hand-made character in a size that suits backsplashes, accent walls, patios, and cozy floors where a big 12-inch saltillo would feel too heavy. The compact format lets you follow tight curves, wrap steps, and create rich patterns that larger tiles simply can’t.
Terracotta, Italian for “baked earth,” is one of the oldest building materials on the planet, and its appeal hasn’t faded. But it is also one of the most porous tiles you can buy, which means the difference between a floor that ages beautifully and one that stains in a week comes down almost entirely to how you seal and maintain it. Here’s everything you need to know before you order.
What Makes 4×4 Terracotta Tile Special
True terracotta is unglazed fired clay, often sun-dried and kiln-fired using traditional methods. The most famous type is Saltillo, made in Saltillo, Mexico, where tiles are still shaped by hand and dried in the open air. That handmade process is exactly why no two tiles are identical: you’ll see color variation, subtle surface texture, and occasionally a paw print or leaf imprint from the drying yard. Some people consider those quirks flaws; most of us consider them the entire point.
The 4×4 size sits at a friendly scale. It reads as detailed and artisanal, works on both walls and floors, and creates more grout lines, which adds slip resistance underfoot and visual rhythm. Because the tiles are small, they’re also easier to handle and install than heavy 12-inch pavers.
Terracotta Colors and Finishes
The classic terracotta color is a warm burnt orange, but the natural range is broader than most people realize. Clay chemistry and firing temperature shift the tone across:
- Warm reddish-orange — the iconic Saltillo look, ranging from bright rust to deep brick.
- Golden and yellow ochres — lighter, sunnier tiles that brighten a space.
- Pink and salmon blushes — softer tones common in premium hand-made lines.
- Manganese and coffee browns — darker, richer tiles fired with added minerals.
Because color comes from natural clay, expect variation within a single order. That’s normal. Dry-lay tiles from several boxes and blend them before you set, so no single dark or light box clusters in one spot. As for finish, most terracotta is left unglazed and matte, though some manufacturers offer pre-sealed or “super-saltillo” tiles with cleaner edges if you want a more uniform look.
Why Sealing Terracotta Is Non-Negotiable
This is the single most important section of this guide. Unglazed terracotta is extremely porous, drinking up water, oil, wine, and dirt like a sponge. An unsealed tile will stain almost instantly and can develop efflorescence, that white powdery haze, as moisture wicks through it. Sealing is not optional; it’s what makes the tile livable.
The Sealing Process
- Let the tile and grout cure fully. Wait at least 48 to 72 hours after installation, longer in humid conditions, so trapped moisture can escape.
- Clean thoroughly. Remove all grout haze and construction dust. Any dirt sealed in is dirt that stays forever.
- Apply a penetrating sealer first. A quality penetrating (impregnating) sealer soaks into the clay and blocks stains from within. Plan on two or three coats, letting each dry.
- Add a topical finish if you want sheen. A topical sealer or terracotta-specific wax builds a surface layer and gives that classic satin-to-glossy glow. Boiled linseed oil is a traditional finish, but modern acrylic or wax topcoats are easier to maintain.
Budget for sealer in your project cost. A gallon of good penetrating sealer runs $30 to $60 and you’ll use more than you expect on thirsty clay. Pro tip: seal the tiles before grouting when possible. Pre-sealing keeps grout from staining the porous faces, then you seal again after grouting for full protection.
Indoor and Outdoor Use
Terracotta works beautifully in both settings, with a few caveats. Indoors, it’s a favorite for kitchens, entryways, sunrooms, and Southwestern or Mediterranean-style living spaces. Its natural warmth and slight texture make it comfortable and slip-resistant underfoot.
Outdoors, terracotta shines on covered patios, courtyards, and porches in mild climates. But here’s the critical warning: standard terracotta is not frost-proof. In climates where temperatures drop below freezing, water absorbed into the porous clay expands and can crack or spall the tile. If you live where it freezes, either keep terracotta to interior use, choose a high-fired frost-resistant porcelain that mimics the look, or make sure outdoor installations are meticulously sealed and, ideally, under cover.
Cost and Budgeting
Terracotta is one of the more affordable natural tile options, which adds to its appeal. Expect these rough numbers:
- Standard Saltillo 4×4 tile: roughly $2 to $5 per sq ft.
- Premium hand-made or specialty terracotta: $6 to $12 per sq ft.
- Sealer and finish: add about $0.50 to $1.50 per sq ft.
- Professional installation: $6 to $12 per sq ft on top of materials, more for intricate patterns.
Always order 10 to 15 percent extra. Handmade tiles vary in size, some arrive chipped, and you’ll want spares that match the original firing for future repairs. Dye lots don’t exist in the same way with clay, so a matching replacement bought years later rarely blends.
Installation Basics
Setting a 4×4 terracotta tile is well within reach of a confident DIYer, but the porous clay adds a few wrinkles worth planning around. Because the tiles absorb moisture aggressively, they can pull water out of thinset too fast, which weakens the bond. To prevent that, lightly dampen the backs of the tiles or use a thinset formulated for porous stone and clay. Work in small sections so you can adjust for the natural size variation between handmade pieces.
A few field-tested pointers keep the job clean:
- Use a wider grout joint, typically 1/2 inch, which suits the rustic look and absorbs the dimensional variation of handmade tile better than a tight line.
- Choose a sanded grout for those wider joints so it resists shrinkage and cracking.
- Set on a stable, cured substrate. On floors, that means cement backer board or a properly cured slab, never bare plywood, since clay tile is unforgiving of any flex underneath.
- Back-butter each tile for full coverage, which matters on floors where hollow spots lead to cracks.
Take your time with layout and let the mortar cure fully before you seal and grout. Rushing the cure is the fastest way to trap moisture in a material that already holds onto it.
Layout Patterns for 4×4 Terracotta Tile
The small square format is a blank canvas. A straight grid keeps things clean and modern. A diagonal set turns the same tile 45 degrees and makes a room feel larger. For real character, mix a 4×4 terracotta tile with decorative hand-painted Talavera accents scattered throughout, a look that’s iconic in Spanish and Mexican design. You can also run a running-bond (offset) pattern like brick, or frame a field of 4×4 tiles with a contrasting border. Because the tiles are small, curves and inset medallions are far easier than with large-format pavers.
Maintenance and Long-Term Care
Sealed terracotta is low-maintenance but not no-maintenance. Sweep or vacuum regularly to keep grit off the surface, since abrasive dirt wears down the sealer. Damp-mop with a pH-neutral cleaner; skip acidic cleaners like vinegar, which etch and strip the finish. Wipe spills promptly, especially oil and wine, even on sealed tile.
Plan to reapply the topical sealer or wax every one to three years in high-traffic areas, and re-do the penetrating sealer roughly every three to five years or when water stops beading on the surface. With that modest routine, terracotta develops a warm patina that genuinely improves with age, one of the few flooring materials that looks better after a decade than it did on day one.
Final Thoughts
A 4×4 terracotta tile is one of the best ways to bring authentic, hand-made warmth into a home without a luxury budget. Respect its one real weakness, porosity, by sealing thoroughly and maintaining the finish, and keep it out of freezing outdoor exposure. Do that, and you’ll have a rich, characterful surface that ties a room together and only grows more beautiful over the years. For homeowners drawn to Mediterranean, Spanish, or Southwestern style, few materials deliver as much soul per dollar.
Prefer to explore on your own?
See how new flooring looks in your actual room in seconds — free, no signup.
Try the free Floor Studio →