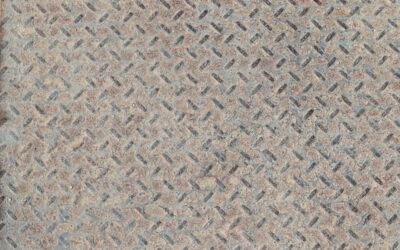
A shed without a proper floor invites moisture, pests, and rot to ruin whatever you store inside. An 8×8 shed with floor solves that by giving you a dry, level, elevated platform that protects your mowers, tools, and seasonal gear for the long haul. At 64 square feet, this size hits a sweet spot for suburban backyards: big enough to be genuinely useful, small enough to often avoid permit hassles. Here is what to weigh on materials, floor construction, cost, and foundation before you buy.
Why the 8×8 Size Works
Eight feet by eight feet delivers 64 square feet of storage, roughly the footprint of a small bedroom. That is enough room for a riding-adjacent push mower, a wall of shelving, garden tools hung on hooks, and still leave floor space to walk in and grab what you need.
The compact footprint also matters for regulations. Many municipalities allow accessory structures under 100 or 120 square feet without a building permit, so an 8×8 often slips under that threshold. Always confirm with your local building department, since setback rules from property lines still apply.
Why the Floor Matters
The floor is the single most important feature separating a shed that lasts from one that fails. A quality floor keeps ground moisture from wicking up into your stored items, blocks burrowing rodents, and provides a stable, level surface for heavy equipment.
Sheds sold without floors sit directly on the ground or a slab, which works only if you pour concrete yourself. A shed with an integrated wood floor arrives ready to protect your belongings from day one, which is why floored models command a premium and are worth it for most buyers.
Common Floor Types
Not all shed floors are equal, and the construction determines how much weight it holds and how long it lasts. Understanding the options helps you judge value.
- Pressure-treated plywood over 2×4 or 2×6 joists is the standard, resisting rot and moisture.
- Tongue-and-groove OSB is cheaper but less durable and vulnerable to water if unsealed.
- Composite or plastic floors on resin sheds resist rot entirely but hold less weight.
- Poured concrete slab is the most durable base if you build in place rather than buy a kit.
For storing heavy equipment, look for a floor built on joists spaced 16 inches on center or tighter.
Shed Material Options
The walls and roof matter as much as the floor. Wood sheds offer the most classic look and are easy to modify with shelves and hooks, but they require periodic painting or staining to prevent rot. Metal sheds resist fire and pests and cost less, though they can dent and may lack a floor.
Resin and vinyl sheds have surged in popularity for a reason. They never need painting, resist rot and rust, and often include a reinforced plastic floor, making them low-maintenance choices for homeowners who want to buy it and forget it.
Cost Breakdown
Pricing spans a wide range based on material and quality. A basic 8×8 metal shed kit without a floor can start around $500 to $900, but you must add a floor or slab. Resin sheds with an integrated floor typically run $900 to $1,800.
Wood sheds with a proper pressure-treated floor generally cost $1,500 to $3,500 for a quality kit, and professionally built or delivered pre-assembled wood sheds can reach $4,000 or more. Factor in foundation materials and any delivery or assembly fees when you compare quotes.
Foundation and Site Prep
Even a shed with a floor needs a proper base beneath it to stay level and dry. The most common and affordable option is a gravel pad: excavate a few inches, add landscape fabric, and fill with 4 to 6 inches of compacted crushed stone extending a foot beyond the shed on all sides.
Gravel drains water away and keeps the wood floor from sitting in mud. For a more permanent installation, a poured concrete slab or a grid of concrete deck blocks supporting the joists works well. Whatever you choose, get the base dead level, because a shed that sits crooked will bind its doors and stress its floor over time.
Buying Tips
Before you commit, check a few practical details. Confirm the door opening is wide enough for your largest item, since some 8×8 sheds have narrow single doors that will not fit a wide mower. Look for adequate wall height and headroom if you plan to stand and work inside.
Read the fine print on whether the floor is truly included or sold as an add-on, and verify the floor’s weight rating against what you plan to store. Finally, choose vents or a ridge vent to control humidity, and treat any exposed wood with sealer before your first season to maximize the life of your investment.
Assembly and Delivery Options
How your shed arrives shapes both cost and effort. Kit sheds ship flat and require a weekend of assembly with basic tools, rewarding patient DIYers with the lowest price. Pre-built sheds are delivered fully assembled on a trailer and craned or rolled into place, costing more but saving you the labor and the risk of a crooked build.
If you assemble it yourself, recruit a helper, since wall panels and roof sections are awkward for one person, and read the entire manual before starting. Lay out and count all hardware first, because a missing bracket discovered halfway through is a frustrating trip back to the store. Whichever route you choose, confirm the delivery truck has clear access to your backyard and that gates and paths are wide enough for the shed or its largest panels.
Organizing the Interior
Sixty-four square feet fills up fast if you only stack things on the floor, so build upward. Wall-mounted shelving, pegboard, and hanging hooks turn otherwise wasted vertical space into storage for hand tools, garden implements, and supplies, keeping the floor clear for mowers and larger equipment.
Plan zones before you move everything in. Reserve the floor for wheeled and heavy items, dedicate one wall to long-handled tools on hooks, and use shelves for bins of small parts and seasonal gear. Overhead space near the roofline can hold rarely used items on a simple loft shelf. A little organization at the start keeps an 8×8 shed genuinely usable rather than a cluttered box you dread opening.
Protecting and Maintaining the Floor
The floor is the hardest-working part of the shed, so a little upkeep keeps it solid for decades. On a wood floor, seal any exposed or cut edges with a water-repellent sealer before your first season, and re-coat high-wear areas every few years. Wipe up spilled fuel, oil, and fertilizer promptly, since these chemicals can degrade both the finish and the wood beneath.
Guard against the two enemies of a shed floor: moisture and pests. Keep the gravel base clear so water drains away rather than pooling under the shed, and trim back vegetation that traps humidity against the structure. A rubber mat or interlocking floor tiles in the main walkway protects the decking from mower tires and dropped tools, and periodically checking for soft spots lets you catch and repair any water damage before it spreads.
Is an 8×8 Floored Shed Right for You
For most homeowners needing to clear the garage of tools, mowers, and seasonal gear, an 8×8 shed with floor is an ideal balance of capacity, cost, and simplicity. Choose a pressure-treated wood floor or a reinforced resin model, set it on a level gravel or concrete base, and confirm local permit rules first. Get those fundamentals right, and you will have a dry, secure storage building that protects your belongings for decades.
Prefer to explore on your own?
See how new flooring looks in your actual room in seconds — free, no signup.
Try the free Floor Studio →