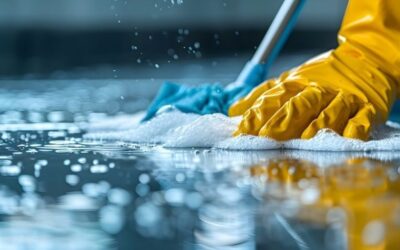
A damp, dingy basement floor collects more grime than almost any other surface in your house, so choosing the right basement floor cleaner matters more than most homeowners realize. Whether you’re staring down oil stains on bare concrete, a chalky white film creeping across the slab, or musty mildew in the corners, the product and method you pick will decide whether the floor comes clean or just spreads the mess around. This guide walks through the main surface types, the cleaner categories that actually work, and a safe step-by-step routine.
- Match the Cleaner to Your Floor Surface
- Cleaner Types and How They Work
- What to Look For When Buying
- Removing Oil and Grease Stains
- Killing Mildew, Mold, and Musty Odors
- Dealing With Efflorescence
- Pressure Washing vs. Mopping
- A Simple Step-by-Step Routine
- Safety and Ventilation
- Drainage and Standing Water
- Keeping the Floor Clean Longer
Match the Cleaner to Your Floor Surface
Basements come in four common finishes, and each one reacts differently to chemicals. Bare concrete is porous and forgiving, so it tolerates strong alkaline degreasers and even mild acids. Sealed or painted concrete needs gentler, pH-neutral products, because harsh cleaners strip paint and dull the finish. Epoxy-coated floors are the most sensitive: skip anything acidic or solvent-based, since citrus and vinegar can etch or cloud the coating over time.
Tile basements, whether ceramic or vinyl, want a pH-neutral formula that won’t attack grout or lift adhesive. When in doubt, test any cleaner on a hidden 12-inch square and wait 15 minutes before committing to the whole floor. That five-minute check saves a lot of regret.
Cleaner Types and How They Work
Understanding the chemistry helps you buy smarter instead of grabbing whatever bottle is on sale.
- pH-neutral cleaners (pH 6-8): Safe for epoxy, paint, tile, and sealed concrete. Best for routine weekly or monthly mopping.
- Alkaline degreasers (pH 9-13): The go-to for oil, grease, and heavy grime on bare concrete. They emulsify petroleum stains that neutral cleaners leave behind.
- Acidic cleaners (pH 1-4): Muriatic acid diluted to about 10:1 or specialty efflorescence removers dissolve mineral salts and rust. Use only on bare concrete, never epoxy.
- Enzyme and oxygen cleaners: Break down organic odors and light mold without harsh fumes, good for finished basements.
What to Look For When Buying
Beyond pH, a few practical features separate a good product from a frustrating one. Concentration matters: a concentrate you dilute yourself, often at 2 to 8 ounces per gallon, stretches further and costs less per cleaning than a ready-to-use spray. Check whether the label specifically lists your surface, since a cleaner rated for garage concrete may not be safe on a finished epoxy playroom floor. Low-VOC and fragrance-free formulas are worth seeking out for a basement, where fumes linger in the enclosed air. Finally, look for a product that rinses clean and leaves no slippery residue, because a slick basement floor near stairs is a genuine fall hazard.
Homeowners often overlook whether a cleaner needs rinsing at all. No-rinse pH-neutral formulas speed up routine mopping, while degreasers and acids almost always require a thorough rinse to stop them from continuing to work on the surface. Read the directions before you start so you have the right buckets, brushes, and drying time ready.
Removing Oil and Grease Stains
Garage-adjacent basements and workshop floors often carry motor oil, paint drips, and grease. Start by sprinkling a dry absorbent, like cat litter or baking soda, over fresh spills and letting it sit 20 to 30 minutes to pull oil out of the pores. Sweep it up, then scrub the area with an alkaline degreaser and a stiff nylon brush. For stubborn set-in stains, a poultice made of degreaser and an absorbent powder, covered with plastic overnight, draws oil back to the surface. Expect to repeat the process two or three times on old stains.
Killing Mildew, Mold, and Musty Odors
Mildew thrives in the exact conditions basements provide: humidity above 60%, poor airflow, and cool concrete. For small patches under about 10 square feet, mix one part household bleach to three parts water, or use an EPA-registered mold cleaner, and apply it with a brush. Let it dwell 10 minutes, scrub, and rinse. Wear gloves and a mask, and never mix bleach with ammonia or acidic cleaners, because the reaction releases toxic gas.
If mold covers more than about 10 square feet or keeps returning, the real fix is moisture control. A dehumidifier holding humidity near 50%, along with sealing foundation cracks, prevents regrowth far better than repeated scrubbing.
Dealing With Efflorescence
Those white, crystalline deposits are efflorescence: mineral salts carried to the surface as water evaporates through concrete. A cleaner alone won’t stop it, but you can remove the crust. Dry-brush loose powder first with a stiff broom, then apply a diluted acidic cleaner or a dedicated efflorescence remover to bare concrete only. Rinse thoroughly. Because efflorescence signals moisture moving through the slab, address drainage and consider a masonry sealer afterward to slow its return.
Pressure Washing vs. Mopping
Your cleaning tool should match the mess and the drainage. Mopping works fine for routine dirt on sealed, painted, or finished floors where standing water has nowhere to go. Keep the mop damp, not soaking, and change the water once it turns gray.
Pressure washing shines on bare concrete with a nearby floor drain. A machine in the 1,500 to 2,500 PSI range blasts embedded grime and paint flecks that mopping can’t touch. Never pressure wash a basement without a drain, though, since you’ll trap gallons of water on the slab. And keep the wand at least 12 inches back from epoxy or painted surfaces to avoid peeling the finish.
A Simple Step-by-Step Routine
- Clear the floor and sweep or vacuum all loose debris, dust, and cobwebs.
- Pre-treat stains and mildew spots and let the product dwell 10 to 30 minutes.
- Mix your main cleaner per label directions, typically 2 to 4 ounces per gallon of warm water.
- Work in 4-by-4-foot sections with a stiff brush, deck scrubber, or mop.
- Rinse with clean water, pushing runoff toward the drain or lifting it with a wet vac.
- Ventilate and let the floor dry fully, usually 4 to 12 hours depending on humidity.
Safety and Ventilation
Basements trap fumes because they lack the airflow of upstairs rooms. Open any windows, run a box fan pointed toward an exit, and take breaks in fresh air when using degreasers or acids. Wear chemical-resistant gloves, safety glasses, and closed shoes; add a respirator rated for organic vapors when working with muriatic acid or heavy mold. Store leftover product in its original labeled container, well out of reach of kids and pets. A little caution keeps a routine chore from turning into a hazard.
Drainage and Standing Water
How your basement handles water shapes every cleaning decision. A floor with a functioning central drain lets you wash freely, flooding sections and squeegeeing runoff toward the drain. A drainless slab, common in older homes, means you must control how much liquid you introduce and lift it back up with a wet/dry vacuum before it seeps into cracks. Before any wet cleaning, confirm the drain isn’t clogged; a quick pour of a gallon of water tells you whether it flows. If water pools and lingers, that standing moisture feeds mold within 24 to 48 hours, undoing the cleaning you just did.
For basements that flood or stay perpetually damp, cleaning is only half the battle. Consider grading issues outside, gutter downspouts that dump too close to the foundation, and interior French drains or sump pumps. A clean floor over a wet slab is a temporary victory.
Keeping the Floor Clean Longer
The best basement floor cleaner works even better on a floor that stays dry. Fix plumbing leaks promptly, run a dehumidifier through humid months, and add walk-off mats at the base of stairs to catch grit. Sealing bare concrete every two to three years cuts staining and efflorescence dramatically, and a quick weekly sweep stops dust from grinding into the surface. With the right product, a matched method, and steady moisture control, even a hardworking basement floor can look sharp for years.
Prefer to explore on your own?
See how new flooring looks in your actual room in seconds — free, no signup.
Try the free Floor Studio →