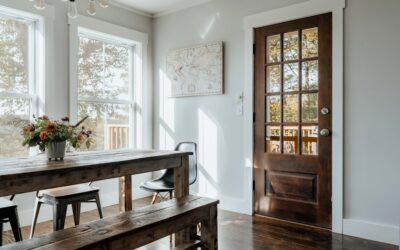
That sunny alcove created by a bay window is one of the most charming features a home can have, and leaving it empty is a missed opportunity. A bay window bench transforms that nook into a cozy reading spot, extra seating, and often hidden storage, all while highlighting the architectural beauty of the window itself. This guide covers design options, proper dimensions, materials, build approaches from DIY to custom, and what you can expect to spend, so you can turn your bay window into a favorite corner of your home.
Whether you want a simple cushioned ledge or a built-in with drawers below, understanding the choices helps you plan a bench that fits your space and your budget.
- Why Add a Bench to a Bay Window
- Getting the Dimensions Right
- Design Options to Consider
- Material Choices
- DIY vs Custom-Built
- Step-by-Step Overview for a DIY Storage Bench
- Cost Expectations
- Styling Your Window Seat
- Dealing With Radiators, Vents, and Wiring
- Comfort Details That Make the Difference
- Final Thoughts
Why Add a Bench to a Bay Window
A bay window bench delivers several benefits at once. It creates comfortable, light-filled seating perfect for reading, morning coffee, or watching the yard. It adds valuable storage when built with drawers or a lift-up lid, ideal for blankets, toys, books, or seasonal items. It frames and emphasizes the window as a focal point, boosting the room’s character and curb appeal from inside. And in dining nooks or kitchens, a bench provides space-efficient seating that fits more people than individual chairs. For many homeowners, it is one of the highest-charm, best-value upgrades a bay window can receive.
Getting the Dimensions Right
Comfort comes down to proportions, and a few standard measurements make a bench feel right rather than awkward:
- Seat height — 17 to 20 inches from the floor, similar to a chair, so feet rest comfortably. Add cushion thickness when calculating.
- Seat depth — 18 to 24 inches for a comfortable perch; go deeper, 24 to 30 inches, if you want a lounging daybed feel with back cushions.
- Length — determined by the width of your bay, typically 4 to 6 feet across the main span.
- Clearance — keep the seat below the window sill so it does not block the sash operation, and account for any window cranks or locks.
Always measure the full bay including the angled side sections, since many benches follow the window’s faceted shape rather than sitting as a simple straight box.
Design Options to Consider
Bay window benches range from simple to elaborate. Popular approaches include:
- Simple cushioned platform — A basic box or platform topped with a custom cushion. Clean, affordable, and easy to build.
- Storage bench with lift-up lid — The seat top hinges open to reveal a large storage cavity, great for blankets and bulky items.
- Bench with drawers — Front-facing drawers offer easy-access storage without lifting cushions, ideal for frequently used items.
- Built-in with side bookcases — Flanking the bench with cabinetry or shelving creates a cohesive, custom reading nook.
- Faceted bench following the bay angles — Matching the window’s angled geometry for a tailored, built-in look.
Add back and throw cushions to turn any bench into a plush window seat, and consider under-bench toe-kick lighting for ambiance.
Material Choices
Your material affects cost, durability, and finish. Common choices include:
- Plywood (cabinet-grade) — The workhorse for the box structure, strong and stable, then finished or painted.
- MDF — Smooth and paint-ready for a clean painted finish, though heavier and not moisture-tolerant.
- Solid wood — For stained or natural finishes and a high-end look, at higher cost.
- Poplar or pine trim — For face frames, moulding, and decorative details.
- Foam and upholstery fabric — High-density foam (about 3 to 4 inches thick) with durable, washable fabric for the cushion.
Match the bench finish to your existing baseboards and trim so it reads as an intentional built-in rather than a piece of furniture pushed into place.
DIY vs Custom-Built
A basic bay window bench is within reach of an intermediate DIYer. Building a simple storage box from plywood, adding a hinged lid, trimming it with moulding to match your baseboards, and topping it with a custom cushion is a satisfying weekend project. You will need a circular or table saw, a drill, a brad nailer, wood glue, hinges, and finishing supplies.
More complex designs with faceted angles, drawers, integrated bookcases, or fine finishes are better handled by a finish carpenter or cabinetmaker, especially if you want furniture-grade results. Custom work ensures the bench precisely follows the bay’s angles and integrates seamlessly with the walls and window trim.
Step-by-Step Overview for a DIY Storage Bench
For those building their own, the basic process looks like this:
- Measure the bay carefully, including angled sections, and sketch the bench footprint.
- Build a base frame or toe-kick platform to raise the box to seat height and provide a recessed kick space.
- Construct the storage box from cabinet-grade plywood, sized to fit snugly within the bay.
- Add a hinged lid with a soft-close or lid support, or install drawer boxes on slides for drawer designs.
- Trim the front and sides with moulding to match your existing baseboards and cap the top edge.
- Fill, sand, prime, and paint or stain to match the room.
- Have a custom cushion made or cut foam and upholster a plywood seat panel.
Cost Expectations
Costs vary widely by approach:
- DIY materials — $150 to $500 for a simple to moderate storage bench, plus the cushion.
- Custom cushion — $150 to $500 depending on size and fabric.
- Professional built-in — $1,000 to $3,500 or more for a custom bench with storage and quality finish.
- Elaborate built-in with flanking cabinetry — $3,000 to $7,000+.
The wide range reflects the difference between a straightforward painted box and a furniture-grade built-in with drawers, angles, and integrated shelving.
Styling Your Window Seat
Once the bench is built, cushions and accessories bring it to life. Choose a durable, fade-resistant fabric since the spot gets direct sunlight, and add a mix of throw pillows in coordinating colors. A soft throw blanket makes it inviting, and a small side table or wall-mounted reading light completes a cozy reading nook. Keep the styling simple so the window and the view remain the stars.
Dealing With Radiators, Vents, and Wiring
Many bay windows sit above a heating register or an old radiator, and a bench can accidentally block that airflow if you are not careful. Before finalizing your design, check for floor or wall vents within the bay footprint. If a register lands under the bench, you can build a toe-kick air path or install a vent extension that carries warm air out to the room, but ignoring it will leave the space cold and reduce your furnace’s efficiency. Similarly, watch for electrical outlets, cable jacks, or window-crank hardware that the bench might cover; plan access panels or relocate outlets before you build. A little planning here prevents a beautiful bench from creating a functional headache later.
Comfort Details That Make the Difference
The gap between a bench people admire and a bench people actually use comes down to comfort details. High-density foam of at least 3 to 4 inches keeps the seat from bottoming out, and a firmer foam holds up far better than the soft foam sold for decorative pillows. Adding a plywood or slatted base beneath the cushion with a small air gap helps prevent moisture and mildew, especially against cold window glass in winter. Back cushions or a bolster against the window turn a perch into a true lounging spot. Because the seat sits in direct sun, choose a fade-resistant, easy-clean fabric such as a performance weave, and consider a removable, washable cover for spots that see food or pets. These small choices determine whether the bench becomes a daily favorite or a pretty ledge nobody sits on.
Final Thoughts
A bay window bench turns an underused architectural feature into one of the most beloved spots in your home, blending comfortable seating, smart storage, and undeniable charm. Plan the dimensions for real comfort, match the finish to your existing trim for a built-in look, and decide honestly whether your design is a DIY project or a job for a finish carpenter. Whether you build a simple cushioned box or commission a custom built-in with drawers and bookcases, the result is a light-filled nook you will find yourself returning to again and again.