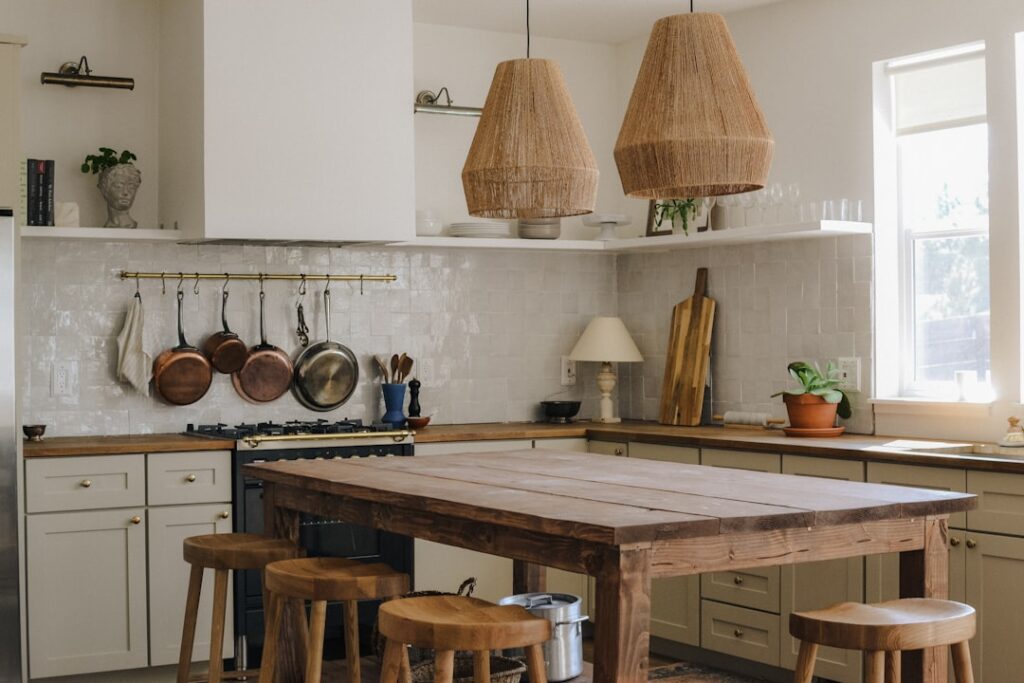
The best beginner diy kitchen island plans skip the fancy joinery and lean on stock cabinets, a solid countertop, and a level floor. You do not need a woodshop or years of experience to build a sturdy island that adds prep space, storage, and casual seating to your kitchen. With $200 to $800 in materials and a free weekend, you can assemble something that looks built-in and holds up to daily use for a decade or more.
This guide covers three proven approaches, the clearances and heights that keep an island functional, a full materials and tools list, and a step-by-step build for the most common method. Read the dimensions section first, because an island that crowds your walkways will frustrate you every day no matter how well you build it.
Get the Dimensions Right First
Before you buy a single board, measure your floor. You need a minimum of 36 to 42 inches of clearance on every side of the island so cabinet doors, the dishwasher, and the oven can open while a person walks past. In a busy kitchen with two cooks, aim for 42 to 48 inches. If your kitchen cannot give up at least a 36-inch aisle all the way around, an island will make the room feel cramped, and a rolling cart or a peninsula is the smarter call.
Standard counter height is 36 inches from the finished floor, which means your base needs to account for the countertop thickness. A 1.5-inch butcher block on a 34.5-inch stock base cabinet lands right at 36 inches. For seating, plan a 12-inch overhang for standard 36-inch counter-height stools, or extend to a full 24-inch overhang only if you add corbels or steel brackets to support the load. A comfortable seat needs about 24 inches of width per person.
Approach One: Back-to-Back Base Cabinets
The most reliable of all beginner diy kitchen island plans starts with two 30- to 36-inch stock base cabinets screwed back-to-back on a plywood platform. Big-box stores sell unfinished or prefinished 36-inch base cabinets for $120 to $250 each. Set them spine-to-spine so you get drawers or doors facing one direction and open shelving or more storage facing the other, then skin the exposed ends with a matching panel or beadboard.
This method gives you a wide, heavy, stable island with real storage on both sides, and it uses cabinets engineered to carry a countertop. Because the cabinets already have finished faces and adjustable feet or a toe kick, most of your work is fastening, leveling, and topping. It is the approach I recommend to anyone building their first island.
Approach Two: Single Cabinet Plus Countertop
If your kitchen is small or your budget is tight, a single 36-inch base cabinet topped with butcher block makes a compact island or a movable prep station. Add locking casters rated for 200-plus pounds if you want to roll it against a wall when not in use. This build costs as little as $200 and takes an afternoon, though it offers storage on one side only and needs to be anchored or weighted so it does not tip when you lean on it.
You can dress up a single cabinet with a bead-board back panel, decorative feet, and a coat of cabinet enamel so it reads as furniture rather than a lone box. This is the easiest entry point into island building and a good confidence-builder before you tackle a larger back-to-back version.
Approach Three: Furniture and Bookcase Hacks
Some of the most charming islands never started as cabinets at all. A solid-wood dresser, a low bookcase, or a pair of matching nightstands can become an island with a butcher-block or stone-look laminate top screwed on. Turn a bookcase so the open shelves face out for cookbook and basket storage, or flip a dresser to keep its drawers. Look for real wood pieces at estate sales for $40 to $150; particleboard furniture is too weak to carry a heavy top and daily leaning.
The furniture-hack route rewards patience and a good eye more than carpentry skill. Reinforce the top of the piece with a plywood sub-top so the countertop has a flat, continuous surface to bond to, and add adjustable furniture glides underneath so you can level it on an uneven kitchen floor.
Materials and Tools You Will Need
For the back-to-back cabinet build, gather two 36-inch base cabinets, a sheet of 3/4-inch plywood for the platform, 2×4 lumber for a support frame, 2.5-inch and 1.25-inch wood screws, construction adhesive, shims, and your countertop of choice. A 1.5-inch birch or acacia butcher block in a 25-by-50-inch size runs $150 to $300; a laminate top costs less; a stone remnant costs more but needs professional cutting. Finish materials include cabinet-grade paint, wood filler, and a food-safe mineral oil or polyurethane for butcher block.
Tool-wise, keep it simple: a drill/driver, a circular saw or jigsaw, a 4-foot level, a tape measure, a stud finder, clamps, a countersink bit, and safety glasses. If you plan to add an electrical outlet to the island, that circuit work should be permitted and, in most jurisdictions, done by a licensed electrician; National Electrical Code requires a receptacle on many islands, and DIY wiring can void insurance and endanger your home.
Step-by-Step Build
Here is the core sequence for the back-to-back cabinet island, the one place a short list genuinely helps:
- Mark the island footprint on the floor with painter’s tape and confirm your 36-to-42-inch clearances on all sides.
- Build a 2×4 base frame or cut a 3/4-inch plywood platform 1 inch smaller than the cabinet footprint to create a recessed toe kick.
- Set the two cabinets back-to-back on the platform, clamp them, and drive 2.5-inch screws through the abutting side panels to join them.
- Level the assembly with shims, checking front-to-back and side-to-side, then anchor the platform to the floor joists or subfloor with screws.
- Skin the exposed ends and back with finish panels, fill screw holes, and paint or stain.
- Center the countertop, secure it from underneath through the cabinet corner blocks with 1.25-inch screws, and seal butcher block with mineral oil or polyurethane.
Leveling and Anchoring for the Long Haul
Kitchen floors are rarely flat, and an island that rocks or sits out of level will telegraph every flaw in your countertop seams and grout lines. Set a 4-foot level across the top of the joined cabinets in both directions and slide tapered cedar shims under the low corners until the bubble centers. Only after the base is dead level should you fasten anything down, because trying to correct a lean after the top is on means tearing the whole thing apart.
Anchoring keeps a tall island from tipping when someone leans on the overhang or a child climbs a stool. Locate the floor joists with a stud finder, or on a slab drive concrete screws through the platform, and secure the base in at least four spots. For a rolling cart, skip anchoring but choose locking casters and add sandbags or a bottom shelf loaded with cookware to lower the center of gravity so it stays put during hard chopping.
Cost, Timeline, and Finishing Touches
A first-time builder should budget one to two weekends: one for assembly and one for finishing coats to cure. Total spend typically lands between $200 for a single-cabinet cart and $800 for a large back-to-back island with a quality butcher-block top, a fraction of the $1,500 to $6,000 a contractor charges. The biggest cost swings come from your countertop and whether you add electrical or a small sink, both of which involve professional trades.
Finish the project with details that hide its budget origins: add crown or shoe molding at the base, install cabinet hardware that matches your existing kitchen, and top it with two coats of durable enamel. Following these beginner diy kitchen island plans, you will end up with a solid, level, genuinely useful island that most guests will assume came with the house.