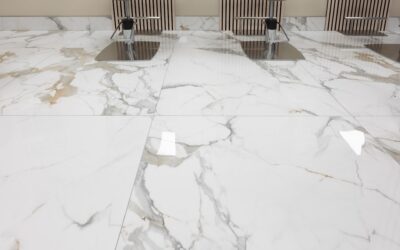
Walk into a newly renovated bathroom and the first thing you notice is often what you don’t see: grout lines. That clean, expansive look comes from using a big tile format instead of the standard 12×12 squares that dominated homes for decades. Large-format tile, generally defined as any tile with a side of 15 inches or more, has taken over modern design for good reason. Fewer seams mean easier cleaning, a more seamless appearance, and rooms that read as larger and more open. But installing it correctly demands more prep and skill than small tile.
What Counts as a Big Tile
The industry draws the line at 15 inches. Any tile with at least one edge measuring 15 inches or longer qualifies as large-format. In practice, the popular sizes homeowners choose include:
- 12×24 inches: The workhorse plank-style tile, great for floors and shower walls.
- 24×24 inches: A clean square that shines in open living areas.
- 24×48 inches: Dramatic, gallery-like, common in modern kitchens.
- Slab tiles up to 48×110 inches: Used to mimic solid stone with almost no seams.
Most large-format tile is porcelain, prized for its low water absorption and hardness. Natural stone and gauged porcelain slabs also come in big formats, though they carry higher costs and more demanding handling.
Why Homeowners Choose It
The appeal goes beyond looks. Fewer grout lines mean less grout to seal, scrub, and eventually replace, which is a genuine long-term maintenance win. Large tiles also make a space feel bigger because the eye isn’t broken up by a busy grid. In a small bathroom, running 12×24 tile vertically on the walls can visually raise the ceiling.
There’s a durability angle too. A single large porcelain tile has fewer weak points than a field of small ones, and modern porcelain shrugs off scratches, moisture, and heavy furniture. That’s why you see large-format tile in commercial lobbies as much as in high-end homes.
Subfloor Prep Is Everything
Here’s the truth every installer learns fast: big tile is unforgiving of an uneven subfloor. Because the tile is rigid and long, it can’t follow dips and humps the way small tile does. Industry standards call for a floor flat to within 1/8 inch over 10 feet for large-format tile, tighter than the 1/4 inch allowed for smaller sizes.
Before setting a single tile, check the floor with a long straightedge or level. Grind down high spots and fill low areas with a self-leveling underlayment. Skip this and you’ll get lippage, where the edges of adjacent tiles sit at different heights, creating trip hazards and ugly shadow lines. On a big tile, even a slight rock means an eventual crack.
Mortar and Installation Technique
Large tiles need the right thinset and the right trowel. Use a large-and-heavy-tile mortar, sometimes labeled LHT or medium-bed mortar, which resists slumping and supports the tile’s weight without shrinking. A standard 1/4-inch notch trowel won’t move enough material; step up to a 1/2-inch square-notch trowel to guarantee full coverage.
Follow these steps for a solid install:
- Back-butter each tile with a thin skim coat of mortar in addition to the troweled bed.
- Comb the mortar in straight lines, then knock down the ridges so no air pockets form.
- Set the tile and use a rubber mallet or beating block to fully embed it.
- Aim for 95 percent mortar coverage in wet areas, 80 percent minimum in dry ones.
- Use a leveling clip system to hold adjacent tiles flush while the mortar cures.
Those leveling systems, which cost about $20-$40 for a starter kit, are nearly essential for big tile. They pull the surface flat and eliminate the lippage that dooms so many DIY jobs.
Grout Lines and Layout
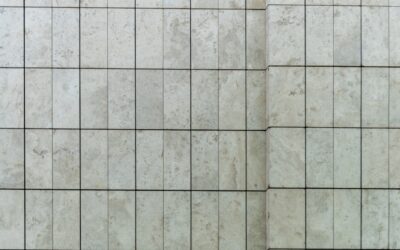
Large-format tile still needs grout lines, just smaller ones. A 1/16 to 3/16 inch joint is typical; anything tighter risks the tiles touching and cracking as the substrate moves. Rectified tiles, which have precisely cut edges, allow the narrowest joints and the most seamless look.
Avoid running rectangular tiles in a 50 percent brick offset. Because large tiles have a slight bow in the center, offsetting the ends against the high point of the next tile magnifies lippage. Stick to a 33 percent offset or a straight stacked layout instead. It’s a small design choice that makes a big difference in the finished surface.
Cost Expectations
Big tile spans a wide price range. Basic 12×24 porcelain runs $2-$5 per square foot, mid-grade 24×24 lands around $5-$9, and premium slab-look tiles can hit $15-$25 or more. Labor typically adds $7-$14 per square foot because of the extra prep and skill involved, more than small-tile installation.
Budget for the extras too: leveling clips, medium-bed mortar, and possibly self-leveler for the subfloor. Those items are minor line items compared to a callback to fix cracked tiles from a poorly prepped floor.
Cutting Large-Format Tile
Cutting is where big tile intimidates first-timers, but the right tools make it manageable. A rail-mounted manual tile cutter handles straight cuts on tiles up to about 24 inches by scoring and snapping in one motion. For longer tiles, harder porcelain, and any curved or notched cut, a wet saw with a continuous-rim diamond blade is the tool to use. The water keeps the blade cool and controls the dust that porcelain throws off.
A few habits keep cuts clean. Support the full tile on both sides of the cut so it doesn’t crack from its own weight mid-pass, feed it slowly and let the blade do the work, and mark your cut line with a grease pencil. For L-shaped notches and outlet cutouts, make relief cuts and finish the corner carefully rather than forcing the blade around a turn. Round holes for pipes call for a diamond hole saw run wet. Rushing a cut on a $12 tile is a false economy when a slow, steady pass gives you a clean edge every time.
Where Big Tile Struggles
Large-format tile isn’t the answer everywhere, and it’s worth knowing its limits. In small, choppy rooms with lots of fixtures, a big tile means more cuts and more waste as you notch around toilets, vanities, and jogs in the wall. Steps, curved walls, and heavily sloped shower floors are also poor candidates, since a rigid slab can’t follow those contours the way small mosaic tile can.
Shower floors specifically need enough joints to grip wet feet and to pitch toward the drain, so most installers drop down to 2-inch mosaics there even when the walls are large-format. Matching the tile size to the space, rather than forcing big tile into every corner, is the mark of a thoughtful install.
Is Big Tile Right for Your Project?
If you want a modern, low-maintenance floor or wall with minimal grout, a big tile format is hard to beat. It rewards careful prep with a clean, expansive finish that smaller tile simply can’t match. Just go in knowing the subfloor has to be dead flat, the mortar and trowel have to be sized up, and a leveling system will save you from lippage. Handle those fundamentals and large-format tile delivers a durable, high-end result that looks great for decades.
Prefer to explore on your own?
See how new flooring looks in your actual room in seconds — free, no signup.
Try the free Floor Studio →