
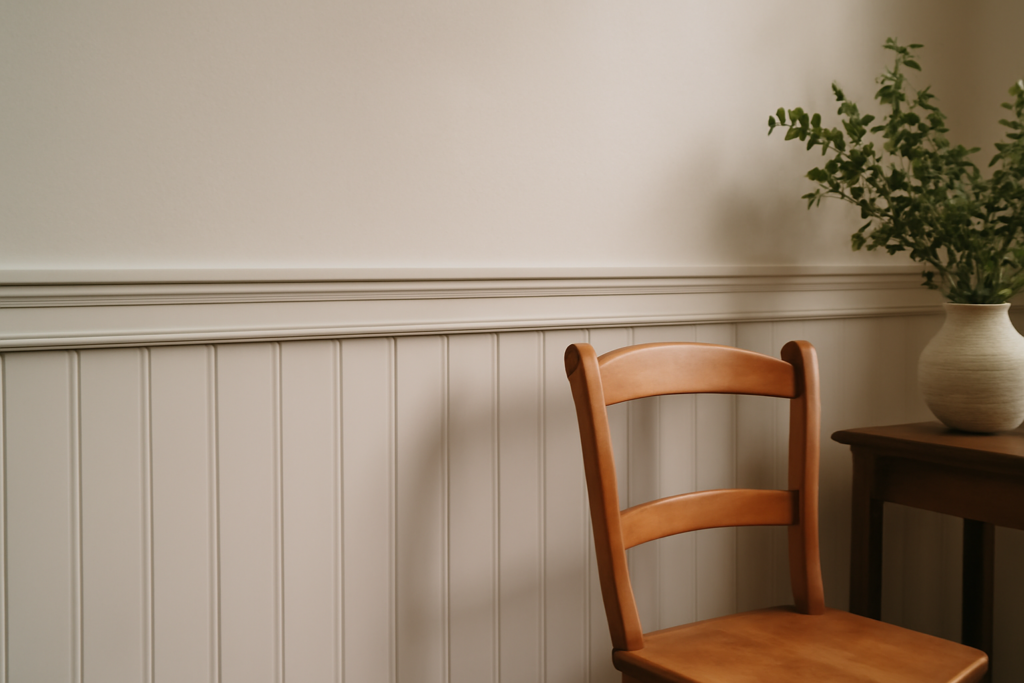
A chair rail wall is one of the simplest and most affordable ways to add architectural character to a room. Originally installed to keep chair backs from scuffing the plaster, the chair rail is a horizontal molding that runs around a room roughly a third of the way up the wall. Today it is mostly decorative, dividing the wall into two zones for paint, wallpaper, or wainscoting and giving flat, builder-grade rooms a sense of craftsmanship. This guide covers correct height, style options, materials, cost, and a straightforward DIY installation.
- What Is a Chair Rail and What Does It Do
- The Right Chair Rail Height
- Chair Rail Styles and Profiles
- Material Choices
- What a Chair Rail Wall Costs
- Tools You Will Need
- How to Install a Chair Rail: Step by Step
- Design Ideas for a Chair Rail Wall
- Common Mistakes to Avoid
- Which Rooms Benefit Most
- Coping vs. Mitering Corners
- Finishing for a Built-In Look
What Is a Chair Rail and What Does It Do
A chair rail is a continuous strip of molding attached horizontally to the wall. Beyond its historic purpose of protecting walls from chairs, it now serves several roles: it visually breaks up a tall or plain wall, provides a clean transition line between two paint colors or between paint and wallpaper, and caps wainscoting or board-and-batten paneling below it. In dining rooms, entryways, hallways, and stairwells it adds a traditional, finished look that makes a space feel more intentional.
The Right Chair Rail Height
Height is the detail people most often get wrong. The traditional rule places the chair rail at one-third the wall height. For a standard 8-foot (96-inch) ceiling, that puts the rail at roughly 32 inches from the floor. For 9- or 10-foot ceilings, raise it proportionally to around 36 inches. A few guidelines:
- Measure from the floor to the top edge of the rail, typically 32 to 36 inches.
- Higher ceilings can carry a slightly higher rail; very low ceilings look best with the rail on the lower end.
- If you are pairing it with wainscoting, coordinate the panel height so the rail caps it cleanly.
- Consider furniture; the rail should generally sit above the backs of your dining chairs, not behind them.
Avoid placing the rail dead center on the wall, which visually cuts the room in half and looks awkward. Lower is almost always better.
Chair Rail Styles and Profiles
Molding profiles range from simple to ornate:
- Simple ranch or bevel profiles: Clean, modern, and inexpensive.
- Traditional ogee and colonial profiles: Curved detailing that suits classic and formal rooms.
- Layered or built-up rail: Combining two or three moldings for a more substantial, custom look.
- Flat stock with a cap: A contemporary take using a simple board topped with a small cap molding.
Material Choices
Chair rail comes in several materials:
- MDF (medium-density fiberboard): Smooth, affordable, and paints beautifully. The most popular choice for painted trim. Not for damp areas.
- Solid pine or poplar: Real wood, ideal if you plan to stain rather than paint. Poplar paints well too.
- PVC or polyurethane: Moisture-proof, good for bathrooms or high-humidity rooms.
For most painted chair rail walls, primed MDF offers the best value and finish.
What a Chair Rail Wall Costs
This is a budget-friendly project. Material runs roughly $1 to $4 per linear foot for MDF or pine, more for hardwood or built-up profiles. An average room needs 40 to 60 linear feet, so material for one room is often just $60 to $200. If you hire a carpenter, labor adds $2 to $6 per linear foot, putting a professionally installed room around $200 to $600. DIY keeps the whole project comfortably under $200 for most rooms, which is why it is such a popular weekend upgrade.
Tools You Will Need
- Miter saw for clean angle cuts at corners.
- Stud finder to locate framing.
- Level and pencil for a straight layout line.
- Brad nailer or hammer and finish nails.
- Construction adhesive, caulk, wood filler, and paint.
How to Install a Chair Rail: Step by Step
The project is very DIY-friendly and can usually be done in a day:
- Mark your height. Measure up from the floor at several points, then use a level to snap or draw a continuous line around the room at your chosen height (say 32 inches).
- Find the studs. Mark stud locations along your line so nails hit solid framing.
- Measure and cut. Cut the first piece to length, mitering inside and outside corners at 45 degrees. Test-fit before nailing.
- Attach the rail. Apply a bead of construction adhesive, align the top edge to your line, and nail into studs with a brad nailer.
- Work around the room. Continue piece by piece, coping or mitering corners for tight joints.
- Finish. Fill nail holes with wood filler, caulk the top and bottom seams for a seamless look, sand, prime, and paint.
Design Ideas for a Chair Rail Wall
Once the rail is up, you have design options. Paint the lower portion a deeper shade and the upper a lighter one for classic contrast. Add picture-frame molding boxes below the rail for an elegant, formal look. Apply grasscloth or patterned wallpaper above the rail and paint below. Or install beadboard or board-and-batten wainscoting capped by the rail for a cottage feel. The rail is the anchor for all of these treatments.
Common Mistakes to Avoid
The number one error is installing the rail too high, often near the middle of the wall, which chops the room visually; keep it around one-third height. Another is failing to use a level, leaving a rail that drifts up or down and follows an uneven floor. Skipping caulk at the seams leaves visible gaps that cheapen the result. And nailing only into drywall instead of studs leads to a rail that loosens over time. Take your time with layout and joints and the finished trim will look built-in.
Which Rooms Benefit Most
A chair rail adds the most impact in rooms where architectural detail feels appropriate and where the eye lingers. Dining rooms are the classic home for chair rail, often paired with wainscoting or picture-frame molding below for a formal look. Entryways and foyers make a strong first impression with a rail that carries around the space and up the stairs. Hallways gain interest along otherwise blank walls, and the rail doubles as genuine protection where furniture and passersby might scuff the paint. Home offices and formal living rooms also suit the detail. Casual family rooms and bedrooms can carry a chair rail too, though a simpler profile keeps them from feeling overly formal. Very small rooms or those with lots of doors and windows can end up looking chopped up, so consider the wall space you actually have to work with.
Coping vs. Mitering Corners
The joints at the corners separate an amateur-looking chair rail from a crisp, professional one. Outside corners, where two walls meet and point toward you, are handled with a simple 45-degree miter on each piece so they wrap the corner cleanly. Inside corners, where walls meet away from you, can be mitered too, but many finish carpenters prefer a coped joint. Coping means cutting the profile of one piece to fit precisely over the face of the other, which produces a tighter joint that stays closed even if the walls are slightly out of square or the trim shifts seasonally. Coping takes practice with a coping saw, so for a first project, careful 45-degree miters plus caulk in the inside corners produce a very acceptable result.
Finishing for a Built-In Look
The difference between a chair rail that looks nailed on and one that looks original to the house is in the finishing. After the rail is installed, fill every nail hole with wood filler, let it dry, and sand it flush. Then run a thin, even bead of paintable caulk along both the top and bottom edges where the trim meets the wall, and smooth it with a damp finger or tool. This closes the tiny gaps that always exist between trim and imperfect walls, making the rail appear seamlessly integrated. Prime any bare MDF or wood, then paint. Semi-gloss or satin paint is traditional for trim because it wipes clean and subtly catches the light, distinguishing the rail from the flatter wall finish above and below it.
A chair rail wall is a low-cost, high-reward project that brings instant architectural interest to plain rooms. Set the height at roughly a third of the wall, choose a profile and material that match your style, and take care with level layout and tight corner joints. Whether you use it to divide paint colors, cap wainscoting, or simply add a classic detail, a well-installed chair rail elevates a room far beyond what its modest cost would suggest.


