The humble cinderblock is one of the most versatile and affordable building materials available to homeowners and contractors alike. From retaining walls and raised garden beds to full foundation systems and outdoor kitchens, cinderblocks deliver structural strength, fire resistance, and longevity at a fraction of the cost of poured concrete or natural stone. This guide covers everything you need to know about cinderblock types, sizes, construction techniques, and creative DIY project ideas.
What Is a Cinderblock?
A cinderblock (also written as cinder block) is a rectangular concrete masonry unit (CMU) made from a mixture of Portland cement, aggregate, and water. Traditionally, the aggregate included industrial cinders (coal ash), which gave the blocks their name and made them lighter than standard concrete blocks. Modern cinderblocks may use lightweight aggregates like expanded shale or pumice instead of cinders, though the term remains in common use.
Key characteristics of cinderblocks include:
- Hollow core design: Two or three open cells reduce weight and allow for rebar and grout reinforcement.
- Compressive strength: Standard blocks handle 1,900-2,800 PSI, sufficient for most residential applications.
- Fire resistance: CMU walls offer 2-4 hour fire ratings depending on thickness and filling.
- Pest resistance: Unlike wood framing, cinderblocks are immune to termites and wood-boring insects.
Types & Standard Sizes
| Block Type | Nominal Size (inches) | Actual Size (inches) | Weight (lbs) | Primary Use |
|---|---|---|---|---|
| Standard Stretcher | 8 x 8 x 16 | 7.625 x 7.625 x 15.625 | 35-40 | Walls, foundations |
| Half Block | 8 x 8 x 8 | 7.625 x 7.625 x 7.625 | 18-22 | Corners, ends |
| Single Corner | 8 x 8 x 16 | 7.625 x 7.625 x 15.625 | 35-38 | Wall corners |
| Double Corner | 8 x 8 x 16 | 7.625 x 7.625 x 15.625 | 36-40 | Pilasters, piers |
| Cap Block (Solid) | 2 x 8 x 16 | 1.625 x 7.625 x 15.625 | 15-18 | Topping walls |
| 4-inch Block | 4 x 8 x 16 | 3.625 x 7.625 x 15.625 | 22-26 | Non-load-bearing partitions |
| 12-inch Block | 12 x 8 x 16 | 11.625 x 7.625 x 15.625 | 50-55 | Foundation walls, retaining walls |
The nominal size includes the 3/8-inch mortar joint on each side, so actual block dimensions are 3/8 inch smaller in each direction. This standardization ensures blocks lay up in consistent courses.
Cinderblock Cost Breakdown
| Item | Cost Range (2026) | Notes |
|---|---|---|
| Standard 8x8x16 block | $1.50-$3.00 each | Price varies by region and quantity |
| Mortar (80 lb bag) | $8-$14 | One bag lays approximately 30 blocks |
| Rebar (#4, per 20 ft stick) | $8-$15 | Used for vertical and horizontal reinforcement |
| Grout (80 lb bag) | $8-$12 | For filling reinforced cells |
| Professional labor | $10-$17 per block | Includes materials and installation |
| DIY wall cost (per linear ft) | $8-$15 | 4 ft tall wall, materials only |
Buying in bulk (full pallets of 90-108 blocks) typically saves 15-25% compared to individual pricing. Delivery fees generally run $50-$150 depending on distance and quantity.
Common Uses for Cinderblocks
- Foundation walls: CMU foundations remain common in many regions, especially for basements and crawl spaces.
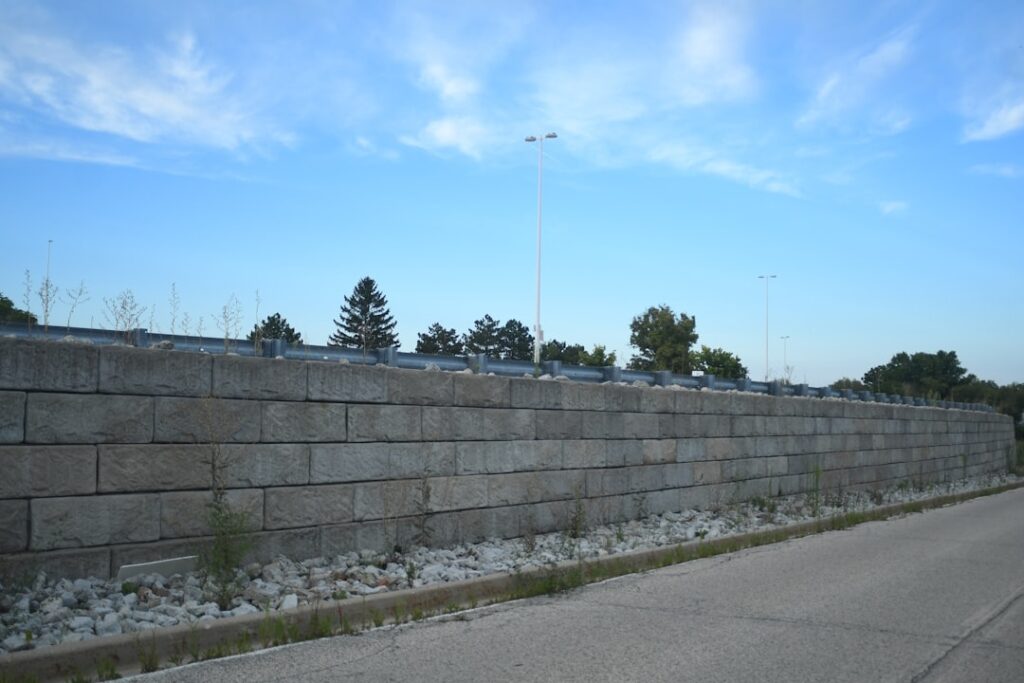
- Retaining walls: Cinderblocks handle the lateral pressure of retained soil when properly reinforced with rebar and grout.
- Garden beds: Quick and affordable raised beds that resist rot, unlike wood frames.
- Outdoor kitchens: Fire-resistant construction makes cinderblocks ideal for grill surrounds and countertop bases.
- Privacy walls & fences: Durable, low-maintenance alternatives to wood fencing.
- Garage & shed walls: Cost-effective and strong enough for storage structures.
- Fire pits: Simple square or circular fire pits built in an afternoon.
For finishing the floors in your cinderblock structures, explore our guide on chipboard flooring, which is a practical subfloor option for garages and workshops.
How to Build a Cinderblock Retaining Wall
A cinderblock retaining wall up to 4 feet tall is a manageable DIY project. Walls taller than 4 feet typically require engineering review and may need permits.
Materials Needed
- Standard 8x8x16 cinderblocks
- Type S mortar mix
- #4 rebar (1/2 inch)
- Grout mix for filling cells
- Gravel for drainage (3/4 inch crushed stone)
- Perforated drain pipe (4 inch)
- Filter fabric
- Cap blocks
- Concrete for footing
Step-by-Step Process
- Excavate and level: Dig a trench 24 inches wide and 12 inches deep. Compact the soil and add 4 inches of compacted gravel as a base.
- Pour the footing: Pour a reinforced concrete footing 16-20 inches wide and 8 inches deep. Set vertical rebar dowels every 32 inches (every other cell).
- Lay the first course: Set the first row of blocks in a full mortar bed, checking for level and alignment. This course is the most critical.
- Build up courses: Continue stacking blocks with 3/8-inch mortar joints, staggering the joints (running bond pattern) for structural integrity.
- Reinforce: Thread vertical rebar through the cells containing dowels. Add horizontal rebar (bond beam) at every other course using knock-out bond beam blocks.
- Fill cells with grout: Fill all cells containing rebar with grout. Consolidate with a pencil vibrator or by rodding.
- Install drainage: Behind the wall, place filter fabric, perforated drain pipe at the base, and backfill with 12 inches of crushed stone.
- Cap the wall: Set cap blocks with mortar for a finished appearance and to prevent water infiltration.
- Waterproof: Apply waterproofing membrane or coating to the back (soil-facing) side of the wall.
DIY Cinderblock Projects
Raised Garden Beds
Stack cinderblocks two or three courses high (16-24 inches) in a rectangular shape without mortar for a quick, movable garden bed. The hollow cells in the top course make perfect pockets for herbs or strawberry plants. Line the interior with landscape fabric before filling with garden soil.
Outdoor Bench
Create a simple, sturdy outdoor bench by stacking cinderblocks as legs (2-3 high) and sliding 4×4 lumber through the cells as a seat. Sand and seal the wood, and paint the blocks to match your modern farmhouse decor style.
Firewood Storage Rack
Arrange cinderblocks in two parallel columns with the cells facing up. Insert 2×4 lumber through the cells to create horizontal rails. This keeps firewood off the ground for better air circulation and drying.
Outdoor Bookshelf or Plant Stand
Stack cinderblocks and planks alternately to create shelving for potted plants, garden supplies, or outdoor decor. This industrial look pairs surprisingly well with greenery and natural materials.
Building Tips & Best Practices
- Always start with a proper footing: Never build directly on soil. A concrete footing below frost line prevents frost heave from cracking your wall.
- Use Type S mortar: It offers the best balance of bond strength and workability for cinderblock construction. Type N is acceptable for non-load-bearing above-grade walls.
- Butter both ends: Apply mortar to the flanges (ears) of each block before placing it, not just the web. This creates a stronger bond.
- Check level constantly: Verify level and plumb every 2-3 blocks. Corrections become impossible after the mortar sets.
- Tool joints promptly: Smooth mortar joints with a jointing tool when they are “thumbprint” hard — firm enough to hold a shape but still slightly soft.
- Control moisture: Cover fresh block work with plastic if rain is expected within 24 hours. In hot, dry weather, mist the wall periodically during the first day to prevent rapid curing.
- Apply surface treatment: Bare cinderblocks absorb water. Seal or paint exterior walls with masonry waterproofer for longevity. Clean surfaces first with a pressure washer before applying coatings.
Frequently Asked Questions
What is the difference between a cinderblock and a concrete block?
Traditionally, cinderblocks used coal cinders as aggregate, making them lighter but weaker. Modern concrete blocks use sand, gravel, or lightweight aggregates and meet specific strength standards. Today, the terms are used interchangeably in everyday conversation, though engineers differentiate based on weight class and compressive strength.
How many cinderblocks do I need for a wall?
A standard 8x8x16 block covers 0.89 square feet of wall area (including mortar joints). Divide your total wall area in square feet by 0.89 to get the number of blocks needed. Add 5-10% for cuts and breakage.
Can you build a house with cinderblocks?
Yes. CMU (concrete masonry unit) construction is common in many regions, particularly in the Southeast US, Florida, Caribbean, and tropical areas. Cinderblock homes offer excellent hurricane resistance, termite immunity, and fire protection. They require insulation (rigid foam or furring strips with batt insulation) for energy efficiency in most climates.
How long do cinderblock walls last?
Properly built and maintained cinderblock walls last 80-100+ years. The primary failure points are mortar deterioration (repointing every 25-50 years) and water infiltration if waterproofing is neglected.
Do cinderblock walls need rebar?
For structural walls, retaining walls, and any wall in seismic zones, rebar reinforcement is essential and typically required by building codes. Non-structural garden walls under 4 feet may not legally require rebar, but adding it significantly increases durability and resistance to cracking.
Can you paint cinderblocks?
Yes. Use elastomeric masonry paint or exterior latex specifically formulated for masonry. Prime with a masonry primer first to seal the porous surface and ensure even coverage. Allow new blocks to cure at least 28 days before painting.
Last updated: March 2026