Walk past any pole barn, workshop, or increasingly any modern farmhouse, and odds are you are looking at the same panel: three-quarter-inch trapezoidal ribs marching across a 36-inch sheet. Classic rib metal siding panels are the most widely sold metal panel profile in America because they hit a rare sweet spot — cheap to make, quick to hang, stiff enough to span framing, and clean-lined enough to look intentional on a house. At $1.50 to $3 per square foot for material, they cost a fraction of standing seam while sharing the same steel and the same paint systems. Here is what the profile actually is, how to spec it correctly, and where its exposed-fastener design demands attention.
What Defines the Classic Rib Profile
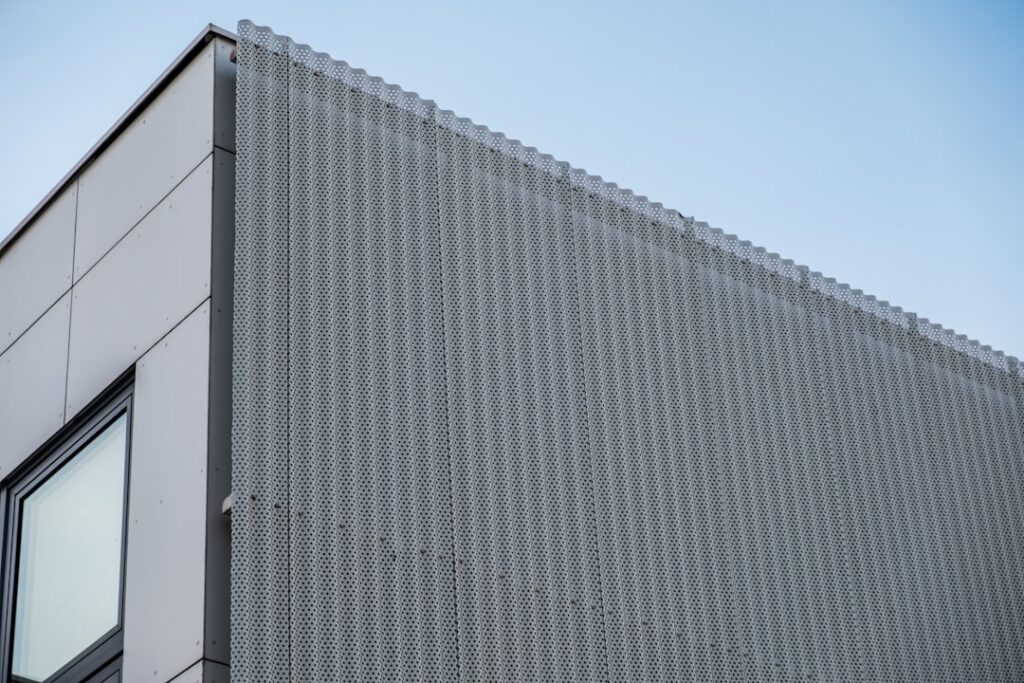
Classic rib (sold under names like Classic Rib, 5-Rib, Pro-Rib, and Grandrib depending on the roll-former) is an exposed-fastener panel with these typical specs:
- Coverage width: 36 inches net after side lap
- Rib height: 3/4 inch trapezoidal ribs
- Rib spacing: 9 inches on center — five major ribs per panel, usually with small stiffening flutes between
- Lengths: cut to order, commonly 8 to 24 feet, so most walls hang seamless floor to eave
- Gauges: 29 gauge standard at farm stores, 26 gauge as the upgrade
It differs from its cousins in ways that matter at the lumberyard. Corrugated panel has round waves and a wavier, more industrial look. R-panel/PBR has taller 1-1/4-inch ribs on 12-inch centers and leans commercial. Board-and-batten metal imitates wood siding with wide flat pans. Classic rib sits in the middle: enough shadow line to hide minor substrate waviness, subtle enough to read as siding rather than roofing — though the identical panel does double duty on roofs, which is part of why it is stocked everywhere.
Gauge, Substrate, and Finish Choices
The $0.30-per-square-foot decision that determines how the wall looks in a decade is gauge and paint. 29-gauge panel (about 0.014 inch thick) is the farm-store default and fine for outbuildings, but on a house wall that catches low sun it telegraphs every furring irregularity and dents from an aggressive hailstorm or a thrown basketball. 26 gauge (about 0.019 inch) is meaningfully stiffer and is what I spec for residential walls. Under the paint, insist on Galvalume (55 percent aluminum-zinc) or G-90 galvanized substrate — bargain G-60 coating rusts years sooner at cut edges.
Paint systems come in two tiers: SMP (silicone-modified polyester), standard at $1.50 to $2.25 per square foot panels with 25-to-40-year warranties that mostly cover film integrity, not fade; and PVDF (Kynar 500) on premium lines. For whites, tans, and light grays, SMP performs fine. For matte black, charcoal, and reds — fashionable and fade-prone — pay for PVDF or accept visible chalking by year 12 to 15.
What Classic Rib Costs
Material runs $1.50 to $3 per square foot depending on gauge and finish, which makes a 3-foot-by-12-foot sheet roughly $55 to $100. Add the supporting cast: trim (corners, J-channel, base and top flashings) at $2 to $4 per linear foot, gasketed screws at about $10 to $15 per 250, and housewrap or furring. Installed by a contractor, classic rib walls land at $4 to $8 per square foot — comparable to mid-grade vinyl but with double or triple the service life. DIY installers with a helper, a drill, and metal shears can realistically hang 400 to 600 square feet of wall a day on a simple building, which is why this panel remains the default for garages, shops, and barndominiums.
Installing It Right: Substrate and Layout
Vertical panels need horizontal fastening lines: either 1×4 furring strips at 24 inches on center over sheathing and housewrap, or solid sheathing with marked framing. Furring adds a drainage-and-drying gap behind the panel — cheap insurance on a conditioned building. Start with a level base trim (drip flashing) so the first panel hangs plumb; every subsequent sheet registers off it, and a 1/4-inch lean at panel one becomes a visible stairstep at panel ten. Lay out so cut panels land at the least visible corner, and plan openings so a major rib, not a fragile cut edge, meets window trim where possible.
Cut with electric shears, a nibbler, or a circular saw running a fine metal-cutting blade backward-free — never an abrasive chop blade, which overheats the zinc coating and leaves an edge that rust-blooms within two seasons. File or touch up cut edges that will sit exposed.
The Fastener Discipline
Exposed screws are the profile’s economy and its Achilles heel, and technique decides which. Use screws with EPDM-gasketed washers, driven into the flat of the panel next to the ribs (for siding; roof applications differ), hitting furring or framing every 24 inches vertically and at every panel lap. Torque is everything: the washer should compress until it just bulges slightly past the metal cap. Overdriven screws dish the panel and split the gasket; underdriven ones leave a leak path and back out with thermal cycling. On a dark wall, run screw lines with a chalk line — wandering screw rows are the single most common tell of a rushed job. Budget a fastener inspection around year 15; UV-tired washers or backed-out screws get replaced with the next-size-up stitch screw in an afternoon, and that modest ritual is essentially the profile’s entire maintenance program.
Detailing Openings and Penetrations
Windows, doors, and the inevitable hose bibs are where rib panel jobs get judged. At openings, the order of operations is flashing first, trim second, panel third: self-adhered flashing tape on the rough opening, a metal head flashing with end dams above every window and door, then J-channel sides and a sloped sill trim that kicks water onto the panel face below. Never rely on caulk as the primary defense — sealant on metal is a maintenance item with a 10-to-15-year life, while lapped metal flashings work forever. Around penetrations like vents, outlets, and gas lines, cut panel holes 1/4 inch oversized, land a split trim ring or pipe flashing over the rib profile, and seal with a polyurethane or hybrid sealant rather than cheap silicone, which peels off coated steel. Where a wall meets a roof (porch tie-ins, garage returns), hold the panel 1 to 2 inches off the shingles and run an L-flashing behind it — panels cut tight to a roof wick water and rust from the bottom edge up, the most common premature failure on otherwise good installs.
Where Classic Rib Shines and Where to Skip It
Best-fit applications: garages, shops, barns, and barndominiums; farmhouse-style homes where the rib rhythm suits the architecture; wainscot accents under lap siding; and any wildfire-zone or hail-country building where noncombustible, impact-tolerant cladding earns its keep. Reasons to choose something else: on a high-end modern facade, concealed-fastener board-and-batten or standing seam looks cleaner and avoids screw maintenance entirely for the extra $2 to $4 per foot; on ornate traditional homes, metal ribs simply fight the style. And in coastal salt air, either upgrade to aluminum panel or accept vigilant edge maintenance on steel.
Ordering Smart: Takeoff and Lead Times
Measuring for classic rib is refreshingly simple, but a few habits save money and headaches. Calculate each wall’s square footage, subtract openings larger than a door, and divide by 3 (the panel’s coverage width in feet) to get panel count per wall, ordering each wall’s panels cut to its exact height — eave height plus an inch for the base trim engagement. Add 5 percent for waste on a simple rectangle, 10 percent with multiple gables and openings. Order all trim in the same call and same color lot: base/drip, outside and inside corners, J-channel for openings, and top-of-wall or gable trim, figured by linear footage plus 10 percent. Stock panels in white, tan, and gray often ship from regional roll-formers in days; custom colors and PVDF finishes typically run one to three weeks. When the bundles arrive, store them off the ground on a slight slope with the strapping cut — banded panels trap condensation between sheets, and “wet storage stain” (white oxide blotching) can mar a finish before a single screw is driven. Walk the delivery and note any freight damage on the bill before signing; scratched panels are a claim on day one and your problem on day two.
Bottom Line
Classic rib metal siding panels are the working-class hero of metal cladding: honest, fast, inexpensive, and durable to 40-plus years when you buy 26-gauge Galvalume, choose the right paint tier for your color, and respect the fastener details. Spend where it counts — gauge, PVDF on dark colors, straight screw lines over furring — and a panel invented for barns will hold its own on any wall you put it on.