
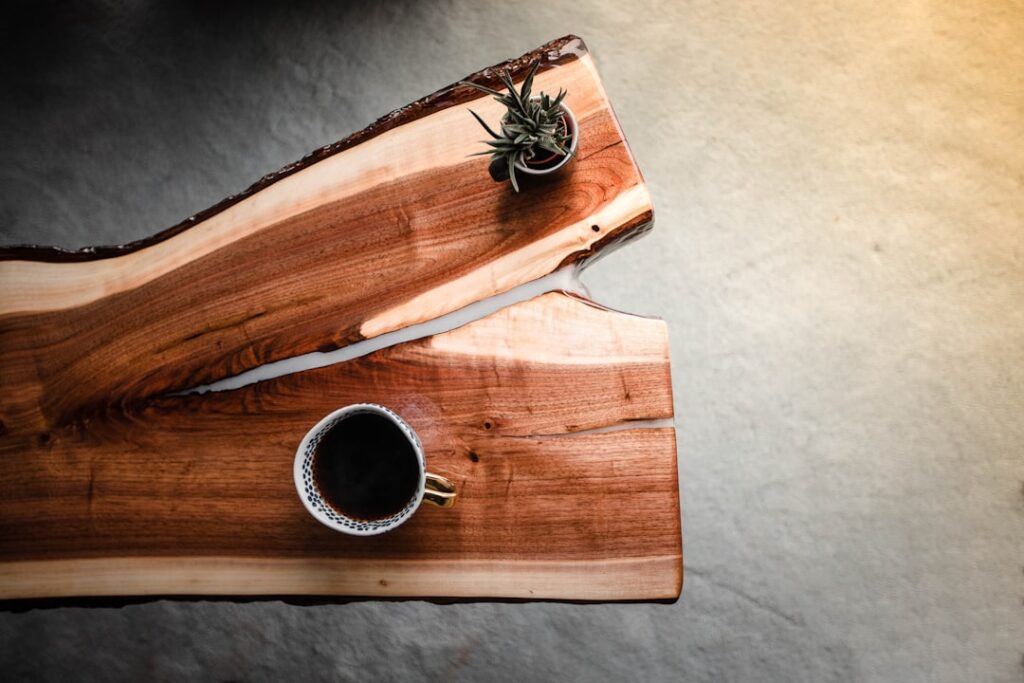
Few finishes can transform a slab of rough lumber into a glass-smooth, depth-filled showpiece the way epoxy can. Clear epoxy for wood is the secret behind river tables, glossy bar tops, sealed live-edge slabs, and countless DIY projects that look like they came from a high-end gallery. But the difference between a flawless pour and a cloudy, bubble-filled mess comes down to choosing the right product and following the right steps. This guide walks you through both.
What Clear Epoxy for Wood Does
Epoxy is a two-part system, a resin and a hardener, that cures into a hard, transparent solid through a chemical reaction. On wood, it serves three main jobs: it coats and protects the surface with a durable, glossy layer; it fills voids, cracks, and knots; and it encapsulates objects or color for decorative effects. The cured result is waterproof, scratch-resistant, and crystal clear when applied correctly.
Unlike a thin wipe-on finish, epoxy builds real thickness, which is what gives those tabletops their liquid-glass, three-dimensional depth.
Choosing the Right Type of Epoxy
Not all clear epoxy is the same, and using the wrong one is the most common beginner mistake. The two main categories are defined by how thick a layer they can cure at once.
Tabletop or Coating Epoxy
This self-leveling formula is made for thin layers, typically up to 1/8 inch per coat. It is ideal for sealing tabletops, bar tops, and counters. For thicker coverage you pour multiple coats, called flood coats, letting each cure first.
Deep Pour or Casting Epoxy
Deep pour epoxy is designed for thick applications, often 1 to 2 inches in a single pour, which is what river tables and void filling require. It cures slowly to keep heat low and prevent cracking. Never use a thin tabletop epoxy for a deep pour; it can overheat, yellow, and crack.
Preparing the Wood
Preparation determines whether your finish looks professional or amateur. Do not rush it.
- Dry the wood: Moisture content should be low, ideally under 12 percent, or trapped moisture can cloud the cure and cause adhesion problems.
- Sand thoroughly: Work up through the grits to around 120 to 220 so the surface is smooth and even.
- Clean off all dust: Vacuum, then wipe with a tack cloth. Any debris becomes permanently visible under epoxy.
- Seal coat first: Apply a thin “seal coat” of epoxy over porous wood to lock in air and prevent bubbles rising during the main pour.
- Build a dam: For pours, tape or build forms sealed with silicone so the liquid epoxy cannot leak out.
Mixing and Pouring Without Mistakes
Epoxy is unforgiving about ratios, so measure carefully and follow the label exactly. Most wood epoxies use a specific ratio by volume or weight, commonly 1:1 or 2:1.
- Measure precisely using graduated cups; eyeballing leads to soft, tacky spots that never cure.
- Mix slowly for the full time stated, usually 3 to 5 minutes, scraping the sides and bottom.
- Transfer to a second cup and mix again to catch any unmixed resin clinging to the first container.
- Pour within the working time, which varies from minutes for coating epoxy to hours for deep pour.
- Pour deep layers in lifts if your product specifies a maximum depth per pour.
Beating the Bubbles
Bubbles are the number one frustration with epoxy, but they are easy to control. As the epoxy sits, air rises to the surface. Pass a heat gun or a small propane torch in quick sweeps a few inches above the surface; the heat breaks the surface tension and pops the bubbles instantly. Do not linger in one spot, which can scorch or create ripples. For deep pours, a longer cure time naturally lets bubbles escape, and warming the resin slightly before mixing lowers its viscosity so air releases more easily.
Curing and Finishing
Patience pays off at the end. Most epoxies reach a tack-free state in 12 to 24 hours but need several days, sometimes up to a week, to fully cure and reach maximum hardness. Cure in a warm, dust-free room around 70°F to 75°F; cold temperatures slow the cure and can cause cloudiness, while a dusty space will trap particles forever.
Once fully cured, you can sand and polish for an even glassier finish. Work up through wet sandpaper grits, then buff with a polishing compound for a mirror shine. If you prefer a satin look, a matte topcoat over the epoxy softens the gloss.
Care and Common Pitfalls
A cured epoxy surface is tough but not indestructible. Use coasters and trivets, since hot mugs and pans can leave dull rings or marks. Clean with mild soap and water rather than abrasive cleaners that scratch the gloss. Be aware that clear epoxy can amber slightly over years of UV exposure; for pieces in direct sunlight, choose a UV-resistant formula to slow the change.
Popular Projects and How to Approach Them
Clear epoxy unlocks a wide range of woodworking projects, each with its own approach. Knowing which type and technique fits the project saves you costly do-overs.
- River tables: Two live-edge slabs with a deep-pour epoxy “river” between them, often tinted blue or left clear. Use casting epoxy and pour in lifts within the depth limit.
- Bar and tabletops: A flood coat of tabletop epoxy over the wood for a glassy, durable surface. Build thickness with multiple thin coats.
- Live-edge slabs: Fill natural cracks and knots with clear or tinted epoxy, then top-coat the whole surface.
- Cutting board accents: Decorative only, since epoxy is not food-safe for cutting on; keep it to display pieces or serving boards used over the resin-free zones.
- Coasters and small art: Great beginner projects using silicone molds and small batches of casting epoxy.
Start small. A set of coasters teaches you mixing, bubble control, and cure timing on a low-stakes piece before you commit a fifty-dollar slab to a full river table.
The Bottom Line
Clear epoxy for wood can turn an ordinary slab into a striking, durable centerpiece, but success lives in the details. Match the epoxy type to your pour depth, prep and seal the wood properly, measure and mix exactly, and chase out bubbles with gentle heat. Give it the full cure time it needs, and you will end up with a glass-smooth, waterproof finish worthy of the wood underneath it.


