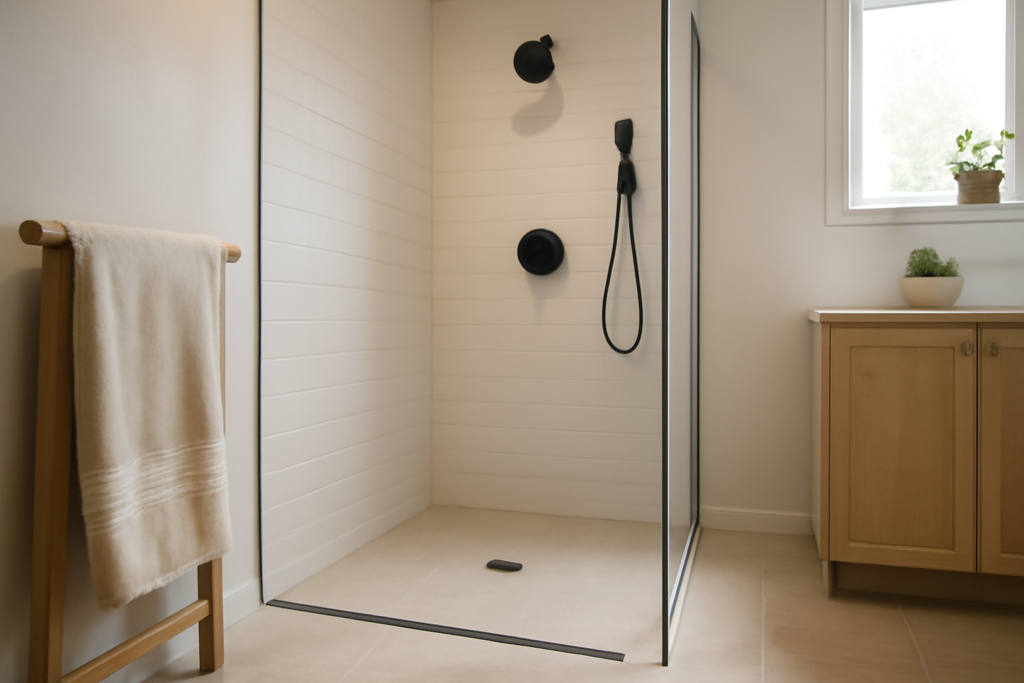
A curbless shower pan eliminates the raised threshold you normally step over to enter a shower, creating a seamless, floor-level entry that is both strikingly modern and genuinely accessible. Also called barrier-free or zero-entry showers, they have become the centerpiece of high-end bathroom remodels and the smart choice for aging-in-place design. But going curbless demands more careful construction than a standard shower, because there is no curb to hold water in. This guide explains how they work, what they cost, and how to build one that stays dry.
- What Is a Curbless Shower?
- Why Homeowners Choose Curbless
- How a Curbless Pan Handles Water
- Recessed Subfloor vs. Built-Up Floor
- What a Curbless Shower Pan Costs
- Prefab Curbless Trays vs. Fully Custom
- Waterproofing Is Everything
- Common Mistakes to Avoid
- Managing Water Without a Curb
- Tile Selection for Curbless Floors
- Is a Curbless Shower Right for You?
What Is a Curbless Shower?
In a conventional shower, a curb—usually a 4- to 6-inch raised threshold—dams the water inside the enclosure. A curbless design removes that dam entirely, so the shower floor is level with, or nearly level with, the surrounding bathroom floor. Water is kept in check instead by careful sloping toward the drain, a slightly recessed shower floor, and often a linear drain along one edge. The result is a clean, open look with no visual break between the bathroom and the shower, and a wheelchair- or walker-accessible entry with nothing to trip over.
Why Homeowners Choose Curbless
The appeal goes well beyond aesthetics:
- Accessibility: no threshold makes the shower usable for wheelchairs, walkers, and anyone with limited mobility—ideal for aging in place.
- Modern, spa-like look: a continuous floor makes the whole bathroom feel larger and more luxurious.
- Easier cleaning: no curb crevice to scrub, and often a single tile flowing throughout.
- Resale appeal: barrier-free showers are increasingly sought after and can be a selling point.
How a Curbless Pan Handles Water
Without a curb, three things keep water where it belongs. First, the shower floor is sloped—typically 1/4 inch per foot—so all water runs to the drain. Second, the shower floor is set slightly lower than the surrounding floor, either by recessing the subfloor between the joists or by building up the rest of the bathroom, so any stray water flows back toward the shower. Third, a linear (trench) drain placed along the far wall or the entry edge captures water across a wide line rather than a single point, which lets you slope the floor in just one direction for a cleaner tile layout. Proper waterproofing over the entire wet zone ties it all together.
Recessed Subfloor vs. Built-Up Floor
The biggest construction decision is how to create the level change. In new construction or a gut remodel with an accessible floor structure, the framer can drop or notch the joists to recess the shower area, giving you a truly flush, floor-level entry. In a retrofit where you cannot alter the joists, the alternative is to build up the surrounding bathroom floor with a subfloor layer so the shower sits relatively lower. Concrete slab homes require chipping out a recess in the slab. Each path affects cost and the finished threshold height, so this should be settled before demolition.
What a Curbless Shower Pan Costs
Curbless construction costs more than a standard curbed shower because of the extra framing, waterproofing, and the linear drain. The pan components—a pre-sloped curbless foam tray with a bonded membrane (Schluter, Wedi, Laticrete) plus a linear drain—typically run $500 to $1,500 in materials. Professional installation of the full curbless pan lands around $2,000 to $5,000, and that is before wall tile. Recessing a joisted floor or cutting a slab adds $500 to $2,000. All told, a curbless shower usually costs $1,000 to $3,000 more than a comparable curbed one, with the linear drain and floor structure being the main premiums.
Prefab Curbless Trays vs. Fully Custom
You have two build routes. Prefabricated curbless trays from waterproofing-system makers arrive pre-sloped to a linear or point drain and pair with a bonded sheet membrane—these speed the job, reduce error, and are the most DIY-friendly path for the confident homeowner. A fully custom mortar-bed pan with a sloped bed and a clamping linear drain gives complete design freedom but requires expert mortar-floating and a flood test. For most remodels, the foam-tray systems hit the best balance of reliability and buildability, which is why professional tile setters increasingly favor them for curbless work.
Waterproofing Is Everything
Because there is no curb backstop, curbless showers are less forgiving of waterproofing mistakes—so the membrane work has to be flawless. The waterproof layer must extend across the entire shower floor, up the walls to a safe height, and out beyond the shower opening onto the surrounding floor to catch any migrating water. All corners, drain connections, and seams must be sealed with the manufacturer’s banding and sealant. Skimping here or mixing incompatible waterproofing products is the number-one cause of curbless failures, and a leak under a flush floor is expensive to find and fix. This is a strong argument for professional installation on curbless jobs.
Common Mistakes to Avoid
Curbless punishes a few specific errors:
- Insufficient slope or the wrong drain location lets water pool or escape onto the bathroom floor.
- No recess or build-up, so the shower floor sits flush with no way to keep water in.
- Waterproofing that stops at the shower edge instead of extending onto the surrounding floor.
- Skipping the flood test before tiling, which is the only way to verify the pan holds.
- Poor glass or splash management—open curbless showers may need a longer glass panel or a well-placed showerhead to control spray.
Managing Water Without a Curb
The biggest practical worry with curbless showers is water escaping onto the bathroom floor, and good design solves it before it starts. The floor pitch is the first line of defense—everything must slope decisively toward the drain, with the surrounding bathroom floor either level or gently sloping back toward the shower. A generous glass panel or a longer partial wall on the open side blocks the majority of spray, and positioning the showerhead to spray away from the entry rather than toward it keeps water inside the wet zone. A linear drain placed at the entry threshold acts as a final catch, intercepting any water that migrates outward. Many designers also add a subtle flush-set drain trough or a slightly recessed shower field so a stray splash flows back in. Combined, these measures keep a curbless shower every bit as dry as a curbed one in normal use.
Tile Selection for Curbless Floors
Tile choice matters more in a curbless shower because the floor is both a wet surface and, often, a continuation of the bathroom floor. Prioritize slip resistance—look for a floor tile with a higher COF (coefficient of friction) rating or a textured, matte finish, and favor smaller floor tiles or mosaics whose numerous grout lines add grip and conform to the slope more easily than big rigid tiles. Because a linear drain lets the floor pitch in a single plane, you can even use large-format tile on a curbless floor, which is impossible with a traditional center drain that requires four-way slope. Running the same tile from the bathroom through the shower creates the seamless, spacious look curbless designs are prized for—just confirm the tile is rated for wet, sloped floor use, not only walls, and seal the grout well.
Is a Curbless Shower Right for You?
A curbless shower pan is worth the extra cost when accessibility matters—aging-in-place planning, mobility needs, or universal design—or when you want the clean, spa-like look that only a flush floor delivers. It shines in walk-in showers with linear drains and continuous tile. The trade-offs are higher cost, more demanding construction, and less tolerance for waterproofing errors, so it rewards hiring an experienced installer or, if you DIY, using a proven foam-tray system and never skipping the flood test. Get the slope, the recess, and the waterproofing right, and a curbless shower will be the accessible, elegant highlight of your bathroom for decades.