A patio extends your living space outdoors and adds real value to your home, and you do not need to hire a contractor to get one. With the right approach, DIY outdoor patio ideas range from a weekend gravel project to a polished paver installation, all achievable by a determined homeowner. The key is matching the material to your budget, your skill level, and the time you have. This guide compares the main patio types, walks through the basics of building each, and shares money-saving tips so you end up with a patio that looks great and lasts.
Gravel Patios: The Budget Champion
If cost and ease are your top priorities, a gravel patio is hard to beat. It is the most affordable and beginner-friendly option, requiring no concrete work or heavy materials. Gravel also drains well, so water never pools, and it adds a relaxed, natural look.
The basics are straightforward: mark and excavate the area a few inches deep, lay down landscape fabric to suppress weeds, install edging to contain the gravel, then fill with a base layer of crushed stone topped with a finer decorative gravel like pea gravel. Tamp it down as you go. The main downsides are that gravel shifts underfoot, can scatter outside the edging, and is less stable for furniture, so use a heavy edging and a compacted base to keep it tidy.
Paver Patios: The Best Balance
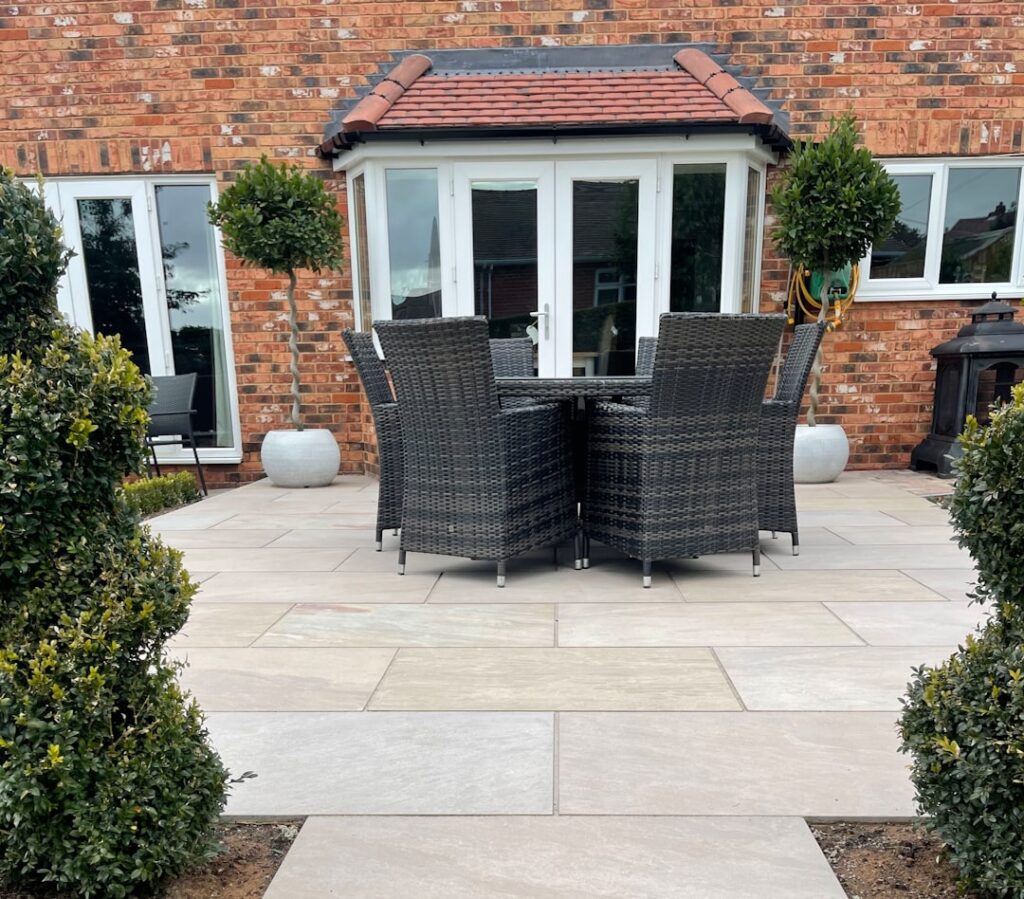
Pavers offer the most polished, durable result that is still DIY-friendly, which is why they are so popular. Concrete or stone pavers come in countless shapes, colors, and patterns, and a well-built paver patio can last decades. It takes more effort than gravel but rewards you with a solid, attractive surface.
- Excavate the area several inches deep, accounting for base and paver thickness.
- Add and compact a base layer of crushed gravel for stability and drainage.
- Spread and level a layer of sand as the setting bed.
- Lay the pavers in your chosen pattern, keeping them tight and level.
- Install edge restraints, then sweep polymeric sand into the joints to lock everything in place.
Build in a slight slope away from the house, typically a small fall per foot, so water drains properly. Renting a plate compactor makes a big difference in the final result.
Concrete Patios: Durable and Versatile
A poured concrete patio is durable, low-maintenance, and clean-looking, though it is the most demanding DIY option. Pouring a slab involves building forms, mixing or ordering concrete, and finishing it before it sets, which is physically intensive and time-sensitive. For larger areas, many DIYers order ready-mix delivery rather than mixing bag by bag.
Concrete can also be dressed up: stamping, staining, or scoring patterns into the surface mimics stone or tile at a lower cost. If a full pour feels intimidating, large concrete pavers or precast slabs give you a concrete look with far simpler installation, set on a gravel-and-sand base like regular pavers.
Budget-Friendly Creative Ideas
You can build a charming patio without premium materials. A few wallet-friendly approaches:
- Mixed materials: combine gravel with stepping stones or pavers to cover area cheaply while keeping a stable walking path.
- Flagstone in gravel: set irregular flagstones into a gravel base for a natural, high-end look at moderate cost.
- Brick patio: reclaimed or salvaged brick laid on sand creates timeless charm inexpensively.
- Decomposed granite: a compactable, firmer alternative to loose gravel with a warm, natural tone.
Shopping at the end of the season, sourcing reclaimed materials, and renting rather than buying tools all cut costs significantly.
Planning and Preparation Tips
Whatever material you choose, preparation determines whether the patio lasts or fails. Before digging, call your local utility locating service to mark underground lines; this is free and prevents dangerous mistakes. Check whether your project needs a permit, especially for larger or attached structures. Plan the size around how you will use the space, leaving room for furniture, walkways, and traffic flow.
A solid, compacted base and proper drainage are the two factors that separate a patio that stays flat for years from one that heaves, sinks, or puddles. Never skimp on excavation depth or base compaction to save time. Take the prep seriously and the surface layer almost takes care of itself.
Furnishing and Enhancing Your Patio
Once the surface is down, the right additions turn a bare slab into an outdoor room. Define the space with comfortable seating sized to the patio, and anchor it with an outdoor rug to add color and warmth underfoot. Shade is often the difference between a patio you use and one you avoid in summer, so consider a pergola, a market umbrella, or a shade sail. String lights or low-voltage path lighting extend usable hours into the evening and add ambiance for very little cost. Container plants, a fire pit, or a small water feature bring life and a focal point. Build these enhancements around how you actually plan to use the space, whether that is dining, lounging, or entertaining.
Maintenance to Keep It Looking New
A patio lasts longest with a little routine care, and the upkeep varies by material. Gravel patios need occasional raking to redistribute stones and topping off as gravel settles or scatters. Paver patios benefit from periodic sweeping, refreshing the polymeric sand in the joints every few years, and pulling any weeds that sprout between units; sealing the pavers is optional but helps resist stains and fading. Concrete patios should be cleaned periodically and resealed every few years to prevent cracking, staining, and surface wear, especially in freeze-thaw climates. Across all types, clearing leaves and debris promptly prevents staining and slippery buildup. A seasonal cleaning and a quick inspection keep small issues from becoming big repairs.
Bringing It All Together
The best DIY patio is the one that matches your budget, skills, and timeline. Choose gravel for the easiest, cheapest build, pavers for the best balance of durability and DIY feasibility, or concrete for a sleek, long-lasting slab if you are up for the work. Mix materials and shop smart to stretch your dollars. Above all, invest in proper excavation, a compacted base, and good drainage. Do that, and you will create an outdoor space you enjoy for years, built with your own hands.