A gallon of mid-grade interior wall paint costs around 35 dollars and will fail in six months on a kitchen cabinet door. The right enamel paint for wood costs 55 to 75 dollars and will hold up for 8 to 12 years on the same door. The difference is not marketing. Enamel formulas cure into a hard, tile-like film that resists scuffs, grease, and repeated cleaning, which is exactly what trim, cabinets, doors, and furniture demand. This guide walks you through choosing the right product, prepping the surface correctly, and avoiding the brush marks and tackiness that ruin most first-time enamel jobs.
What Enamel Paint Actually Is
Enamel is a category, not a brand. It refers to any paint that dries to a hard, glossy or semi-glossy finish through either solvent evaporation (oil-based) or coalescence of acrylic resins (water-based). True enamels contain a higher resin-to-pigment ratio than wall paint, which is what gives them their durability and washability.
You will see three sub-types on the shelf: oil-based alkyd enamel, waterborne alkyd enamel, and 100 percent acrylic enamel. All three work on wood, but they behave very differently during application and over time.
Oil vs Water-Based Enamels
Oil-based alkyd enamels like Benjamin Moore Satin Impervo level out beautifully, hide brush marks, and cure rock-hard in 7 to 10 days. The downsides are real: 30 to 45 minute open time, strong solvent odor, mineral spirits cleanup, and yellowing on white finishes after a few years in low-light areas.
Waterborne alkyd enamels like Sherwin-Williams ProClassic Acrylic-Alkyd and Benjamin Moore Advance bridge the gap. You get oil-like leveling with soap-and-water cleanup, no yellowing, and lower VOCs. Open time runs about 20 to 30 minutes. These have become the default choice for cabinets and trim in occupied homes since around 2018.
Pure acrylic enamels dry fastest, around 1 to 2 hours to recoat, but show brush marks more readily and never cure quite as hard as alkyds. They are the right call for exterior porch floors and outdoor furniture where flex matters more than impact resistance.
Prep Work That Actually Holds Up
No enamel paint for wood, regardless of price, will stick to a slick or contaminated surface. Plan on 60 to 70 percent of your total project time being prep, not painting.
- Degrease with TSP substitute or a 50/50 ammonia-water mix, especially kitchen cabinets
- Sand all glossy surfaces with 180 to 220 grit until uniformly dull
- Fill nail holes and dings with a hardening wood filler like Minwax High Performance
- Vacuum every surface, then wipe with a microfiber tack cloth
- Prime with a bonding primer such as INSL-X Stix or Zinsser BIN on knotty wood
Skipping the primer on raw pine or knotty cedar guarantees tannin bleed-through within 30 days. On previously painted wood in good shape, you can prime only the bare spots and feather them in.
Application Tools and Techniques
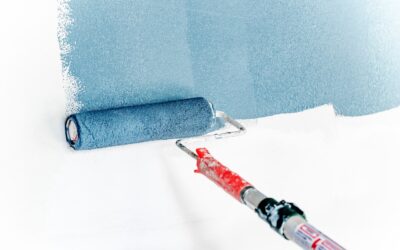
For trim and doors, a 2.5 inch angled sash brush with synthetic filaments works for waterborne enamel. A natural China bristle brush is the traditional choice for oil. Use a microfiber mini-roller (4 to 6 inch) for cabinet doors and flat panels to eliminate brush marks entirely.
Thin water-based enamels with Floetrol at 4 to 8 ounces per gallon to extend open time in warm rooms. For oil enamels, Penetrol does the same job. Both reduce brush drag without weakening the film. Apply in long, light strokes following the grain, and never go back into a section that has started to set up. You will tear the surface and create lap marks that show forever.
Drying, Recoating, and Full Cure
Touch-dry is not the same as ready-to-use. Most waterborne enamels are dry to recoat in 4 to 6 hours but need 14 to 30 days to fully cure. Cabinet doors hung too early will stick to the frames and tear the film when opened. Bookshelves loaded with heavy objects within the first week will show permanent indents from the load.
The fix is patience. Reinstall hardware after 24 to 48 hours, but avoid heavy contact or stacking items on the surface for at least two weeks. In humid climates above 70 percent relative humidity, double those windows.
Color, Sheen, and Where to Use Each
Enamel sheens range from matte through satin, semi-gloss, and high-gloss. Satin is the most forgiving for cabinets and doors because it hides minor application flaws. Semi-gloss is the workhorse for trim and is easier to clean. High-gloss belongs on showpiece pieces like front doors and built-in libraries where you want the lacquer-like depth.
Whites yellow slightly even in waterborne formulas if buried behind closed cabinet doors that never see sunlight. If pure white matters to your kitchen, choose a tinted off-white like Benjamin Moore White Dove (OC-17) rather than a true white, and the slight cream will mask any future shift.
Common Mistakes That Ruin a Job
The three failures that produce 90 percent of redo calls are these: painting over a glossy factory finish without scuffing, recoating before the previous coat has had its full window, and rolling enamel in a cold garage at 55°F. Most enamels need a minimum application temperature of 60°F, with 65 to 75°F as the sweet spot.
Stir, do not shake, when reopening a can. Shaking introduces microbubbles that pop on the surface mid-cure and leave a stippled, almost dimpled texture. A wooden stir stick for 90 seconds is enough. If a skin has formed on top, cut and remove it whole rather than mixing it back in.
When to Skip Enamel Entirely
For decks, fences, and outdoor wood that flexes with weather, switch to a flexible exterior alkyd or solid color stain rather than enamel. Hard enamel films crack and peel on substrates that move. For interior wall murals and decorative pieces that will never be touched, a quality acrylic wall paint is cheaper, faster, and looks the same to the eye.
Used in the right place, enamel paint for wood gives you a finish that rivals a cabinet shop spray job at a fraction of the cost. The product on the shelf is not the limiting factor on most homeowner projects. Prep, patience, and the right tool in your hand are.