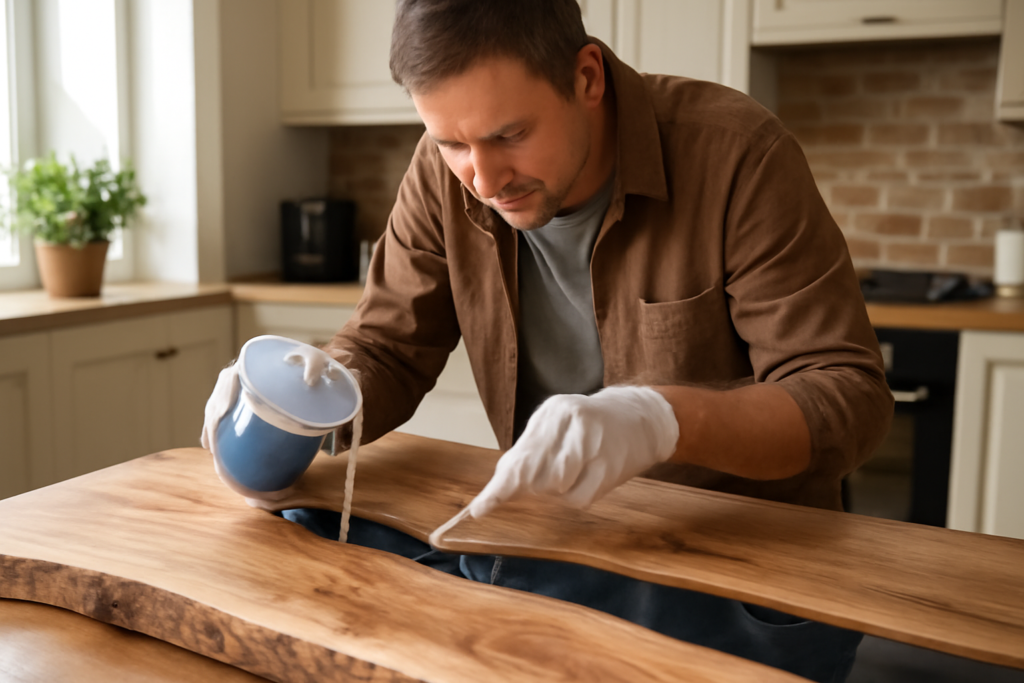
If you have admired a glassy bar top or a river table where blue resin flows through a live-edge slab, you have seen epoxy for wood in action. Epoxy is a two-part resin that cures into a hard, clear, durable surface, and it does jobs that varnish and polyurethane simply cannot, like filling deep cracks or encasing an entire tabletop in a thick protective coat. It is rewarding to work with, but it is also a chemical product that demands proper ventilation, accurate mixing, and patience. This guide covers the main types, how to use them, and how to stay safe.
How Epoxy for Wood Works
Epoxy comes as two liquids: a resin and a hardener. When you combine them in the correct ratio, a chemical reaction kicks off and the mixture slowly cures from liquid to solid. That reaction generates heat, called the exotherm, which is why pouring too thick in one batch can cause the resin to overheat, crack, or yellow. Understanding cure chemistry is the difference between a flawless pour and a ruined slab.
Types of Wood Epoxy
Choosing the right product is critical because they behave very differently:
- Bar-top and tabletop epoxy: Designed for thin coating layers, usually up to about 1/8 inch per pour. Self-leveling and great for sealing surfaces.
- Deep-pour casting epoxy: Formulated for thick pours of 1 to 2 inches or more in a single application. It cures slowly to manage heat, ideal for river tables and filling large voids.
- Epoxy wood filler and putty: Thick, sculptable products for repairing rot, knots, and gouges before finishing.
Using a coating epoxy where you need a casting epoxy is the most common beginner mistake. A thick pour of bar-top resin can overheat and crack, so always match the product to the depth.
Mix Ratios and Application
Epoxy is unforgiving about measurement. Each product specifies a mix ratio by volume or weight, commonly 1:1 or 2:1 resin to hardener. Off-ratio mixing leaves the epoxy tacky or soft and it may never fully cure. Always:
- Measure both parts precisely using graduated cups or a scale, following the label exactly.
- Stir slowly and thoroughly for several minutes, scraping the sides and bottom of the container.
- Work within the stated pot life, since the resin starts thickening once mixed.
- Remove air bubbles with a heat gun or torch passed quickly over the surface.
- For deep pours, follow the maximum single-pour depth and let each layer set if needed.
Filling Voids and Making River Tables
Live-edge slabs almost always have cracks, knots, and natural voids. Epoxy fills and stabilizes these beautifully. Seal the bare wood with a thin coat first so the slab does not release air bubbles into your main pour. Build a leak-proof mold or dam with melamine and tape or silicone, then pour casting epoxy in manageable layers. For a river table, contain the slabs on each side and fill the center channel with tinted resin. Plan on a full cure of several days before sanding and finishing.
Safety: Read This Before You Pour
Epoxy is safe to use when you respect it, but the uncured resin and hardener can irritate skin, eyes, and lungs. Protect yourself every time:
- Ventilation: Work in a well-ventilated space and use a respirator rated for organic vapors when sanding cured epoxy or working with large pours.
- Skin protection: Wear nitrile gloves and cover exposed skin. Uncured epoxy can cause sensitization with repeated contact.
- Eye protection: Always wear safety glasses, since splashes happen.
- Heat tools: Use heat guns and torches carefully and never near flammable vapors.
- Cleanup: Clean uncured resin with the manufacturer-recommended cleaner, not by handling it bare.
Keep the product and its safety data sheet on hand, and store leftovers sealed and away from children and pets.
Curing and Finishing
Most epoxy reaches a workable hardness within 24 to 72 hours but takes up to a week or more to fully cure to maximum strength, especially deep pours. Cure faster in a warm, dry room around 70 to 75 degrees Fahrenheit. Once fully cured, you can sand progressively through finer grits and buff to a high gloss, or top-coat with a UV-resistant finish for tables that see sunlight, since some epoxies amber over time.
Coloring and Customizing Epoxy
One of the joys of working with epoxy is how customizable it is. You can leave it crystal clear to showcase the wood, or tint it with mica powders, liquid pigments, and dyes for vivid color. Metallic mica powders create the swirling, ocean-like effects popular in river tables. Translucent tints let light pass through for a glassy look, while opaque pigments produce solid color. Always use colorants made for epoxy and add them sparingly, since too much can interfere with the cure. Test your color in a small batch first, because the cured shade often looks different from the wet mix.
Tools and Materials Checklist
Having everything ready before you mix is essential, since epoxy starts curing the moment the two parts meet. A typical kit includes:
- Resin and matching hardener in the correct ratio
- Graduated mixing cups or a digital scale
- Stir sticks and a clean container
- Nitrile gloves, safety glasses, and a respirator
- A heat gun or torch for bubbles
- Melamine, tape, or silicone for building a mold or dam
- Sandpaper in progressive grits and a buffing pad for finishing
Troubleshooting Common Problems
Even careful work can hit snags. Sticky or soft spots usually mean an off-ratio mix or inadequate stirring, so always measure and blend thoroughly. Cloudiness or excessive bubbles often come from cold temperatures or moisture in the wood, which is why sealing the slab and working in a warm room helps. Cracking in a thick pour points to overheating from too much volume at once, the fix being shallower layers with a casting epoxy. Yellowing over time can occur with sun exposure, so use a UV-resistant product or top-coat for pieces near windows.
Final Thoughts
Epoxy for wood opens up projects that no other finish can match, from sealed bar tops to dramatic river tables. Match the epoxy type to your pour depth, measure your ratios precisely, and never skip ventilation and gloves. Start with a small test piece, and your first big pour will go far more smoothly.