Few flooring upgrades are as fast or as forgiving as peel-and-stick tile, and Floor Pops is one of the most recognized brands in that space. These self-adhesive vinyl tiles let you transform a tired bathroom, laundry room, or kitchen floor in an afternoon, with no grout, mortar, or special tools. For renters and DIYers on a budget, they offer a remarkable amount of style for very little money.
But peel-and-stick tile has real limits, and knowing them up front saves frustration later. Here is an honest look at what Floor Pops are, where they shine, and how to install them so they last.
- What Are Floor Pops?
- Where Floor Pops Work Best
- What Floor Pops Cost
- Pros and Cons
- How to Install Floor Pops
- Care and Maintenance
- Floor Pops vs. Other Peel-and-Stick Options
- Tips for Longer-Lasting Results
- Can You Remove Floor Pops?
- Using Floor Pops on Walls and Other Surfaces
- Are Floor Pops Worth It?
What Are Floor Pops?
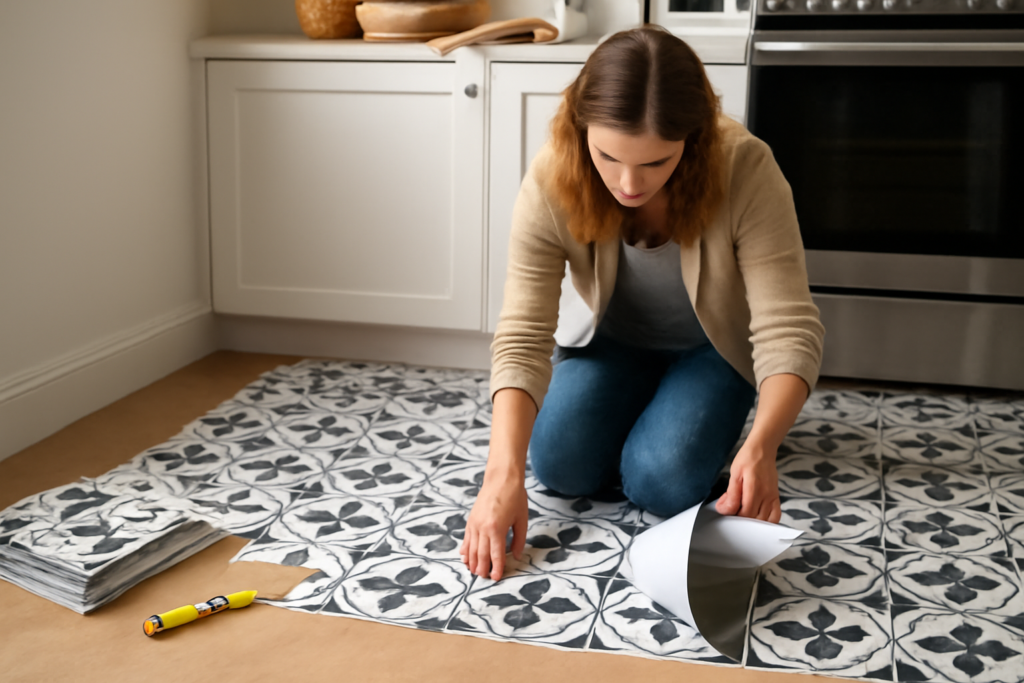
FloorPops are decorative peel-and-stick vinyl floor tiles, typically sold in 12-by-12-inch squares. Each tile has a printed pattern, a clear protective wear layer on top, and a peel-away backing that exposes a pressure-sensitive adhesive. You stick them directly onto a clean, smooth subfloor or existing hard floor. The brand is best known for bold encaustic-style patterns, geometric designs, marble looks, and classic black-and-white motifs that echo expensive cement tile at a fraction of the cost.
Where Floor Pops Work Best
These tiles thrive in low-moisture, light-traffic rooms where a quick style refresh matters more than long-term durability.
- Half baths and powder rooms: small footprints make installation quick and cheap.
- Laundry rooms: a fun pattern brightens a utilitarian space.
- Rental units: a low-commitment upgrade that can sometimes be removed.
- Closets, pantries, and mudrooms: small areas where you want a pop of design.
They are not recommended for high-traffic entryways, kitchens with heavy appliance traffic, or rooms that see standing water.
What Floor Pops Cost
Affordability is the main draw. A pack typically covers a set amount of square footage, and per-square-foot pricing usually lands around $2 to $5. A small powder room floor might cost well under $100 in materials. Compare that to ceramic tile, which can run $7 to $20 or more per square foot installed once you add labor, mortar, and grout, and the savings are obvious.
Pros and Cons
Advantages
- Very low cost and no special tools required
- Fast, mess-free installation with no grout or mortar
- Wide range of trendy patterns and looks
- Beginner-friendly and easy to cut with a utility knife
Drawbacks
- Thinner and less durable than ceramic or luxury vinyl plank
- Adhesive can lift in high heat or with moisture exposure
- Best as a medium-term solution, not a 20-year floor
- Requires a very smooth, clean surface to adhere well
How to Install Floor Pops
Proper prep is everything with peel-and-stick tile. The adhesive only grips well on a clean, dry, smooth surface, so do not skip the cleaning step.
- Prep the floor: clean thoroughly with a degreasing cleaner, let it dry fully, and fill any dips or grout lines so the surface is flat.
- Plan your layout: find the center of the room, snap chalk reference lines, and dry-lay tiles to balance the pattern and avoid thin slivers at the walls.
- Peel and place: remove the backing, line the tile up to your reference line, and press it down firmly from the center outward.
- Cut edges: score and snap tiles with a sharp utility knife and straightedge to fit around walls and fixtures.
- Press and seal: roll the floor with a hand roller or walk it in to bond the adhesive. Some installers add silicone caulk along the edges in damp rooms.
Care and Maintenance
Sweep regularly and damp-mop with a mild cleaner. Avoid soaking the floor, since standing water can creep under the tile edges and weaken the adhesive. Skip steam mops, which can soften the bond. Place mats at doorways to reduce grit and protect the wear layer.
Floor Pops vs. Other Peel-and-Stick Options
Floor Pops sit in a crowded category, so it helps to know how they compare. Against thicker glue-down or click luxury vinyl plank, Floor Pops are thinner, cheaper, and faster to install, but far less durable and not suited to heavy traffic. Against basic generic peel-and-stick vinyl tile, Floor Pops stand out mainly for their bold, designer-style patterns rather than plain wood or stone looks. And against ceramic tile, they trade durability and authenticity for a fraction of the cost and a fraction of the effort. The right choice depends on whether you value style and speed or long-term toughness.
Tips for Longer-Lasting Results
A few habits dramatically extend the life of a peel-and-stick floor. Clean and degrease the surface thoroughly before installing, because any grease or dust ruins the bond. Make sure the existing floor is smooth, since texture and grout lines telegraph through the thin tiles and create weak spots. Roll each tile firmly after placing it to activate the adhesive fully. Keep the room at a stable temperature, as extreme heat softens the glue and cold makes tiles brittle. Finally, avoid dragging heavy appliances across the surface, which can shift or tear the tiles.
Can You Remove Floor Pops?
One of the appeals for renters is that these tiles can often be removed, though it is not always perfectly clean. Warming each tile with a hair dryer softens the adhesive so you can peel it up slowly. Leftover glue residue usually comes off with an adhesive remover and a plastic scraper. Results vary by how long the tiles were down and what surface they were on, so if you are renting and need to restore the original floor, test removal on one tile in a corner first to set expectations.
Using Floor Pops on Walls and Other Surfaces
While these tiles are designed for floors, many DIYers also use peel-and-stick tiles creatively on other surfaces, such as a laundry-room backsplash, a stair riser, or the front of a small piece of furniture. The same rules apply: the surface must be clean, smooth, and dry, and the tiles should be kept away from constant moisture and high heat. On vertical surfaces especially, pressing firmly and adding a sealant bead at the edges helps the adhesive hold. It is a low-cost way to get a coordinated, decorative look beyond the floor itself.
Are Floor Pops Worth It?
For a quick, affordable, renter-friendly refresh in a small or low-traffic room, Floor Pops deliver impressive style for the money. Just go in with realistic expectations: this is a smart medium-term solution, not a permanent replacement for tile or luxury vinyl plank. Prep the floor carefully, choose a low-moisture room, and you can get a designer-looking floor in a single afternoon for less than the cost of dinner out.
Prefer to explore on your own?
See how new flooring looks in your actual room in seconds — free, no signup.
Try the free Floor Studio →