Few flooring challenges are as common, or as frustrating, as connecting two rooms that sit at different heights, which is exactly where floor transitions for uneven floors come to the rescue. Whether it is a tile bathroom meeting a hardwood hallway, a thick carpet dropping to laminate, or an older home where the subfloor simply is not level, the right transition piece bridges the gap safely and makes the change look intentional. This guide covers the transition types that handle height differences, the materials to choose, and how to install them for a smooth, trip-free result.
- Why Uneven Floors Happen
- Transition Types That Handle Height Differences
- Matching the Transition to the Gap
- Material Options
- Should You Level the Floor First?
- How to Install a Transition on an Uneven Floor
- Cost Considerations
- Safety and Aesthetics
- Choosing the Right Transition for Common Floor Pairings
- Final Thoughts on Floor Transitions for Uneven Floors
Why Uneven Floors Happen
Height differences between rooms are surprisingly normal. Different flooring materials have different thicknesses, so tile, hardwood, laminate, vinyl, and carpet rarely finish at exactly the same level. On top of that, older homes settle, subfloors can be uneven, and renovations layered over original floors add height in some rooms but not others. The result is a lip or a slope at the doorway that is both a trip hazard and an eyesore. The good news is that floor transitions for uneven floors are designed precisely to manage these mismatches.
Transition Types That Handle Height Differences
Not every transition strip deals with uneven heights, so choosing the right profile matters:
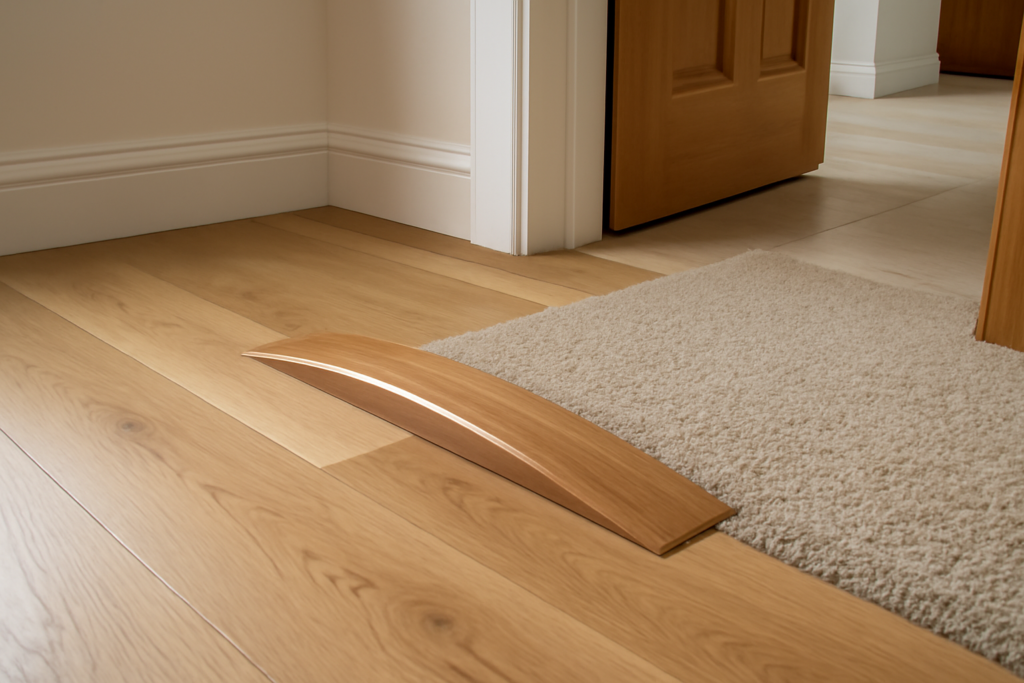
- Reducer strip: The workhorse for uneven floors. It slopes gently down from a higher floor to a lower one, easing the step into a ramp.
- T-molding: Best when two floors are roughly the same height; less ideal for large gaps.
- End cap or square nose: Finishes a higher floor where it meets a much lower surface or a sliding door track.
- Threshold or saddle: A raised bar, often in doorways, that spans and levels the gap between two rooms.
- Ramp or beveled transition: A wider slope used for larger height differences, especially for accessibility.
- Seam or flush transition: Custom-built to blend floors when the subfloor can be leveled first.
Matching the Transition to the Gap
The size of the height difference dictates the solution. For a small mismatch of an eighth to a quarter inch, a reducer or a well-fitted threshold usually does the job cleanly. For a larger drop, a wider beveled ramp or a custom-shaped reducer spreads the slope over more distance so nobody catches a toe. Where accessibility is a concern, such as for wheelchairs or mobility aids, building codes and best practices favor a gentle ramped transition rather than an abrupt lip. Always aim to turn a sharp edge into a gradual slope.
Material Options
Floor transitions for uneven floors come in several materials, each with its own look and durability:
- Wood: Warm and classic, easy to match to hardwood, and can be shaped or sanded to fit an odd gap.
- Metal (aluminum or brass): Extremely durable, sleek, and available in adjustable and flexible profiles that accommodate varied heights.
- Vinyl and rubber: Flexible, affordable, and forgiving, good for bridging awkward or curved transitions.
- Laminate and engineered: Color-matched to floating floors for a seamless look.
Flexible metal and rubber options are particularly useful for uneven floors because they can be adjusted or bent to follow an imperfect gap.
Should You Level the Floor First?
Before reaching for a transition strip, consider whether the underlying unevenness should be corrected. A minor height difference is perfectly fine to handle with a reducer. But if the subfloor itself is badly out of level, or the gap is large and inconsistent along the doorway, it is often worth leveling first. Self-leveling compound can smooth a dipped concrete subfloor, and shims or plywood can raise a low spot. Fixing the root cause creates a better base for the flooring and lets a simple transition finish the job cleanly. When leveling is impractical, a well-chosen transition is the smart compromise.
How to Install a Transition on an Uneven Floor
Installing floor transitions for uneven floors follows a logical sequence:
- Measure the doorway width and the exact height difference between the two floors.
- Choose the correct profile, usually a reducer or adjustable transition, that spans the gap.
- Cut the transition to length with a saw suited to the material.
- Dry-fit the piece to confirm it sits flush on the high side and ramps smoothly to the low side.
- Secure the base track or the transition with screws, adhesive, or the manufacturer’s clip system.
- Check that the finished transition has no sharp lip, rocks, or gaps, and that it feels smooth underfoot.
Cost Considerations
Transitions are an affordable fix. A single reducer or threshold typically costs about 10 to 40 dollars depending on material, with premium wood and brass at the higher end and vinyl at the lower end. Adjustable and flexible metal transitions cost a bit more but simplify uneven installs. If a professional handles it, labor for a doorway transition is modest, though leveling the subfloor first adds to the total. For most homeowners, the whole cost of finishing a doorway comes to well under a hundred dollars in materials.
Safety and Aesthetics
A good transition does double duty: it removes a trip hazard and makes the change between rooms look deliberate. Keep the slope gentle, ensure the piece is firmly fastened with no movement, and pick a finish that complements both floors so the transition reads as a design detail rather than a patch. In homes with elderly residents or young children, prioritize low-profile ramped transitions and consider a color that contrasts slightly so the change in level is easy to see.
Choosing the Right Transition for Common Floor Pairings
Because different flooring combinations create different height mismatches, it helps to think through the specific pairings you are likely to encounter. Tile meeting hardwood is one of the most common, and because tile is often thicker, a reducer that slopes down from the tile to the wood usually works best. Carpet meeting a hard floor is another frequent situation; here a specialized carpet edge or a Z-bar tucks the carpet down and a transition strip bridges to the adjacent surface. Laminate or vinyl meeting tile calls for a reducer or T-molding depending on how close the heights are, always leaving the floating floor room to expand.
When two very different materials meet, the transition also has to accommodate their movement, since floating floors expand and contract while tile stays put. A well-chosen strip absorbs that difference without pinching the floor. Use this quick reference for common pairings:
- Tile to hardwood: a reducer sloping from the taller tile to the wood.
- Carpet to hard floor: a carpet edge or Z-bar plus a transition strip.
- Laminate to tile: a reducer for height gaps, T-molding when heights are close.
- Vinyl to concrete: a flexible end cap or reducer that follows minor unevenness.
- Room to hallway: a threshold or saddle to level and finish the doorway.
Matching the transition to the exact pairing, and allowing for movement where floating floors are involved, gives you a doorway that stays smooth, quiet, and trip-free for years.
Final Thoughts on Floor Transitions for Uneven Floors
Floor transitions for uneven floors solve one of the most common headaches in any home by turning an awkward, hazardous height difference into a smooth, finished detail. Reach for a reducer or beveled ramp for real height gaps, choose a durable material that matches your décor, and consider leveling the subfloor first when the unevenness is severe. Measure carefully, fasten securely, and keep the slope gentle for safety. With the right transition in place, moving from one room to the next feels seamless, looks intentional, and stays safe for everyone in the household.
Prefer to explore on your own?
See how new flooring looks in your actual room in seconds — free, no signup.
Try the free Floor Studio →