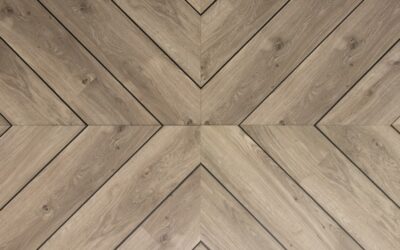
Picking flooring from a 4-inch sample is like picking paint from a chip — the tone shifts the moment it covers a real wall. A free virtual flooring visualization tool closes that gap by dropping your chosen plank into a photo of your actual room, complete with shadows, sightlines, and adjacent finishes. The good ones save you from a $4,800 mistake. The bad ones produce uncanny renders that misjudge every plank length. This guide walks through which tools work, where they fall short, and how to use them so the install matches the screen.
How These Tools Work
Most visualizers fall into three technical buckets. Photo-overlay tools accept a phone snapshot of your room and use perspective mapping to wrap a plank texture across the floor plane — Shaw, Mohawk, and Armstrong all run this style. AR-based tools use your phone camera live, recognizing the floor in real time through Apple’s RoomPlan or Google’s ARCore — Floor & Decor and a few startups offer this. Pre-built room renderers let you skip your photo entirely and place product into a stock living room or kitchen scene. Each style trades effort for accuracy.
Photo-overlay tools usually take 15-45 seconds per render and output a static JPG. AR tools are instant but live only in the app session. Pre-built renderers are fastest but show flooring in a room that looks nothing like yours.
The Best Free Visualizers in 2026
A handful of tools stand out for accuracy, sample selection, and ease of use:
- Shaw Floors Try Before You Buy: Photo upload, 1,200+ SKU library, exports to email — best overall accuracy
- Mohawk Room Visualizer: Pre-built rooms plus photo upload, great for laminate and LVP previews
- Armstrong Flooring Design A Room: Strong for hardwood with realistic grain rendering
- Floor & Decor Visualizer: AR-based, works through their mobile app, pulls live store inventory
- LL Flooring Picture It: Photo upload, includes tile and stone alongside wood-look options
- Karndean Designflooring Floorstyle: Best for designer LVT patterns and custom layouts like herringbone
None require an account for basic use, though saving renders or ordering free samples typically asks for an email.
Pros: Why These Tools Are Worth Using
The single biggest win is catching tone mistakes early. A medium walnut plank that looks rich in a 3×5 sample often reads orange under afternoon sun in a west-facing kitchen. Seeing that on screen before delivery saves a 22% restocking fee. Visualizers also help with scale — narrow 5-inch planks visually shrink a small room, while 9-inch wide planks make even a 12×14 space feel intentional. You can compare three or four candidates side by side in 10 minutes.
For couples disagreeing on style, a visualizer settles arguments fast. Drop both choices into the same room photo, screenshot each, and compare. The “wrong” pick usually loses on its own once both are in context.
Cons and Where Accuracy Breaks Down
No tool is perfect. Photo-overlay engines struggle with:
- Rooms with rugs, large furniture, or pet bowls covering the floor plane
- Strong directional sunlight that creates contrast the algorithm cannot match
- Rooms shot from a low or extreme angle
- Reflective surfaces like glossy tile or polished concrete
- Plank scale — most tools render planks at a generic 6-inch width regardless of actual SKU
Color accuracy on monitors and phone screens varies by 8-15% from the real product. Always order a physical sample for the final two contenders before committing.
Getting the Best Results From Your Photo
Shoot your room with the floor as clear as possible. Move chairs, roll up area rugs, and pick up cords. Stand in a corner so the entire floor plane is visible, hold the phone at chest height, and shoot landscape. Turn off HDR — it confuses the perspective engine. Natural daylight between 10 a.m. and 2 p.m. produces the most accurate render, since the tool tries to match the room’s existing light temperature to the sample.
If a room has multiple light sources or strong shadows, take two photos at different times of day and run both through the visualizer. The truth lives somewhere between them.
Comparing Two Floors Side by Side
Most visualizers let you save renders to email or download. Use that. Open both images on a tablet or large monitor — phone screens are too small for honest comparisons. Look at four things in each render: how the plank color reads against your wall paint, how it transitions to the adjacent room’s flooring, whether the grain pattern competes with your countertops or cabinets, and how the plank length feels relative to room dimensions.
A free virtual flooring visualization tool gives you decision confidence, but only if you compare honestly. Avoid the temptation to keep rendering until you find one that “looks right” — the third or fourth render is usually the most accurate.
When You Still Need Physical Samples
Order samples for the top two finalists. Most manufacturers ship 6 to 12-inch samples free or for $5-$10 with credit toward purchase. Lay the sample on the actual floor in the actual room. View it morning, midday, and evening. Place it next to your cabinets, baseboards, and any adjacent flooring. This 48-hour test catches what no visualizer can — the way real light bounces off real material in your real space.
Frequently Asked Questions
Are virtual flooring visualizers truly free?
Yes. All major manufacturer tools are free with no obligation. Some ask for an email to save your render or ship samples, but no payment is required.
How accurate is a virtual visualizer?
Color accuracy is roughly 85-92% versus the real product. Plank scale, grain detail, and gloss level often render generically. Always confirm with a physical sample before purchase.
Do I need to download an app?
Most photo-overlay tools work in any browser on phone or desktop. AR-based tools like Floor & Decor’s require their mobile app and a phone with LiDAR or ARCore support.
Can I visualize multiple rooms at once?
Some tools allow batch uploads, but most handle one room at a time. Save each render and compare them in a photo viewer.
What is the best free visualizer for hardwood?
Armstrong and Shaw render hardwood grain most accurately. For wide-plank engineered hardwood specifically, Mohawk’s tool tends to win on realism.
Prefer to explore on your own?
See how new flooring looks in your actual room in seconds — free, no signup.
Try the free Floor Studio →