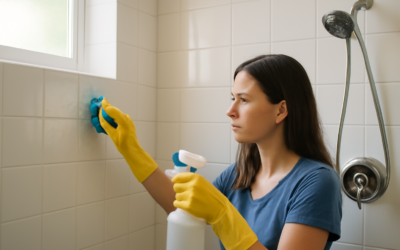
Grout lines are the first thing to show dirt on a tile floor. Even when the tiles themselves look clean, discolored, stained, or moldy grout makes the entire floor look neglected. The problem is that grout is porous. It absorbs dirt, grease, soap residue, and moisture like a sponge, and regular mopping barely touches the grime embedded below the surface.
The good news is that cleaning grout does not require expensive equipment or professional services for most situations. This guide walks through the most effective methods for cleaning grout on floor tiles, from gentle everyday approaches to heavy-duty solutions for severely discolored grout.
- Why Grout Gets Dirty
- Start with the Gentlest Method
- Method 1: Hot Water and a Stiff Brush
- Method 2: Baking Soda and Vinegar
- Method 3: Hydrogen Peroxide
- Method 4: Oxygen Bleach (OxiClean)
- Method 5: Commercial Grout Cleaners
- Method 6: Steam Cleaning
- Method 7: Chlorine Bleach (Last Resort)
- How to Clean Grout in Specific Areas
- How to Prevent Grout from Getting Dirty
- When to Consider Professional Cleaning or Regrouting
- Final Thoughts
Why Grout Gets Dirty
Standard cement-based grout is porous, meaning it has microscopic openings that absorb liquids and trap particles. Every time you mop, spill something, or walk across the floor with dirty shoes, a little more grime works its way into those pores. Over time, the accumulated dirt darkens the grout and becomes increasingly difficult to remove with surface cleaning alone.
Bathrooms add mold and mildew to the equation, as the warm, damp environment is ideal for fungal growth. Kitchens contribute grease and cooking residue. High-traffic areas accumulate ground-in dirt from shoes. Each environment creates a slightly different grout cleaning challenge.
Start with the Gentlest Method
Always begin with the mildest cleaning approach and work your way up to stronger solutions only if needed. Aggressive chemicals can damage grout, discolor colored grout, and degrade sealant. Starting gentle also tells you how severe the problem actually is before you break out the heavy artillery.
Method 1: Hot Water and a Stiff Brush
For lightly soiled grout that is not deeply stained, hot water and mechanical scrubbing are often sufficient.
- Fill a bucket with hot water (not boiling, which can crack grout).
- Pour or spray hot water along the grout lines.
- Scrub with a stiff-bristled nylon brush. An old toothbrush works for small areas, but a grout brush with a larger handle is far more practical for entire floors.
- Wipe up the dirty water with a mop or towels.
- Repeat if necessary.
This method works best as regular maintenance to prevent buildup rather than as a remedy for grout that has been neglected for years.
Method 2: Baking Soda and Vinegar
This is the most popular DIY grout cleaning method, and it works well on moderate dirt and staining.
- Make a paste of baking soda and water (roughly 3 parts baking soda to 1 part water).
- Apply the paste to the grout lines using a finger, old toothbrush, or squeeze bottle.
- Spray white vinegar over the baking soda paste. It will fizz as the acid and base react.
- Let the mixture sit for 5 to 10 minutes.
- Scrub the grout lines with a stiff brush.
- Rinse with clean water and wipe up the residue.
A note on vinegar: avoid using vinegar on natural stone tile (marble, travertine, limestone) because the acid can etch and damage the stone surface. For stone floors, use the baking soda paste without vinegar, or use a pH-neutral stone cleaner.
Method 3: Hydrogen Peroxide
Hydrogen peroxide (3% solution, the kind sold at pharmacies) is a mild bleaching agent that whitens grout and kills mold and mildew. It is safer than chlorine bleach and works well on white and light-colored grout.
- Pour or spray hydrogen peroxide directly onto the grout lines.
- Let it sit for 10 to 15 minutes.
- Scrub with a stiff brush.
- Rinse with clean water.
For tougher stains, mix hydrogen peroxide with baking soda to form a paste. Apply the paste, let it sit for 15 minutes, scrub, and rinse. The combination provides both chemical and mild abrasive cleaning action.
Method 4: Oxygen Bleach (OxiClean)
Oxygen bleach (sodium percarbonate) is a stronger option that works on heavily soiled or stained grout. It releases oxygen bubbles that break apart dirt and stains embedded in the grout pores. Unlike chlorine bleach, oxygen bleach is color-safe and will not damage colored grout or most tile surfaces.
- Dissolve oxygen bleach powder in warm water according to the package directions.
- Apply the solution generously to the grout lines. The grout should be saturated.
- Let it soak for 15 to 30 minutes. For severe staining, extend to 60 minutes.
- Scrub with a stiff brush.
- Mop up the solution and rinse the floor with clean water.
Oxygen bleach is one of the most effective DIY grout cleaners and works on everything from kitchen grease to bathroom mildew. Ensure the room is well-ventilated during use.
Method 5: Commercial Grout Cleaners
Purpose-made grout cleaners are formulated to tackle the specific types of staining found in grout. Products like Zep Grout Cleaner, Black Diamond Grout Cleaner, and Rejuvenate Grout Deep Cleaner are popular and effective. Most work through a spray-on, wait, scrub, and rinse process similar to the DIY methods above.
Follow the product directions carefully, including ventilation requirements and dwell time. Some commercial cleaners are acidic and should not be used on natural stone tiles. Always test in an inconspicuous area first.
Method 6: Steam Cleaning
A handheld steam cleaner or a steam mop with a grout-cleaning attachment uses high-temperature steam to loosen and lift dirt from grout without any chemicals. The heat kills mold and bacteria, and the pressurized steam penetrates the grout pores to break apart embedded grime.
Steam cleaning is particularly effective for people who want to avoid chemical cleaners entirely. The main limitation is that steam alone may not remove deeply set stains, and it requires a slow, methodical approach. Hold the steam nozzle on each grout line for several seconds and wipe away the loosened dirt with a microfiber cloth immediately after.
Note: Steam mops are not recommended for laminate flooring or vinyl flooring, but they are safe for ceramic and porcelain tile.
Method 7: Chlorine Bleach (Last Resort)
Chlorine bleach (like Clorox) is the nuclear option for grout cleaning. It whitens grout aggressively and kills mold and mildew effectively. However, it is harsh on colored grout (it can bleach out the color), can damage certain tile surfaces, and degrades grout sealant. It also produces strong fumes that require serious ventilation.
- Dilute chlorine bleach with water (1 part bleach to 10 parts water).
- Apply to grout lines with a spray bottle.
- Let it sit for 5 minutes maximum. Do not let it dry on the surface.
- Scrub with a stiff brush.
- Rinse thoroughly with clean water. Repeat rinsing to remove all bleach residue.
Only use chlorine bleach on white grout with non-porous tile (glazed ceramic or porcelain). Never use it on natural stone, colored grout, or unglazed tile. And never mix bleach with vinegar or other cleaning products, as the chemical reaction produces toxic fumes.
How to Clean Grout in Specific Areas
Kitchen Floor Grout
Kitchen grout accumulates cooking grease and food residue. Oxygen bleach or a baking soda and hydrogen peroxide paste works best because it breaks down grease. A degreasing dish soap (like Dawn) added to warm water also helps cut through kitchen-specific grime before scrubbing.
Bathroom Floor Grout
Bathroom grout deals with mold, mildew, and soap scum. Hydrogen peroxide is effective for mold, and a commercial mildew cleaner handles stubborn bathroom staining. Ventilation is key both for cleaning and for preventing future mold growth. Run the exhaust fan during and after showers.
Entryway and Mudroom Grout
These areas accumulate ground-in dirt from shoes. A stiff brush with oxygen bleach solution tackles the embedded dirt effectively. Consider using darker grout in these areas during any future retiling to hide soil between cleanings.
How to Prevent Grout from Getting Dirty
Seal Your Grout
This is the single most effective preventive measure. Grout sealer fills the pores in cement-based grout, preventing dirt, moisture, and stains from penetrating. Apply sealer after the grout has fully cured (usually 28 to 72 hours after installation) and reapply every 1 to 2 years. Penetrating sealers soak into the grout and provide invisible protection. Topical sealers create a visible film on the surface and offer more protection but can alter the grout’s appearance.
Use Epoxy Grout
If you are installing new tile, consider epoxy grout instead of cement-based grout. Epoxy grout is non-porous, stain-resistant, and does not require sealing. It is harder to install (shorter working time, stickier consistency) and more expensive, but the maintenance savings over the life of the floor are significant.
Mop Regularly
Regular mopping prevents dirt buildup before it has a chance to embed in the grout. A weekly mopping with a pH-neutral tile cleaner keeps grout looking good between deep cleanings.
Address Spills Quickly
Red wine, coffee, tomato sauce, and other staining liquids can permanently discolor unsealed grout if left to soak in. Wipe up spills promptly to prevent staining.
When to Consider Professional Cleaning or Regrouting
If DIY cleaning does not restore your grout to an acceptable appearance, professional tile and grout cleaning services use truck-mounted steam extraction equipment and commercial-grade cleaners that produce better results than consumer products. Professional cleaning typically costs $1 to $3 per square foot.
For grout that is cracked, crumbling, or permanently stained beyond recovery, regrouting is the solution. This involves removing the old grout with a grout removal tool or oscillating multi-tool and applying fresh grout. Regrouting costs $5 to $15 per square foot professionally but gives you a completely fresh start.
Final Thoughts
Cleaning grout on floor tiles is straightforward but requires the right approach for the severity of the problem. Start gentle with hot water and a brush, move to baking soda and vinegar or hydrogen peroxide for moderate staining, and use oxygen bleach for heavy-duty jobs. Seal your grout after cleaning to prevent future staining, and commit to regular mopping to keep grime from building up. With consistent maintenance, you can keep your tile floors looking clean and fresh without ever needing the extreme measures.
Prefer to explore on your own?
See how new flooring looks in your actual room in seconds — free, no signup.
Try the free Floor Studio →