Knowing how to remove vinyl tile is an essential skill for any flooring upgrade project. Whether you are pulling up old peel-and-stick squares from the 1990s or removing modern luxury vinyl tile (LVT), the process varies significantly based on the type of vinyl tile and the adhesive used to bond it. This comprehensive guide covers every method — from the simple heat-and-peel approach for peel-and-stick tiles to the heavy-duty scraping required for glue-down LVT — along with adhesive residue cleanup, asbestos safety checks, subfloor preparation, and the cost of hiring a professional.
- Types of Vinyl Tile and Removal Difficulty
- Tools and Supplies Needed
- Asbestos Check: Pre-1980 Vinyl Tile
- How to Remove Peel-and-Stick Vinyl Tile
- Step 1: Prepare the Room
- Step 2: Heat the First Tile
- Step 3: Pry and Peel
- Step 4: Continue Across the Room
- Step 5: Address Stubborn Tiles
- How to Remove Glue-Down LVT (Luxury Vinyl Tile)
- Step 1: Score the Tiles
- Step 2: Apply Heat Aggressively
- Step 3: Scrape with a Long-Handled Floor Scraper
- Step 4: Use an Oscillating Multi-Tool for Edges
- Step 5: Remove Remaining Adhesive
- Cleaning Up Adhesive Residue
- Subfloor Prep After Vinyl Tile Removal
- Professional Vinyl Tile Removal Cost
- Frequently Asked Questions
- Can I put new flooring over existing vinyl tile?
- What is the fastest way to remove peel-and-stick vinyl tile?
- How do I remove vinyl tile from concrete without damaging it?
- Is it safe to remove vinyl tile that contains asbestos?
- How do I remove adhesive residue from vinyl tile?
- How long does it take to remove vinyl tile from a room?
A typical 200-square-foot room takes a DIYer four to eight hours depending on how stubbornly the tiles are bonded. With the right tools and technique, you can remove vinyl tile yourself and save $1 to $3 per square foot in labor costs.
Types of Vinyl Tile and Removal Difficulty
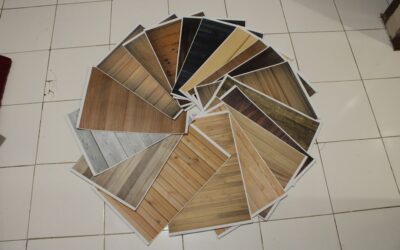
Before you start pulling up tiles, identify which type you have. The removal method and difficulty level differ dramatically between the three main categories of vinyl tile.
| Vinyl Tile Type | Adhesive Method | Removal Difficulty | Time per 100 sq ft |
|---|---|---|---|
| Peel-and-Stick (Self-Adhesive) | Pressure-sensitive adhesive backing | Easy to Moderate | 1–2 hours |
| Glue-Down LVT (Luxury Vinyl Tile) | Spread-on flooring adhesive | Moderate to Hard | 2–4 hours |
| Vintage VCT (Vinyl Composition Tile) | Black mastic or yellow adhesive | Hard (possible asbestos) | 3–5 hours |
Peel-and-stick tiles use a factory-applied adhesive that softens easily with heat. Glue-down LVT is bonded with a separate flooring adhesive that the installer spread on the subfloor, making removal significantly harder. Vintage VCT tiles — the 12×12 or 9×9 squares common in homes built before 1990 — often use tenacious mastic adhesives and may contain asbestos.
Tools and Supplies Needed
Gather the following tools before you begin. Having everything on hand prevents frustrating mid-project trips to the hardware store.
Essential tools for all vinyl tile removal:
- Utility knife with fresh blades
- Stiff 4-inch putty knife or floor scraper
- Long-handled floor scraper (saves your back)
- Heat gun or hair dryer
- Heavy-duty contractor trash bags
- Work gloves and knee pads
- Safety glasses and dust mask
Additional tools for glue-down LVT:
- Oscillating multi-tool with scraper blade
- Adhesive remover (citrus-based such as Sentinel 747 or Goo Gone Pro)
- Bucket, mop, and warm water
- Belt sander or floor buffer with abrasive pad (for stubborn adhesive on concrete)
Safety equipment for suspected asbestos tiles:
- P100 respirator (not a basic dust mask)
- Disposable coveralls
- Plastic sheeting and duct tape for containment
- HEPA vacuum
Asbestos Check: Pre-1980 Vinyl Tile
This is the most critical step before removing any vinyl tile in an older home. Vinyl tiles manufactured before 1980 — and in some cases through 1986 — frequently contained asbestos fibers. The asbestos was used as a strengthening agent and fire retardant in both the tile body and the black mastic adhesive beneath it.
Warning signs of asbestos-containing vinyl tile:
- The home was built before 1980 and the floor appears to be original
- Tiles measure 9×9 inches — the most common asbestos-era size
- The adhesive beneath the tiles is black or dark brown (black mastic)
- The tile backing is dark, fibrous, or tar-like
- Multiple layers of old flooring exist (asbestos tiles were often covered over rather than removed)
If you suspect asbestos, do not remove the tiles yourself. Disturbing asbestos-containing materials releases microscopic fibers that cause mesothelioma, lung cancer, and asbestosis. Have a sample professionally tested by a certified lab — testing typically costs $25 to $50 per sample. If positive, hire a licensed asbestos abatement contractor for removal, which costs $5 to $15 per square foot but protects your health and ensures legal compliance.
For more details on removing vinyl flooring of all types, see our complete guide on how to remove vinyl flooring.
How to Remove Peel-and-Stick Vinyl Tile
Peel-and-stick vinyl tiles are the easiest type to remove because their pressure-sensitive adhesive is designed to be semi-permanent rather than truly permanent. The key tool is a heat gun — warmth softens the adhesive and allows tiles to peel away cleanly.
Step 1: Prepare the Room
Remove all furniture, baseboards, and transition strips from the room. If you plan to reuse the baseboards, label them and set them aside carefully. Sweep the floor to remove loose dirt and debris.
Step 2: Heat the First Tile
Start in a corner of the room. Hold a heat gun 4 to 6 inches above the tile surface and move it slowly back and forth for 30 to 60 seconds. You want the tile warm enough that the adhesive softens but not so hot that the vinyl melts or warps. A medium setting (around 750°F) works well. If you do not have a heat gun, a hair dryer on its highest setting works — it just takes longer.
Step 3: Pry and Peel
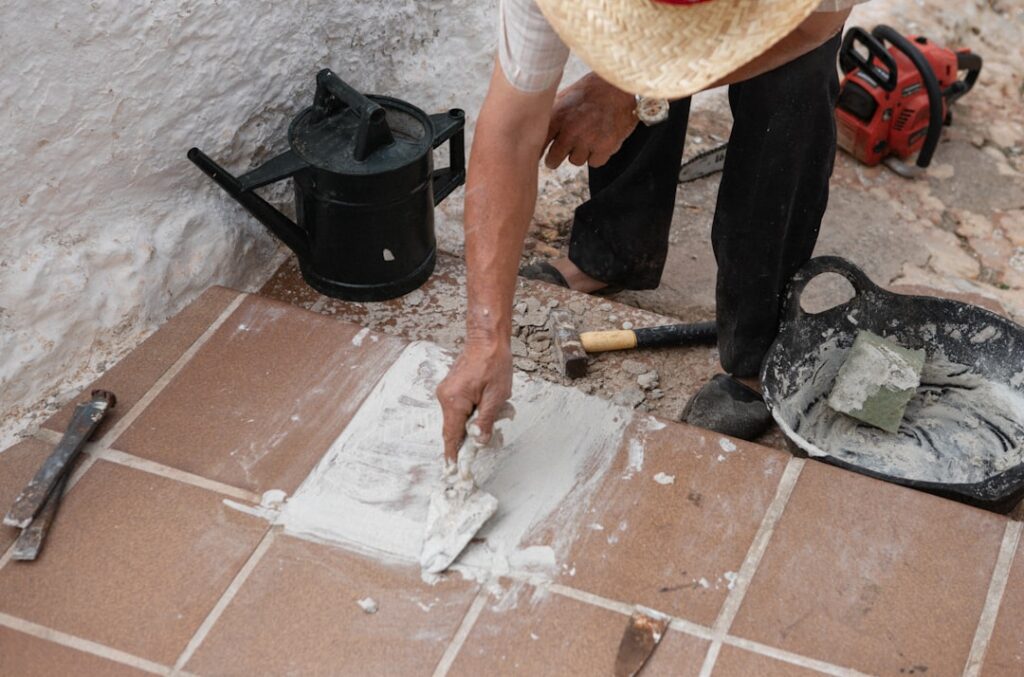
Slide a stiff putty knife or floor scraper under the heated tile edge at a low angle. Push firmly to break the adhesive bond, then lift the tile. If the tile comes up in one piece, move to the next one. If it cracks or breaks, heat it for another 30 seconds and try again. Work in small sections — heat two or three tiles at a time, then peel them while the adhesive is still warm.
Step 4: Continue Across the Room
Develop a rhythm: heat, scrape, peel, bag. Deposit removed tiles into contractor bags immediately to keep the workspace clean. As you remove tiles further from the wall, you may find it easier to use a long-handled floor scraper — the leverage and standing position reduce strain on your knees and back considerably.
Step 5: Address Stubborn Tiles
Tiles that have been in place for many years may have adhesive that has hardened and become more tenacious. For these stubborn tiles, apply more heat (up to 90 seconds), try working the scraper from multiple angles, or score the tile surface with a utility knife to let heat penetrate faster. If a tile simply will not come up in one piece, break it into sections and remove each piece individually.
If you are also dealing with peel-and-stick flooring in plank format, the removal process is nearly identical.
How to Remove Glue-Down LVT (Luxury Vinyl Tile)
Glue-down LVT removal is significantly more labor-intensive than peel-and-stick because professional flooring adhesive creates a much stronger bond. Plan for this job to take two to three times longer than peel-and-stick removal.
Step 1: Score the Tiles
Use a utility knife to score each tile from corner to corner, creating an X pattern. This allows heat to penetrate through the tile to the adhesive layer below. For thicker LVT (5mm or more), you may need to make multiple passes with the knife.
Step 2: Apply Heat Aggressively
Glue-down adhesive requires more heat than peel-and-stick. Hold the heat gun closer (3 to 4 inches) and heat for 60 to 90 seconds per tile. A wallpaper steamer is an excellent alternative for large areas — the moisture helps break down many flooring adhesives while the heat softens the vinyl.
Step 3: Scrape with a Long-Handled Floor Scraper
A long-handled floor scraper is practically mandatory for glue-down removal. Position the blade at a 30-degree angle and push forward with firm, steady pressure. The goal is to get under the tile and adhesive together. Short, chopping strokes work better than long sweeps for breaking through tough adhesive.
Step 4: Use an Oscillating Multi-Tool for Edges
Around cabinets, door frames, and walls where the long-handled scraper cannot reach, an oscillating multi-tool with a rigid scraper blade is indispensable. It vibrates the blade rapidly to slice through adhesive in tight spaces.
Step 5: Remove Remaining Adhesive
After all tiles are up, you will likely have a layer of adhesive residue covering the subfloor. This must be removed completely before installing new flooring — see the adhesive cleanup section below.
For a broader overview of vinyl tile options and their characteristics, visit our vinyl tile flooring guide.
Cleaning Up Adhesive Residue
Leftover adhesive on the subfloor is the most tedious part of vinyl tile removal. Skipping this step is tempting, but adhesive residue causes problems with new flooring — it prevents proper bonding for glue-down installations and creates bumps under floating floors. Here is how to clean it up based on your subfloor type.
On Concrete Subfloors
- Scrape first. Use a long-handled scraper to remove as much adhesive as possible while it is still warm from tile removal.
- Apply adhesive remover. Spread a citrus-based adhesive remover (Sentinel 747 is an industry favorite) generously over the residue. Let it soak for the manufacturer-recommended time — usually 30 to 60 minutes.
- Scrape again. The adhesive should now be soft and gummy. Scrape it off into piles and bag it.
- Mop clean. Mop the floor with warm water to remove the adhesive remover residue. Allow to dry completely.
- Grind if necessary. For extremely stubborn adhesive that resists chemical removal, rent a concrete grinder with a diamond cup wheel. This mechanically removes everything down to bare concrete.
On Plywood Subfloors
- Scrape carefully. Use a sharp floor scraper at a low angle to avoid gouging the plywood surface.
- Sand remaining residue. A belt sander or random orbital sander with 40-grit paper removes thin adhesive layers effectively. Wear a respirator — sanding adhesive creates fine dust.
- Avoid excessive moisture. Do not soak plywood with adhesive remover. Apply it sparingly, let it sit briefly, and wipe — do not flood.
- Evaluate the plywood. If the surface is too damaged or uneven after adhesive removal, install a new 1/4-inch underlayment over the top rather than trying to achieve a perfect surface.
Subfloor Prep After Vinyl Tile Removal
Once the vinyl tiles and adhesive are gone, inspect and prepare the subfloor for new flooring. This step determines how well your new floor will perform.
Check for flatness. Lay a 6-foot straightedge across the subfloor in multiple directions. Variations of more than 3/16 inch over 6 feet need to be addressed. Fill low spots with floor-leveling compound and sand or grind high spots.
Check for moisture. On concrete subfloors, perform a calcium chloride moisture test or use a pin-type moisture meter. Moisture levels above 3 pounds per 1,000 square feet per 24 hours (calcium chloride test) or above 75% relative humidity (in-situ probe) require a moisture barrier before most flooring installations.
Repair damage. Fill cracks, holes, and gouges with appropriate patching compound — hydraulic cement or concrete patch for concrete subfloors, wood filler for plywood. Sand patches smooth after curing.
Clean thoroughly. Vacuum all dust, debris, and adhesive residue with a shop vacuum. The subfloor must be completely clean, dry, flat, and structurally sound before new flooring goes down.
Professional Vinyl Tile Removal Cost
Hiring a professional makes sense if you have a large area, suspect asbestos, or simply want the job done faster. Here is what to expect in terms of pricing.
| Service | Cost per Square Foot | Cost for 200 sq ft Room |
|---|---|---|
| Peel-and-Stick Tile Removal | $1.00 – $1.50 | $200 – $300 |
| Glue-Down LVT Removal | $1.50 – $3.00 | $300 – $600 |
| VCT Tile Removal (non-asbestos) | $2.00 – $3.50 | $400 – $700 |
| Asbestos Tile Abatement | $5.00 – $15.00 | $1,000 – $3,000 |
| Adhesive Removal (add-on) | $0.50 – $1.50 | $100 – $300 |
| Subfloor Leveling/Repair (add-on) | $1.00 – $3.00 | $200 – $600 |
Most flooring contractors bundle tile removal with new flooring installation at a reduced rate — typically 20% to 30% less than removal as a standalone service. Always get at least three written quotes that detail exactly what is included: tile removal, adhesive removal, subfloor prep, and disposal.
DIY savings: For a 200-square-foot room, doing the removal yourself saves approximately $300 to $600 in labor. Your main expenses will be a long-handled floor scraper ($30 to $50), adhesive remover ($15 to $30 per gallon), and trash bags — a total of roughly $50 to $100 in supplies.
Frequently Asked Questions
Can I put new flooring over existing vinyl tile?
Yes, in many cases. If the existing vinyl tile is firmly bonded, level, and in good condition, you can install floating floors (click-lock LVP, laminate) or glue-down LVT directly over it. The key requirements are that the surface is flat (no loose or missing tiles), clean, and free of wax or polish. However, installing over old vinyl adds height — check that doors clear and transitions to adjacent rooms work.
What is the fastest way to remove peel-and-stick vinyl tile?
A heat gun and a long-handled floor scraper working together is the fastest method. Heat three to four tiles at once, then scrape them up in quick succession while the adhesive is soft. An experienced person can clear 50 to 75 square feet per hour this way. For very large areas, renting a ride-on floor scraper machine ($200 to $400 per day) can dramatically speed up the process.
How do I remove vinyl tile from concrete without damaging it?
Use heat to soften the adhesive before scraping — this prevents gouging the concrete surface. Keep your scraper blade sharp and work at a shallow angle (15 to 20 degrees). For adhesive residue, use a chemical adhesive remover rather than aggressive mechanical grinding, which can leave divots in the concrete. If the concrete does get scratched, self-leveling compound fills minor damage easily.
Is it safe to remove vinyl tile that contains asbestos?
No — homeowners should never remove asbestos-containing vinyl tile. Federal and state regulations require licensed asbestos abatement professionals for removal. The safest and most cost-effective approach in many cases is to encapsulate the asbestos tile by installing new flooring over it rather than removing it. Consult with a certified asbestos inspector before making any decisions.
How do I remove adhesive residue from vinyl tile?
Apply a citrus-based adhesive remover (such as Sentinel 747 or Goo Gone Pro-Power) to the residue and let it soak for 30 to 60 minutes. The adhesive should soften enough to scrape away. For stubborn spots, reapply and wait longer. On concrete, a diamond cup grinder removes the most tenacious adhesive. On plywood, sand with 40-grit sandpaper after chemical treatment.
How long does it take to remove vinyl tile from a room?
For a 200-square-foot room: peel-and-stick vinyl tile takes 2 to 4 hours, glue-down LVT takes 4 to 8 hours, and vintage VCT with tenacious mastic can take 6 to 10 hours. Add 1 to 3 hours for adhesive residue cleanup and subfloor prep. These times assume one person working — a helper can cut the time by 30% to 40%.
Prefer to explore on your own?
See how new flooring looks in your actual room in seconds — free, no signup.
Try the free Floor Studio →