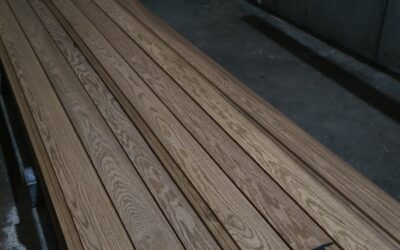
Vinyl flooring is remarkably durable, but no floor is indestructible. Dragged furniture scratches the surface, dropped tools tear through the wear layer, heavy appliances leave dents, and age causes edges to curl. The good news is that most vinyl flooring damage can be repaired without replacing the entire floor. Knowing how to repair vinyl flooring saves hundreds or thousands of dollars in replacement costs and keeps your floor looking its best.
- Fixing Scratches
- Repairing Small Tears and Cuts
- Replacing Individual LVP Planks
- Patching Sheet Vinyl
- Fixing Dents
- Repairing Curling Edges
- When to Replace vs Repair
- Preventing Future Damage
- Frequently Asked Questions
- Can you fix scratches in vinyl plank flooring?
- How do you fix a tear in vinyl flooring?
- Can you replace one vinyl plank without removing others?
- How do you get dents out of vinyl flooring?
- Why is my vinyl plank flooring lifting at the edges?
- Is it worth repairing vinyl flooring or should I replace it?
This guide covers every common vinyl flooring repair — from minor surface scratches to full plank replacement — for luxury vinyl plank (LVP), luxury vinyl tile (LVT), and sheet vinyl.
Fixing Scratches
Surface scratches are the most common vinyl flooring damage. They range from light scuffs that only show in certain lighting to deep gouges that expose the pattern layer beneath the wear layer.
Light Surface Scratches
Light scratches that you can feel with a fingernail but have not cut through the wear layer respond well to simple treatments.
- Clean the area: Sweep away debris and wipe the scratched area with a damp cloth.
- Apply vinyl floor wax or polish: Use a product designed specifically for vinyl flooring. Apply a thin layer over the scratched area with a soft cloth, working it into the scratch.
- Buff to blend: Once dry, buff the area with a clean soft cloth in circular motions. The wax fills the scratch and restores surface uniformity.
- Repeat if needed: Deep light scratches may require two to three applications.
Alternative method: A small amount of WD-40 on a soft cloth can temporarily mask light scratches by filling them with a lubricant film. However, this is a cosmetic fix that needs periodic reapplication and may make the area slightly slippery.
Deep Scratches and Gouges
Scratches that cut through the wear layer into the printed pattern layer require more substantial repair.
- Clean the scratch thoroughly with isopropyl alcohol to remove dirt and grease.
- Apply a vinyl repair kit filler: Use a color-matched vinyl repair compound (available at hardware stores or from the flooring manufacturer). Press the filler into the gouge with a putty knife.
- Smooth and level: Scrape the excess filler flush with the surrounding surface using a plastic scraper.
- Let it cure: Follow the product cure time (usually 24 hours).
- Seal the repair: Apply a thin coat of clear vinyl floor sealer over the patched area to blend the sheen.
Deep scratch repairs are visible on close inspection but blend well from standing height. For heavily scratched areas, replacing the damaged planks is often a better solution. Visit our LVP flooring page for product-specific guidance.
Repairing Small Tears and Cuts
Tears in vinyl flooring typically occur from dragging sharp objects, dropping knives, or moving furniture without protection. The repair approach depends on the severity and location of the tear.
Minor Tears (Under 1 Inch)
- Clean the torn area with isopropyl alcohol.
- If the torn piece is still attached and can be pressed flat, apply a thin layer of vinyl seam sealer under the flap.
- Press the flap down firmly and place a heavy object (books, weights) on top for 24 hours while the sealer bonds.
- Wipe away any excess sealer that squeezes out.
Larger Tears (1 to 3 Inches)
- Clean the area thoroughly.
- Apply vinyl adhesive or super glue under both sides of the tear.
- Press the torn edges together tightly, ensuring the pattern aligns.
- Run a line of clear vinyl seam sealer along the top of the repaired tear.
- Cover with wax paper and weigh down for 24 hours.
- Once cured, apply a thin coat of vinyl floor polish over the repair to blend the surface sheen.
Seam sealer chemically welds vinyl surfaces together, creating a stronger bond than adhesive alone. For sheet vinyl tears, seam sealer is especially effective because the material is flexible and the sealed joint moves with the floor.
Replacing Individual LVP Planks
One of the biggest advantages of click-lock luxury vinyl plank is the ability to replace individual damaged planks without touching the rest of the floor. This is one of the most valuable skills in how to repair vinyl flooring — a single plank replacement costs $5 to $15 in materials versus hundreds for a full floor replacement.
Method 1: Disassemble from the Nearest Wall
This is the cleanest method and preserves all click-lock joints.
- Remove the baseboard or quarter-round trim along the nearest wall.
- Unclick planks row by row from the wall toward the damaged plank.
- Remove the damaged plank and insert a new one.
- Reassemble the rows back to the wall.
- Reinstall the trim.
This method works well when the damaged plank is close to a wall. For planks in the middle of a large room, the next method is more practical.
Method 2: Cut and Replace In Place
This method removes and replaces a single plank without disturbing the surrounding floor.
- Using a utility knife and straight edge, cut along the long edges of the damaged plank, about 1/4 inch inside the seam lines.
- Cut the short ends of the plank in the same manner.
- Pry up and remove the center section of the cut plank.
- Carefully remove the remaining edge strips, taking care not to damage adjacent planks.
- Prepare the replacement plank: using a utility knife, remove the bottom lip of the click-lock groove on the long side and one short side. This allows the plank to drop in from above.
- Apply a thin bead of vinyl flooring adhesive around the perimeter of the opening.
- Set the replacement plank into position, engaging the remaining click-lock edges first, then pressing down the modified edges into the adhesive.
- Place weight on the plank for 24 hours while the adhesive cures.
Important: Always keep leftover planks from your original installation for exactly this purpose. If you do not have spares, check with the retailer or manufacturer for matching stock. For discontinued products, pull a plank from an inconspicuous area (closet, under furniture) and use it as the replacement in the visible location. Visit our vinyl flooring page for brand-specific tips.
Patching Sheet Vinyl
Sheet vinyl cannot be disassembled like click-lock planks. Damaged areas require cutting out and patching.
- Get a matching patch: Use leftover material from the original installation. If unavailable, check under appliances or in closets for a donor piece.
- Position the patch: Lay the patch material over the damaged area, aligning the pattern precisely. Tape it in place with painter’s tape.
- Double-cut both layers: Using a sharp utility knife and straight edge, cut through both the patch and the existing floor simultaneously. Cut in a rectangular or square shape larger than the damage. This ensures the patch and the opening are exactly the same size and shape.
- Remove the damaged section: Peel up the cut section of the old flooring. If it is glued, use a putty knife to carefully scrape up the old material and adhesive.
- Apply adhesive: Spread vinyl flooring adhesive on the exposed subfloor. Use a notched trowel for even coverage.
- Set the patch: Place the patch into the opening, pressing firmly to seat it in the adhesive. Align the pattern with the surrounding floor.
- Seal the seams: Apply vinyl seam sealer along all four edges of the patch. This bonds the patch to the surrounding sheet and prevents water penetration.
- Roll and weight: Use a flooring roller or rolling pin over the patch to ensure full adhesive contact. Place weight on top for 24 hours.
A well-executed sheet vinyl patch is nearly invisible because the double-cut technique creates a perfect fit. For detailed sheet vinyl information, see our vinyl sheet flooring guide.
Fixing Dents
Heavy furniture, appliances, and dropped objects can leave dents in vinyl flooring. The repair approach depends on the vinyl type and dent severity.
Heat Method for Minor Dents
Vinyl softens when heated, and minor dents can sometimes be coaxed back to their original shape.
- Place a damp cloth over the dented area.
- Apply a warm (not hot) iron over the cloth for 30 to 60 seconds. The steam softens the vinyl.
- Remove the iron and cloth. Immediately place a heavy, flat object over the dent while the vinyl cools.
- Leave the weight in place for several hours as the vinyl resets.
Caution: Too much heat will melt or discolor the vinyl. Use the lowest iron setting and always keep the damp cloth between the iron and the floor. Test on an inconspicuous area first. This method works best on WPC vinyl and sheet vinyl — SPC cores are more resistant to reshaping.
Deep Dents
Deep dents that compress the core material typically cannot be fully repaired with heat. Options include:
- Filling the dent with a color-matched vinyl filler compound
- Replacing the damaged plank (for click-lock LVP)
- Patching the area (for sheet vinyl)
Repairing Curling Edges
Edge curling is common in sheet vinyl and peel-and-stick tiles. The edges lift and curl upward, creating trip hazards and entry points for water and dirt.
Sheet Vinyl Curling
- Lift the curled edge and clean underneath with a damp cloth to remove dirt and old adhesive residue.
- Let both surfaces dry completely.
- Apply vinyl flooring adhesive under the curled section using a small notched trowel or putty knife.
- Press the edge down firmly and secure with painter’s tape.
- Place weight along the edge (books, bricks) for 24 hours.
- Remove the tape and weights after the adhesive cures.
Peel-and-Stick Curling
Peel-and-stick tiles commonly curl because the original adhesive has weakened. The repair process is the same as sheet vinyl, but you may need to use a stronger adhesive (construction adhesive or vinyl flooring adhesive) rather than the original self-adhesive backing.
LVP Edge Lifting
Click-lock LVP edges should not lift if properly installed. If edges are rising, the most common causes are:
- Insufficient expansion gap: The floor cannot expand, causing buckling at seams. Remove baseboard, trim the floor edges to create a 1/4-inch gap, and reinstall trim.
- Broken click-lock joint: Replace the damaged plank using the methods described above.
- Uneven subfloor: A high spot underneath pushes planks up at the seam. This requires removing the affected planks, leveling the subfloor, and reinstalling.
When to Replace vs Repair
Not every vinyl flooring problem is worth repairing. Here is a practical framework for deciding when to repair and when to replace.
| Situation | Repair | Replace |
|---|---|---|
| Single scratched plank | Yes — fill or replace one plank | No |
| Multiple scratched planks across the room | Maybe — if under 10% of floor | Yes — if over 20% of floor |
| Small tear in sheet vinyl | Yes — seam sealer repair | No |
| Large tear or rip in sheet vinyl | Patch if matching material available | Yes — if no matching material |
| Water damage under vinyl | No — subfloor needs attention | Yes — remove, fix subfloor, reinstall |
| Widespread fading or discoloration | No — cannot reverse UV damage | Yes — replace affected areas |
| Worn-through wear layer | No — cannot restore wear layer | Yes — floor has reached end of life |
| Curling edges on a few tiles | Yes — re-glue | No |
| Entire floor curling or buckling | No — systemic installation issue | Yes — reinstall with proper prep |
Preventing Future Damage
An ounce of prevention saves hours of repair. These simple habits protect your vinyl floor from the most common types of damage.
Furniture pads: Place felt pads under all furniture legs. Replace pads every 6 to 12 months as they compress and collect debris that can scratch. Use wide furniture coasters under heavy pieces like sofas and bookshelves.
Door mats: Mats at every entrance trap grit, gravel, and sand — the primary causes of vinyl surface scratches. Shake out or vacuum mats weekly.
Trim pet nails: Long pet nails scratch vinyl surfaces. Regular nail trimming protects both your floor and your pet’s joint health.
Lift, never drag: Always lift furniture when moving it. If you must slide something heavy, place cardboard or a moving blanket underneath. Dragging a refrigerator, washing machine, or heavy furniture across vinyl is how the worst damage happens.
Use appliance mats: Place rubber or foam mats under refrigerators, dishwashers, and washing machines to distribute weight and catch leaks.
Keep spare material: Save leftover planks, tiles, or sheet vinyl from your original installation. Store them flat in a dry area. Matching flooring from the same production batch ensures an invisible repair years later.
Frequently Asked Questions
Can you fix scratches in vinyl plank flooring?
Yes. Light scratches respond to vinyl floor wax or polish applied with a soft cloth. Deep scratches that cut through the wear layer can be filled with a color-matched vinyl repair compound. For severely scratched planks, replacing the individual plank is the best solution — click-lock LVP makes single-plank replacement straightforward.
How do you fix a tear in vinyl flooring?
Small tears (under 1 inch) can be sealed with vinyl seam sealer — apply it under the torn flap, press flat, and weight for 24 hours. Larger tears require vinyl adhesive plus seam sealer along the top. For sheet vinyl, a patch cut from matching material using the double-cut technique creates a nearly invisible repair.
Can you replace one vinyl plank without removing others?
Yes. Cut the damaged plank out using a utility knife, remove the pieces, then modify a replacement plank by trimming the bottom click-lock lip so it drops into the opening from above. Glue the replacement plank in place with vinyl flooring adhesive and weight for 24 hours.
How do you get dents out of vinyl flooring?
Place a damp cloth over the dent and apply a warm iron (lowest setting) for 30 to 60 seconds. The steam softens the vinyl. Immediately place a heavy flat object on the area while the vinyl cools and resets. This works best for minor dents on WPC vinyl and sheet vinyl. Deep dents in SPC vinyl usually require plank replacement.
Why is my vinyl plank flooring lifting at the edges?
The three most common causes are insufficient expansion gap (floor cannot expand and buckles), broken click-lock joints, and uneven subfloor underneath. Check the expansion gap first — the floor needs at least 1/4 inch of space at all walls and fixed objects. If the gap is adequate, the click-lock joint may need to be re-engaged or the plank replaced.
Is it worth repairing vinyl flooring or should I replace it?
Repair is worth it when damage is localized (a few planks or a small area), matching material is available, and the rest of the floor is in good condition. Replace when damage is widespread (over 20% of the floor), the wear layer is worn through across high-traffic areas, or the floor is over 15 years old and showing its age throughout.
Prefer to explore on your own?
See how new flooring looks in your actual room in seconds — free, no signup.
Try the free Floor Studio →