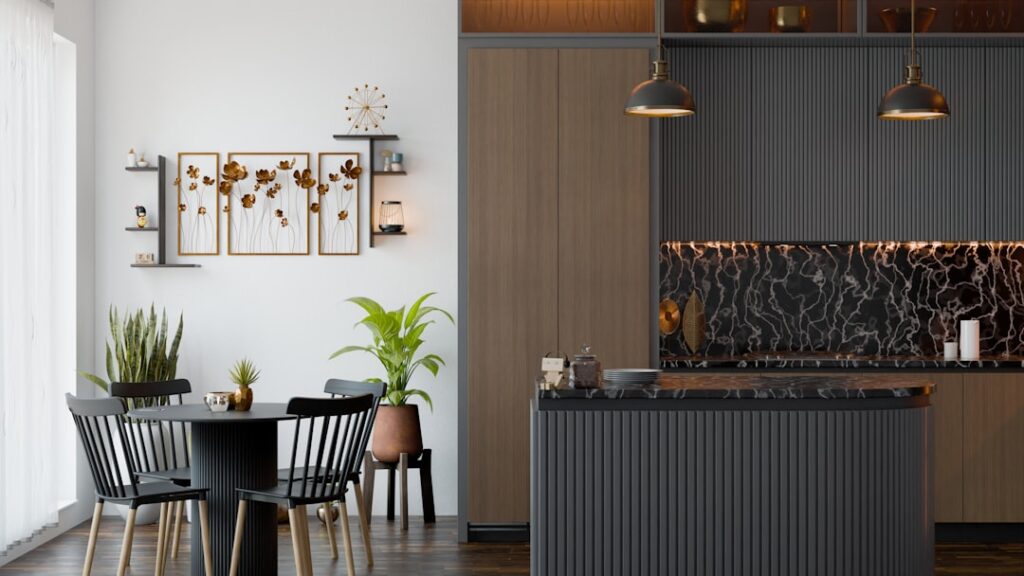
Kitchen cabinet end panels are the detail that separates a kitchen that looks assembled from one that looks built. They are the finished surfaces that cover the exposed sides of your cabinets, the raw sides that manufacturers leave unfinished because they assume another cabinet or a wall will sit against them. When a run of cabinets ends in open space, at the end of an island, beside a refrigerator, or where a peninsula meets the room, that bare particleboard side needs a panel to match the door fronts. Skip it and the eye goes straight to the mismatched, unfinished flank.
I install these on nearly every kitchen because they do so much visual work for a small cost. Here is what the different panels are, where you actually need them, what they run, and how to put them on cleanly.
Why Cabinets Have Unfinished Sides
Stock and semi-custom cabinets are built to be flexible, which means the sides come in a plain melamine or matching-color laminate that is durable but does not carry the door style, the wood grain, or the painted finish of the fronts. The maker cannot know in advance which sides will show and which will butt against a wall or the next box, so they finish the doors and drawer fronts and leave the case sides basic.
That works fine for the 90 percent of cabinet sides buried in a run. The problem is the exposed ends. An unfinished side facing the room reads as cheap and incomplete, even in an otherwise expensive kitchen. End panels solve it by cladding those visible sides in material that matches the doors, so the cabinet looks finished from every angle a person can see.
The Main Types of End Panels
Not all end panels are the same, and knowing the difference keeps you from over- or under-ordering. There are three common categories:
- Skin panels are thin veneer or laminate sheets, roughly 1/4 inch, glued flat over an exposed cabinet side to cover the plain finish. They are the economical way to make a standard cabinet side match the doors.
- Finished-end cabinets come from the factory with the exposed side already finished to match the fronts, so no separate panel is needed. You order these for known exposed positions and pay a small upcharge.
- Decorative or dimensional end panels are thicker, often 3/4 inch, and carry a raised or recessed door-style profile so the cabinet end looks like a full paneled door. These give an island or a tall pantry a custom, furniture-grade look.
Related pieces include refrigerator end panels, which are tall and often deeper to flank a fridge, and base or island panels that wrap the back and sides of a peninsula. Match the profile and finish to your door style so the panel disappears into the design.
Where You Actually Need Them
Walk your kitchen layout and look for every cabinet side that a person can see. Those are your panels. The usual spots are the exposed end of a base or wall cabinet run, both sides and the back of a kitchen island, the side of a cabinet next to a refrigerator or range, the end of a peninsula that faces a dining area, and the visible side of a tall pantry or oven cabinet.
Islands are the big one. Because an island is seen from three or four sides, it usually needs finished panels all the way around, and this is where decorative dimensional panels pay off most, turning a bank of boxes into a piece of furniture. Do not forget the toe kick and any exposed back, which should be clad to match so the island reads as finished from the seating side.
What Kitchen Cabinet End Panels Cost
Cost tracks with the type and the cabinet line. Flat skin panels are the cheapest, often $20 to $60 each depending on size and material. Ordering a cabinet as a finished-end unit typically adds $30 to $100 over the plain box. Decorative dimensional panels with a matching door profile run more, generally $80 to $250 or more each in a semi-custom line, and higher in custom cabinetry or exotic finishes.
For a whole kitchen, end panels commonly add a few hundred dollars to the cabinet order, and for an island wrapped in dimensional panels you can see $500 to $1,200 in panels alone. It sounds like a lot for what is essentially trim, but it is the cheapest upgrade that makes a kitchen look genuinely custom. Cutting these to save money is a false economy that shows every day.
Installing End Panels Cleanly
Skin panels go on with construction adhesive and a few brad nails or finish nails where they will not show, or where filler and caulk will hide them. Cut the panel to wrap flush with the door face at the front and flush or slightly proud at the back against the wall. Scribe the back edge to the wall if it is out of square so the joint is tight. A little patience with a block plane or a belt sander on the scribe line makes the difference between a gap and a seamless fit.
Thicker dimensional panels usually attach with screws through the cabinet side into the panel from the inside, keeping fasteners invisible. Key steps:
- Dry-fit and scribe to the wall and floor before committing adhesive.
- Keep the finished face flush with the front of the cabinet door for a clean vertical line.
- Clamp panels while adhesive sets so they sit dead flat with no bow.
- Fill and touch up any nail holes with matching putty and finish.
Caulk the seam where the panel meets the wall for a built-in look, using a color-matched caulk on painted cabinets.
Ordering and Matching Tips
Order end panels with your cabinets from the same line and finish batch so the color and grain match. Paint and stain colors drift slightly between production runs, and a panel ordered months later can be a shade off, which is glaring right next to the doors. When in doubt, order one more panel than you think you need; an extra flat skin is cheap insurance and useful for a future repair.
If your budget is tight, prioritize the panels that show most, meaning the island and any end facing the main sightline into the kitchen, and use plain skins on lower-visibility sides. Match the panel style to your doors, whether shaker, flat slab, or raised panel, so nothing calls attention to itself. Done right, kitchen cabinet end panels are invisible in the best way. Nobody notices them, they just notice that the kitchen looks finished.
Panel Sizes and How to Order Them
End panels come in standard sizes that map to cabinet dimensions, and knowing them keeps your order tight. Base end panels are cut to cover a base cabinet side, roughly 24 inches deep and about 34.5 inches tall before the countertop, while wall end panels cover the shorter, shallower upper cabinets, commonly 12 to 13 inches deep and 30, 36, or 42 inches tall. Tall panels for pantry and oven cabinets run the full height, often 84 or 96 inches, and refrigerator panels are both tall and deep, usually around 24 to 27 inches, to flank a modern fridge.
Order the panel oversized when you can and trim it to fit on site, because it is far easier to cut a panel down than to stretch one that came up short. Give your cabinet supplier the exact deck-plate and appliance dimensions so the refrigerator and range panels land at the right depth. If your island is deeper than a standard cabinet, you will need a deeper panel or a panel plus a filler strip to reach flush with the front. Confirm the grain direction on wood-veneer panels, too, since a run of cabinets looks best with the grain oriented consistently.
Fillers, Toe Kicks, and Finishing Details
A truly finished cabinet end is more than one flat panel. The small details around it are what sell the built-in look. Where a cabinet meets a wall that is out of square, a filler strip bridges the gap so the panel and door line up cleanly, and the filler gets scribed to the wall just like the panel does. At the bottom, the toe kick should be clad or wrapped in matching material on any exposed end so you do not see raw plywood down at floor level, especially on an island seen from the seating side.
On the top of an exposed end, make sure the countertop overhangs the panel by the same reveal as the rest of the run, usually about an inch, so the edge looks intentional. Caulk the vertical seam where the panel meets the wall with a color-matched caulk, fill and touch up any fastener holes, and check that the panel face sits perfectly flush with the cabinet door fronts. These finishing touches take an extra hour, but they are the difference between a cabinet run that looks factory-built and one that looks like furniture.