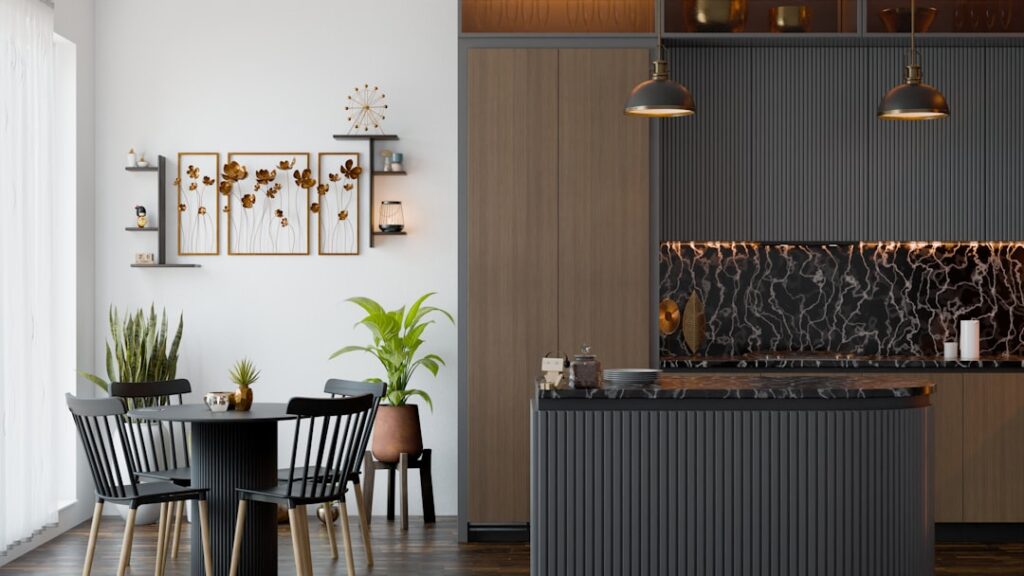
Hang a pendant too high and your island looks dim and unfinished; hang it too low and you spend dinner peering around it. Getting kitchen island hanging lights right is less about the fixture you love and more about three numbers: how high off the counter, how far apart, and how many you need. Nail those and even a modest pendant transforms an island into the room’s centerpiece. Miss them and the most expensive light in the catalog still looks wrong. Here is exactly how the pros dial it in.
The Right Hanging Height
The single most-asked question has a reliable answer: the bottom of the pendant should sit 30 to 36 inches above the countertop. That range clears sightlines across the island, keeps the bulb out of your eyes, and puts light where you actually work. In a room with tall ceilings you can push toward 36 inches; with standard 8-foot ceilings, 30 to 32 inches usually looks best.
Measure from the countertop surface, not the floor, since island counters sit at 36 inches while a raised bar area might be 42. If your island has a mix of heights, base the pendant height on the main prep surface where you spend the most time.
How Many Pendants You Need
Fixture count follows island length, and there is a clean rule of thumb. Measure your island and plan for roughly one pendant per 2 feet of length, then adjust for the fixture style.
- Under 4 feet: One larger pendant or a small linear fixture
- 4 to 6 feet: Two pendants, the most common setup
- 6 to 8 feet: Three pendants, or two oversized ones
- Over 8 feet: Three to four pendants, or a single linear multi-light fixture
Odd numbers tend to look more intentional on longer islands, which is why three pendants is such a popular choice. Larger, statement pendants call for fewer of them; small clear-glass globes look best in groups.
Spacing Them Evenly
Even spacing is what separates a designer look from a DIY guess. Do not simply center a fixture over the middle and eyeball the rest. Instead, divide the island into equal sections. For two pendants, split the island into thirds and place a light at each dividing point. For three pendants, divide into quarters, or center one and balance the other two evenly on each side.
Keep the outer pendants at least 6 to 12 inches in from the island ends so they do not crowd the edges. Standing back and sighting down the run before you drill is the cheapest insurance against a crooked, uneven install.
Choosing the Right Size Fixture
Scale trips up more homeowners than any other factor. A pendant that looks bold in the store can vanish over a large island or overwhelm a small one. A simple guide: the combined width of your pendants should span roughly one-third of the island’s length. For a 6-foot island, that means about 24 inches of total fixture width, whether from two 12-inch pendants or three 8-inch ones.
Diameter matters, but so does visual weight. Clear glass and thin metal frames read light and let you go slightly larger, while solid drum shades or dense materials feel heavier and should be sized more conservatively.
Light Output and Bulb Choice
Pendants over an island do real work, so treat them as task lighting, not just decoration. Aim for enough combined output to actually see what you are chopping. As a target, plan for roughly 300 to 400 lumens per square foot of island prep surface, spread across your fixtures.
- Color temperature: 2700K to 3000K gives a warm, inviting kitchen glow; 3500K reads crisper for detail work
- Dimmable: Always wire island pendants to a dimmer so you can go bright for cooking and low for dining
- Bulb visibility: If the bulb shows through clear glass, choose an attractive vintage-style LED filament bulb
Matching Style to Your Kitchen
The fixture should echo the room without matching everything exactly. Pull a finish from your existing hardware, faucet, or pendant chain to tie the look together, but avoid making everything identical, which reads flat. In a modern kitchen, clean linear or globe pendants work; farmhouse spaces suit metal shades and Edison bulbs; transitional rooms handle a mix of glass and metal beautifully. When in doubt, simpler shapes age better than trendy ones.
Installation and Safety Notes
Each pendant hangs from an electrical box that must be rated to support the fixture’s weight, and heavier fixtures need a fan-rated or heavy-duty box. Because this is line-voltage work over a food-prep surface, turn off the circuit at the breaker before touching any wiring, and confirm the box is properly anchored to a joist or brace.
- Cut power at the breaker and verify with a tester
- Confirm each box location aligns with your planned even spacing
- Adjust the cord or rod length so the pendant bottom lands 30 to 36 inches above the counter
- Wire, secure, and level each fixture before restoring power
If your ceiling boxes are not where your spacing plan wants them, that is a job worth an electrician rather than forcing a compromise you will see every day.
Bringing It All Together
Great kitchen island hanging lights come down to discipline with three numbers: 30 to 36 inches above the counter, evenly divided spacing, and a fixture count matched to island length. Add a dimmer, choose warm dimmable bulbs, and keep the total fixture width to about a third of the island. Follow that framework and almost any pendant you love will look like it was designed for the space, turning your island into the warm, well-lit heart of the kitchen.