Ordering too little laminate flooring means a frustrating mid-project trip to the store and potential dye-lot mismatches. Ordering too much wastes money and leaves you with boxes of unused planks taking up garage space. A laminate flooring calculator helps you find the sweet spot by accounting for room dimensions, waste, and those tricky areas that basic math overlooks.
This guide walks you through the exact process professionals use to calculate laminate flooring quantities, covering everything from simple rectangular rooms to complex open-concept layouts with closets, islands, and angled walls.
The Basic Formula
At its core, calculating laminate flooring is straightforward. Multiply the length of your room by its width to get the total square footage. Then add a waste factor to account for cuts, mistakes, and pattern matching.
For a room that measures 15 feet long by 12 feet wide, the calculation is 15 times 12, which equals 180 square feet. Add 10 percent for waste and you need 198 square feet of laminate. Round up to the nearest full box for your purchase.
Waste Factor Guidelines
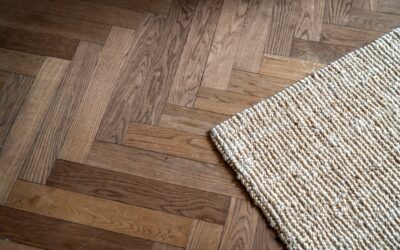
A 10 percent waste factor is standard for rectangular rooms with a straight-lay pattern. Increase that to 15 percent for diagonal installations, which require more angled cuts at the walls. Rooms with many obstacles like columns, doorways, and irregular walls should use a 15 percent factor as well. For complex patterns like herringbone, budget 20 percent waste to be safe.
Step-by-Step Measurement Process
Step 1: Gather Your Tools
You need a tape measure at least 25 feet long, a notepad or phone for recording measurements, and a basic calculator. A laser distance measurer makes the job faster and more accurate, especially in larger rooms, but a standard tape measure works perfectly well.
Step 2: Measure the Main Area
Start by measuring the longest wall in the room. Record the length in feet and inches. Then measure the perpendicular wall for the width. Always measure at the floor level, not at waist height, because walls are not always perfectly straight or plumb.
Take measurements at two or three points along each wall and use the largest number. This ensures you have enough material to cover the widest and longest points of the room, even if the walls are slightly out of square.
Step 3: Handle Closets and Alcoves
If your room has a closet, bay window, or alcove, measure each recessed area separately. Calculate the square footage of each section and add it to your main room total. For example, a closet that measures 3 feet by 5 feet adds 15 square feet to your order.
Step 4: Account for Irregular Shapes
L-shaped rooms are best calculated by breaking them into two rectangles. Measure each rectangle separately, calculate the area of each, and add them together. The same approach works for T-shaped, U-shaped, or any other non-rectangular layout.
For rooms with angled walls, create a rectangle that encompasses the entire space and calculate that area. The waste factor will cover the triangular sections you cut away at the angled wall.
Step 5: Subtract Fixed Obstacles
Kitchen islands, built-in cabinets, and fireplace hearths do not need flooring beneath them. Measure these permanent fixtures and subtract their area from your total. A kitchen island that measures 4 feet by 6 feet saves you 24 square feet of material.
Do not subtract door openings, return air vents, or areas under removable appliances. You may want flooring beneath these in the future, and the small amount of extra material is negligible compared to the convenience of having continuous coverage.
Step 6: Add Your Waste Factor
Take your final square footage number and multiply by 1.10 for 10 percent waste, 1.15 for 15 percent, or 1.20 for 20 percent. This adjusted number is your order quantity.
Calculating for Multiple Rooms
When installing laminate throughout multiple rooms, measure each room individually and add the totals together before applying the waste factor. Hallways connecting rooms should be measured as separate rectangles.
Apply a single waste factor to the combined total rather than adding waste to each room separately. Larger orders generate fewer proportional cutoffs because end-of-row pieces from one room can start the next row or be used in another room.
For a multi-room project, a 10 percent waste factor on the combined total is typically sufficient unless you have many doorways and transitions, in which case 12 to 15 percent is safer.
Understanding Laminate Box Coverage
Laminate flooring is sold by the box, with each box covering a specific number of square feet. Common box sizes cover between 18 and 25 square feet, though this varies by manufacturer and plank dimensions.
Always round up to the next full box. If you need 198 square feet and each box covers 22 square feet, that is 9 boxes. Since 9 boxes only cover 198 square feet exactly, ordering 10 boxes gives you a small safety margin plus a few spare planks for future repairs.
Plank Dimensions Matter
Wider planks produce more waste per cut because each offcut is larger. Longer planks are more efficient in long rooms but generate more waste in short, narrow spaces like hallways and bathrooms. Standard laminate planks measure about 5 inches wide by 48 inches long, but widths of 7 inches and lengths of 54 inches or more are increasingly common in premium lines.
Common Calculation Mistakes
Forgetting the Waste Factor
This is the most common error. Ordering the exact square footage with zero waste leaves you short after the first few cuts. Every row of laminate starts and ends with a cut piece, and those offcuts add up quickly. Always add at least 10 percent.
Measuring in Inches but Calculating in Feet
If you measure 14 feet 6 inches, do not enter 14.6 into your calculator. The correct decimal conversion is 14.5 feet because 6 inches is half a foot. A room at 14.5 by 11.75 feet is 170.375 square feet, not 171.55 square feet.
Using Room Dimensions from a Floor Plan
Builder floor plans show nominal dimensions, not actual finished room sizes. Drywall, trim, and uneven framing can change dimensions by several inches. Always measure the actual room rather than relying on blueprints.
Not Keeping Spare Planks
Even with a perfect installation, damage can occur down the road. A dropped pot, a dragged piece of furniture, or a water leak can ruin individual planks. Keeping three to five spare planks from your original batch ensures a perfect color and pattern match for future repairs.
Quick Reference Calculator
For a small bedroom at 10 by 12 feet, you need 120 square feet plus 10 percent waste, totaling 132 square feet. That translates to roughly 6 boxes at 22 square feet per box.
A standard living room at 15 by 18 feet requires 270 square feet plus 10 percent, coming to 297 square feet or about 14 boxes.
An open-concept main floor at 25 by 30 feet needs 750 square feet plus 10 percent, totaling 825 square feet or approximately 38 boxes.
A hallway at 4 by 20 feet requires 80 square feet plus 15 percent waste due to narrow dimensions, equaling 92 square feet or 5 boxes.
Tips for Accurate Ordering
Buy all your laminate from the same production lot. Different lots can have subtle color variations that become visible once installed side by side. Order everything at once rather than making multiple smaller purchases.
Check the return policy before ordering extra. Many retailers accept unopened boxes for a full refund within 30 to 90 days, which means ordering an extra box or two carries minimal financial risk. This buffer is worth it for peace of mind.
If you are comparing laminate with other floating floor options like luxury vinyl plank or SPC flooring, the same measurement and waste calculation process applies. The physics of cutting and fitting planks is universal across all floating floor types.
Final Thoughts
Accurate measurement is the foundation of a smooth laminate flooring installation. Take your time with the tape measure, break complex rooms into simple rectangles, add an appropriate waste factor, and round up to the nearest full box. This straightforward approach prevents both shortages and expensive over-ordering, letting you focus on the installation itself rather than last-minute material runs.
Prefer to explore on your own?
See how new flooring looks in your actual room in seconds — free, no signup.
Try the free Floor Studio →