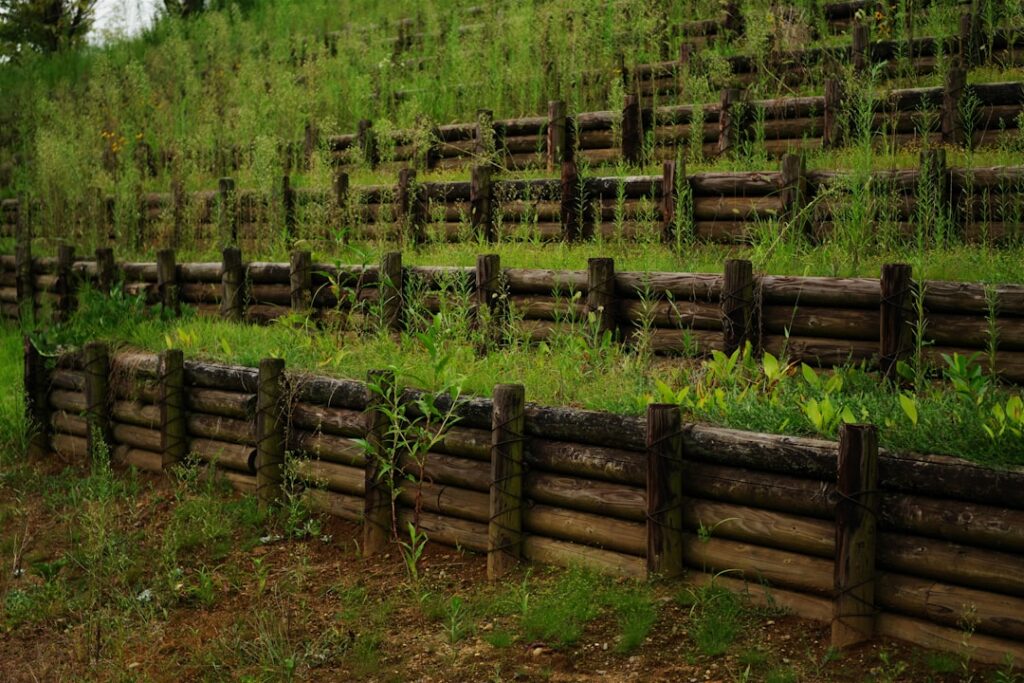
Timber walls fail for one reason far more than any other — not rot, but water pushing from behind because nobody installed drainage. Build a landscape timber retaining wall with a gravel backfill column, a drain pipe, and deadmen anchors tied into the slope, and a pressure-treated wall will hold a bank for 20 to 30 years at roughly half the material cost of a segmental block wall. Skip those three elements and the same timbers lean visibly within five years. This guide walks through timber selection, base prep, the course-by-course build, and the drainage details that decide the wall’s lifespan — plus the honest height limit where a DIY timber wall stops being appropriate.
- Choosing Timbers: Ratings Matter More Than Size
- Height Limits and When to Call an Engineer
- Base Preparation: The Buried First Course
- Stacking, Pinning, and Deadmen
- Drainage: The Part That Decides Everything
- Steps, Corners, and Finishing Details
- Maintenance and Lifespan
- Timber vs. Block: The Honest Comparison
Choosing Timbers: Ratings Matter More Than Size
The standard materials are 6×6 pressure-treated timbers (actual dimensions 5-1/2 by 5-1/2 inches) for serious walls, and the cheaper 3×5 “landscape timbers” with rounded faces for beds and borders under 2 feet. For anything retaining real soil, use 6x6s rated for ground contact — look for UC4A (ground contact) or better yet UC4B (critical ground contact) on the tag, with treatment retention of 0.23 to 0.31 pcf or higher for the modern copper azole and MCA formulas. The bargain-bin timbers treated only for above-ground use will rot at the soil line in 5 to 8 years.
Cost check: a treated 8-foot 6×6 runs $25 to $45 depending on region and lumber market swings. Figure a 3-foot-tall, 24-foot-long wall (six courses) uses about 20 to 24 timbers including deadmen — call it $550 to $950 in wood, plus $150 to $300 for gravel, pipe, spikes, and fabric. All-in DIY cost lands around $25 to $45 per face foot; hiring it out runs $60 to $100 per face foot.
Height Limits and When to Call an Engineer
Keep DIY timber walls at 3 feet or less of retained height. Most jurisdictions require a permit and engineered design above 3 or 4 feet (check your local number before digging — it varies), and the physics gets serious fast: soil pressure grows with the square of wall height, so a 4-foot wall resists nearly twice the force of a 3-foot wall. Slopes above the wall, driveways or structures within a wall-height distance of the top, and clay soils all push a “3-foot” situation into engineering territory regardless of code. The better answer for a 6-foot grade change is two 3-foot terraced walls separated horizontally by at least twice the lower wall’s height. Call 811 before any digging — utility locates are free and legally required.
Base Preparation: The Buried First Course
Timber walls don’t sit on concrete; they sit on compacted gravel below grade. Excavate a trench along the wall line 12 inches wide and deep enough to bury the first course completely plus 4 to 6 inches of base — for most walls that’s a 10- to 12-inch-deep trench. Extend the excavation behind the wall line by 12 inches for the future gravel backfill column. Lay geotextile fabric in the trench, add 4 to 6 inches of 3/4-inch minus crusher run, and compact it in lifts with a hand tamper or plate compactor until it’s dead level along the length and pitched back into the slope about 1/4 inch per foot — this “batter” starts the wall leaning slightly into the hill it’s holding.
Set the first 6×6 course on the base, seat it with a sledge over a block, and check level obsessively along and across each timber. An hour of fussing here saves the whole wall, because every course above copies the first course’s errors.
Stacking, Pinning, and Deadmen
- Stagger the joints: Offset vertical joints at least 2 feet (ideally half a timber) between courses, and set each course back 1/4 to 1/2 inch from the one below to build cumulative batter into the hill.
- Pin the courses: Fasten each course to the one below with 10- or 12-inch galvanized timber spikes or, far easier, 8- to 10-inch structural timber screws (TimberLok/GRK type, about $1.50 each) every 24 inches and within 6 inches of every joint end. For the first course, drill and drive 24-inch lengths of #4 rebar through into the ground every 4 feet.
- Install deadmen at mid-height: Deadmen are 4- to 6-foot timber “arms” running perpendicular from the wall back into the slope, with a 2- to 3-foot cross plate (T-shape) spiked to the buried end. Place them every 6 to 8 feet along the wall on the course at roughly half the wall’s height — on a six-course wall, the third or fourth course. Screw them into the wall course below and bury the anchor end in compacted backfill. Deadmen are what keep the wall from bellying outward, and skipping them is the second most common failure after drainage.
- Cap course: Run the top course full-length over the deadman course, screwed at every overlap.
Cut ends expose untreated wood at the timber’s core — soak every field cut with copper naphthenate preservative ($20 a quart) before installing, especially deadman ends going into soil.
Drainage: The Part That Decides Everything
Water behind a retaining wall adds hydrostatic pressure that can triple the load on the structure, and saturated soil freezing behind the wall jacks courses apart. The drainage assembly is non-negotiable: line the excavated back-cut with geotextile filter fabric; place 4-inch perforated drain pipe (holes down, wrapped in fabric or a sock) directly behind the base course, pitched at least 1/8 inch per foot to daylight at one or both ends of the wall; then backfill the 12-inch column behind the timbers with clean 3/4-inch angular gravel — not the excavated soil — up to within 6 inches of the top. Fold the fabric over the gravel column and cap with topsoil so fines can’t migrate in and clog it. Leave small weep gaps between a few first-course butt joints as backup. If the wall picks up roof runoff from above, extend downspouts past the wall entirely; no drain assembly should be asked to handle a gutter’s output.
Steps, Corners, and Finishing Details
Most timber walls need at least one of the tricky details. Outside corners interlock like a log cabin: alternate which wall’s timber runs long at each course, screwing through the overlap — never butt two mitered ends, which open with the first season’s movement. Steps within the wall face are built as short return walls, each landing buried and based exactly like the main wall; a 6×6 laid flat gives a comfortable 5-1/2 inch riser, so two timbers per step matches typical outdoor stride. Where the wall dies into a slope, step the courses down and bury each stepped end at least a foot back into undisturbed ground so the last timber isn’t a loose cantilever.
Finishing touches worth the hour they take: chamfer or slightly round exposed cap edges with a router or belt sander so they shed splinters and water, and if the wall doubles as casual seating (a 3-foot wall is bench height at the top of a slope), screw the cap course down at 12-inch spacing instead of 24. Skip landscape fabric between the wall face and the soil in front — it just wicks and holds moisture against the wood.
Maintenance and Lifespan
Walk the wall each spring: probe the soil line with a screwdriver for softness, check that daylighted drain outlets are open (crush-guarded with rodent screens), and re-seat any frost-heaved cap timbers. Expect modern ground-contact treated timbers to give 20 to 30 years in free-draining conditions, less in constantly wet clay. When individual timbers eventually decay, the failure is usually at the soil line of the bottom courses — one argument for making the base course dead-easy to keep drained. A leaning wall under 3 feet can sometimes be rescued by excavating the backfill, adding deadmen, and rebuilding the gravel column; a wall bulging past 2 inches out of plane is a rebuild.
Timber vs. Block: The Honest Comparison
A landscape timber retaining wall wins on upfront cost, speed, and the warm look that suits woodland and farmhouse landscapes; a segmental concrete block wall costs 50 to 100 percent more in materials but lasts 50-plus years, needs no fasteners, and curves gracefully. Timber’s straight lines and crisp corners are a feature on raised beds, terraced vegetable gardens, and driveway-edge banks. Whichever you choose, the fundamentals don’t change: buried compacted base, batter into the slope, anchored structure, and a gravel-and-pipe drainage column doing the invisible work. Build those into a timber wall and it will quietly hold its hill for decades.