
Most failed storm doors don’t fail because of the door itself. They fail because the opening was never measured for square, and a Larson unit that hangs a quarter-inch out of plumb will bind, whistle, or bounce off the latch every time you close it. A proper Larson storm door installation is a genuine weekend-DIY project, but only if you respect the prep. Larson ships its doors with the Easy-Hang system, a pre-attached hinge rail that removes most of the guesswork. Get the measurements right and you can have a new door swinging cleanly in about two to three hours.
- Measure the Opening Before You Buy
- Tools and Materials You'll Need
- Attach and Set the Hinge Rail
- Cut and Mount the Latch Rail
- Install the Top Z-Bar (Expander) and Sweep
- Set the Closer and Handle Hardware
- Understanding Larson's Door Options Before You Install
- Weatherproofing and Insulation Payoff
- Maintenance to Keep the Door Working
- Seal, Test, and Common Fixes
Measure the Opening Before You Buy
Larson storm doors come in standard widths of 32, 34, and 36 inches, and most fit openings between 79 and 81 inches tall. Measure the width of your existing exterior door frame at the top, middle, and bottom, working from the inside edge of one brick mold or trim board to the other. Use the smallest of the three numbers. If your opening measures 35.5 inches, you want the 36-inch door, which is built to fit a 35.75- to 36.25-inch opening with the hinge rail attached.
Check the height the same way, measuring on both sides. Also confirm which way you want the door to swing. Larson doors are reversible, but the hinge side is easiest to set on the same side as your entry door’s hinges so both doors open in the same direction. Note whether your trim is deep enough: you need at least three-quarters of an inch of flat mounting surface on the brick mold for the hinge rail to seat properly.
Tools and Materials You’ll Need
- Cordless drill with a #2 Phillips bit and a 1/8-inch pilot bit
- Tape measure, pencil, and a 4-foot level
- Hacksaw or fine-tooth saw to trim the hinge rail and sweep
- Utility knife, caulk gun, and a tube of exterior silicone or polyurethane sealant
- Safety glasses and a helper for the initial hang
Everything else, including the screws, hinge rail, latch rail, sweep, and Z-bar hardware, ships in the Larson box. Lay the parts out and match them against the printed instruction sheet before you touch a drill. Larson packs the fasteners in labeled bags, and confusing the hinge-rail screws with the shorter latch screws is the most common early mistake.
Attach and Set the Hinge Rail
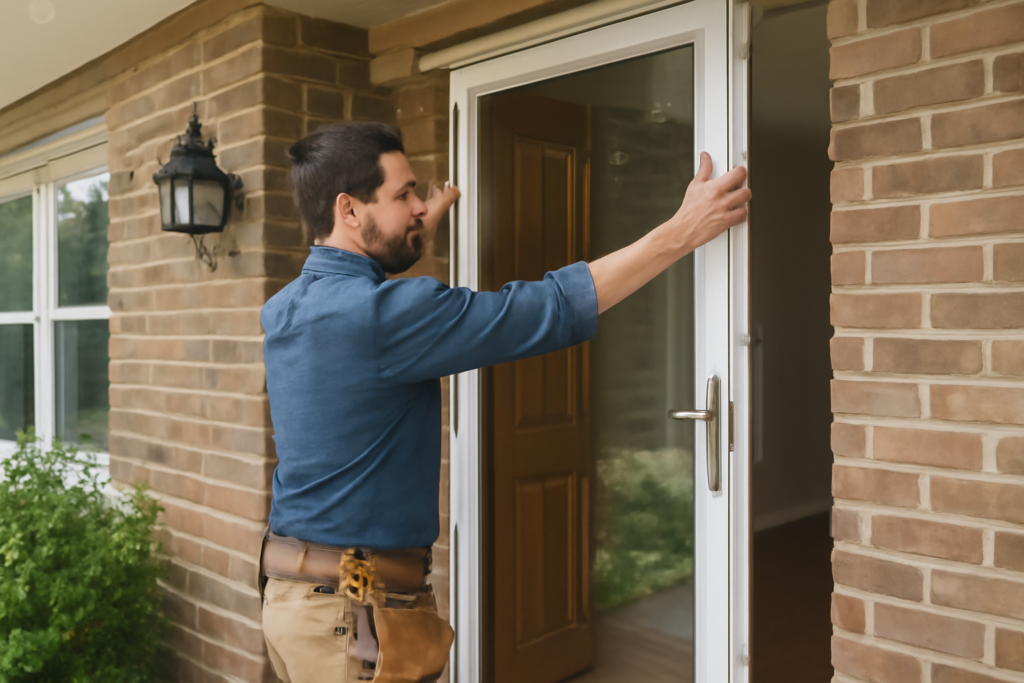
Larson’s Easy-Hang design means the hinge rail comes bolted to the door. Stand the door in the opening on a couple of wood shims so it sits about a quarter-inch off the threshold, giving the sweep room to clear the sill. Push the hinge side tight against the brick mold on the hinge jamb. Have your helper hold it while you run a level up the hinge rail.
Plumb is everything here. When the rail reads dead level top to bottom, drive the top screw through the pre-drilled hole into the brick mold, then re-check plumb before setting the bottom screw. Only after both ends are anchored should you fill in the middle screws. If you set all the screws before checking, you lock in any lean and the door will never latch cleanly.
Cut and Mount the Latch Rail
With the hinge side fixed, close the door and look at the gap along the latch jamb. Larson ships the latch rail long so you can trim it to your exact opening. Measure from the top of the door down to where the rail needs to end, mark it, and cut with a hacksaw. Slide the latch rail onto the latch edge of the door, push the door closed against the jamb, and confirm you have a consistent gap of about an eighth of an inch along the whole edge.
Screw the latch rail to the brick mold top and bottom first, then check the swing. The door should close with light pressure and the handle should engage without slamming. If it drags at the top, the hinge rail is leaning toward the latch side and needs adjustment. Fine-tuning now saves you from chasing a binding door later.
Install the Top Z-Bar (Expander) and Sweep
The top of the frame gets a Z-bar or expander channel that seals the gap above the door. Measure the width between your mounted rails, cut the top expander to length, and screw it to the header of the brick mold so it presses lightly against the top edge of the closed door. This piece is what stops wind and rain from driving over the top of the unit.
The sweep at the bottom is adjustable. Loosen its screws, close the door, and slide the sweep down until the vinyl fin just kisses the threshold, then retighten. You want contact firm enough to block a draft but light enough that the door still closes without a fight. Test by running your hand along the bottom on a windy day; you should feel no air movement.
Set the Closer and Handle Hardware
Larson doors typically ship with one or two hydraulic closers. Mount the closer bracket to the jamb and the door per the template, then adjust the tension screw on the end of the cylinder. Turn it clockwise for a faster, firmer close and counterclockwise if the door slams. Most homeowners land somewhere in the middle after two or three test swings.
Install the handle set through the pre-punched holes, seat the deadbolt or latch strike, and set the hold-open washer on the closer rod so you can prop the door open while carrying groceries. Give every screw a final snug, but do not overdrive them; the aluminum frame strips easily if you lean on the drill.
Understanding Larson’s Door Options Before You Install
Not every Larson door installs identically, and knowing which type you have shapes the job. Full-view models carry a single large glass panel and rely on interchangeable screen and glass inserts you swap by season. Retractable-screen models hide the screen in a cassette at the top, rolling it down only when the glass vent is open. Ventilating models split into upper and lower sashes that slide independently.
The heavier the glass, the more the door sags over time if the hinge rail isn’t dead plumb, so premium full-view units demand extra care during the hinge-rail step. Larson’s higher-end lines also use a laminated safety glass that adds weight; if your door feels notably heavy out of the box, have a helper on hand for the entire hang, not just the first screw. Check the model sticker on the door edge so you match any replacement inserts or hardware down the road.
Weatherproofing and Insulation Payoff
A properly installed storm door does more than protect your entry door from rain. It creates a dead-air buffer between the storm door and your main door, and that trapped air is what delivers the insulation benefit. Studies from door manufacturers suggest a tight storm door can cut air infiltration around an older entry door significantly, which shows up on winter heating bills in cold climates.
To capture that benefit, three seals must all do their job: the top expander pressing on the door’s upper edge, the vinyl bulb weatherstripping along the hinge and latch rails, and the adjustable sweep at the threshold. If any one leaks, the buffer bleeds air and the insulation value drops. On a still day, close the door and run a lit incense stick or a damp hand around the perimeter; any draft flags a seal that needs adjustment. Fixing a whistling gap now is far easier than chasing it in January.
Maintenance to Keep the Door Working
A Larson door rewards a little seasonal attention. Twice a year, wipe the weatherstripping clean and check it for cracks or flattening, replacing any section that no longer springs back. Lubricate the closer’s pivot points and the latch mechanism with a dry silicone spray rather than oil, which attracts grit. Confirm the mounting screws in both rails are still snug, since seasonal expansion and daily use can back them out over time.
Keep the weep holes at the bottom of the frame clear so rainwater drains instead of pooling and freezing. If your door has interchangeable glass and screen inserts, store the off-season panel somewhere flat and protected so it doesn’t warp. Handled this way, the door stays quiet and tight for many years, and small adjustments prevent the slow drift that otherwise turns a smooth-closing door into a sticky, drafty nuisance.
Seal, Test, and Common Fixes
Run a bead of exterior sealant along the outside edge where the hinge and latch rails meet the brick mold, keeping the weep holes at the bottom clear so trapped water can drain. Wipe the excess with a damp rag before it skins over.
If your finished door binds, whistles, or won’t latch, the cause is almost always in the rails. A door that latches at the bottom but gaps at the top means the hinge rail leans; back out two middle screws and nudge it. A whistle usually points to a sweep set too loose or a top expander that isn’t seated. And if the closer lets the door bang shut in cold weather, remember hydraulic closers stiffen below freezing, so re-check the tension when temperatures swing. Handled patiently, a Larson storm door installation delivers years of tight, quiet, weatherproof service and a noticeable bump in your entry’s insulation.


