
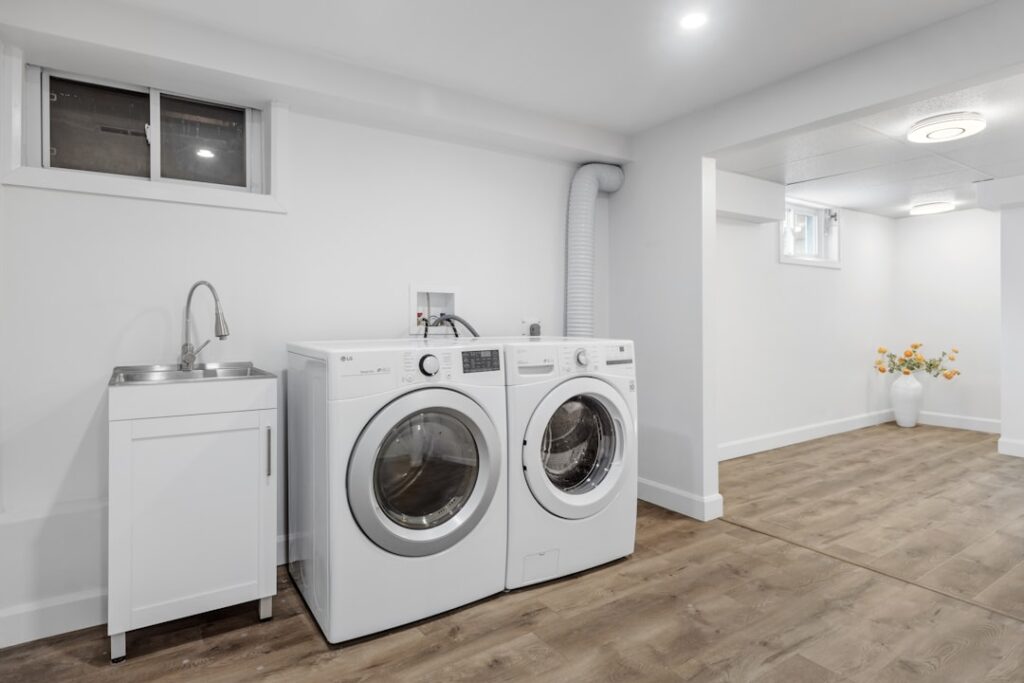
Few rooms punish a floor the way a laundry does. Between washer overflows, a dripping hose bib, and lint that turns damp, the surface underfoot has to shrug off water day after day. That is exactly why laundry room vinyl flooring has become the default pick for contractors who have replaced one too many warped laminate floors behind a leaking machine. Vinyl is affordable, forgiving, and genuinely waterproof when you choose the right product and install it with the room’s specific hazards in mind.
- Why Vinyl Beats the Alternatives in a Laundry
- The Waterproof Core Question
- Sheet Vinyl vs. Luxury Vinyl Plank
- The Denting Problem Nobody Warns You About
- Installation Tips Specific to the Laundry
- Cleaning and Everyday Maintenance
- Common Mistakes to Avoid
- Transitions, Thresholds, and Weak Spots
- Making the Final Call
Why Vinyl Beats the Alternatives in a Laundry
A laundry room is a wet room that pretends to be a dry one. Washers fail. Supply lines split at the crimp. A drain hose pops out of the standpipe and dumps 15 gallons across the floor in under a minute. Wood swells, laminate crumbles at the edges, and tile grout stains and cracks. Vinyl, by contrast, is a plastic surface that does not absorb water into the wear layer at all.
Cost helps too. Sheet vinyl runs roughly $1 to $3 per square foot for materials, and luxury vinyl plank lands around $2.50 to $5. On a typical 40- to 60-square-foot laundry, you are looking at a material bill of well under $300 in most cases. Add easy cleanup, comfort underfoot compared to ceramic, and quiet performance next to a spinning dryer, and the appeal is obvious.
The Waterproof Core Question
Not all vinyl is created equal when water is the whole point. The term you want is a waterproof core, and for a laundry that almost always means SPC, or stone plastic composite. An SPC plank has a dense, rigid mineral core that will not swell if water sits on it. WPC (wood plastic composite) is also waterproof and a touch softer underfoot, but SPC is the tougher choice for an appliance room.
Be careful with the marketing. A vinyl labeled “water resistant” is not the same as “waterproof.” Water resistant usually means the plank itself won’t damage, but water can still travel through the seams. In a laundry, insist on a genuinely waterproof product and pay attention to how the seams behave, which is the real weak point.
Sheet Vinyl vs. Luxury Vinyl Plank
Here is the trade-off that matters most in a laundry. Sheet vinyl comes in a continuous roll, often 12 feet wide, so a small laundry can be covered with zero seams or a single seam. No seams means water has nowhere to sneak through to the subfloor. That makes sheet vinyl the most bulletproof waterproofing choice for this room, full stop.
Luxury vinyl plank looks better and installs as a floating click-lock floor, but every plank edge is a potential entry point. Modern LVP seams are tight, and many carry waterproof ratings, but a standing overflow left for hours can still wick down through the joints and reach the subfloor. If you love the plank look, choose a product with a solid seam treatment and accept that a major flood may need the floor lifted to dry underneath.
| Feature | Sheet Vinyl | Luxury Vinyl Plank |
|---|---|---|
| Seams | None or one | Many click seams |
| Water reaching subfloor | Very unlikely | Possible in a flood |
| Appearance | Good | Best, realistic wood |
| Repairability | Patch whole section | Swap a single plank |
| Cost per sq ft | $1 to $3 | $2.50 to $5 |
The Denting Problem Nobody Warns You About
A front-load washer full of wet clothes can weigh over 300 pounds, and it concentrates that load on four small feet. A dryer adds another 100-plus pounds. Point loads like these will press permanent dents into a soft vinyl floor over time, especially thinner products with a foam backing or a plush WPC core.
Two fixes work well. First, choose a rigid SPC core at least 5 mm thick with a wear layer of 20 mil or more; the dense stone core resists indentation far better than a cushioned one. Second, put load-spreading coasters or hard plastic feet cups under each appliance leg. These distribute the weight across a wider area and are the same trick furniture stores sell for heavy sofas. Skip the soft rubber pads, which can react with vinyl plasticizers and leave a yellow stain.
Installation Tips Specific to the Laundry
Continuous flooring under the appliances is the smart move. Run the vinyl wall to wall before the washer and dryer go in, so a slow leak can’t find a bare patch of subfloor hiding behind the machines. It costs a little more material but seals the most flood-prone zone in the house.
- Start with a flat, clean, dry subfloor. Level any dips over 3/16 inch in 10 feet, since appliance vibration exaggerates every high spot.
- For sheet vinyl, use a full-spread adhesive rather than loose-lay so a flood can’t float the sheet.
- For LVP, leave the required 1/4-inch expansion gap at the walls and cover it with base molding, not caulk that traps water.
- Seal the perimeter and any pipe penetrations with a bead of 100 percent silicone to keep splash-out from reaching the edges.
- Install a drain pan under the washer as a second line of defense regardless of the flooring.
Cleaning and Everyday Maintenance
Vinyl earns its keep in a laundry partly because upkeep is almost nothing. Sweep or vacuum the lint that drifts off the dryer, then damp-mop with a mild cleaner every week or two. Skip wax, harsh solvents, and steam mops, since steam can drive moisture into the seams and undo the very protection you paid for. A pH-neutral vinyl cleaner is all the floor ever needs.
Detergent spills deserve quick attention. Concentrated liquid softener and bleach can dull a wear layer if left to dry, so rinse them off promptly. Felt pads under a folding table or a rolling laundry cart keep drag marks from scuffing the surface, and a small mat in front of the machines catches the heaviest drips before they ever reach the floor.
Common Mistakes to Avoid
Plenty of laundry floors fail not because the vinyl was bad but because a corner got cut during install. Watch for these traps that turn a waterproof floor into a leaky one.
- Laying LVP over an uneven subfloor, which flexes the click joints until they gap and let water through.
- Choosing a thin plank with a soft core, then wondering why the washer feet left craters.
- Caulking a floating floor’s expansion gap solid, which traps the boards and causes buckling.
- Stopping the flooring at the front of the machines instead of running it wall to wall.
- Using soft rubber appliance pads that stain vinyl instead of hard plastic feet cups.
Avoid those five and your floor will handle years of wash cycles without complaint.
Transitions, Thresholds, and Weak Spots
Where the laundry meets a hallway or the garage, use a T-molding or a proper threshold that sits tight to the floor. A gap at the doorway is exactly where an overflow escapes into the rest of the house and where it can dive under the flooring. On a click floor, silicone the underside of the transition strip so water can’t tunnel beneath it.
Keep an eye on the front of the machines, where drips and splashes land most often. If you went with plank, that is the zone most likely to show early seam swelling, so wipe up puddles quickly rather than letting them stand.
Making the Final Call
If maximum flood protection is your priority and you can live with a slightly plainer look, glued-down sheet vinyl is the safest choice for a laundry. If you want the upscale wood-look and the ability to swap one damaged plank, go with a rigid SPC luxury vinyl plank, add feet coasters under the appliances, and stay disciplined about mopping up spills. Either way, laundry room vinyl flooring gives you a durable, waterproof, budget-friendly surface that will outlast the machines sitting on top of it. Match the product to the specific hazard, install it carefully, and you’ll rarely think about the floor again.
Prefer to explore on your own?
See how new flooring looks in your actual room in seconds — free, no signup.
Try the free Floor Studio →

