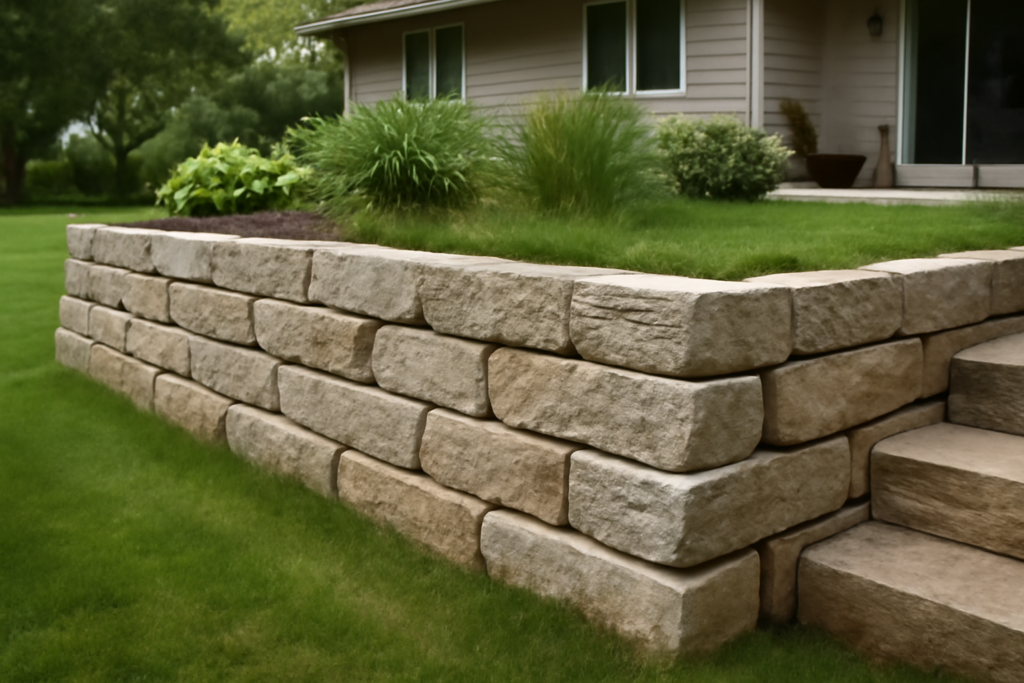
A retaining wall built without drainage can bulge and topple within a few seasons, no matter how beautiful the stone. A limestone retaining wall combines the timeless look of natural stone with real structural strength, but its longevity depends far more on what happens behind the wall than on the face you see. This guide covers the types of limestone available, realistic costs, the drainage details that make or break the project, and how to build a wall that holds a slope for decades.
- Why Choose Limestone
- Types of Limestone for Retaining Walls
- What a Limestone Retaining Wall Costs
- Planning and Permits
- The Critical Foundation and Drainage
- Building the Wall Course by Course
- Sealing and Long-Term Maintenance
- Dry-Stack vs Mortared Construction
- Estimating Materials and Quantities
- Landscaping and Finishing Touches
- Is a Limestone Retaining Wall Right for You
Why Choose Limestone
Limestone earns its popularity through a rare mix of durability and beauty. As a sedimentary stone, it ranges from creamy white to warm buff and soft gray, weathering gracefully into a natural patina that many homeowners prefer to the sharp look of concrete block. It cuts and shapes more easily than granite, which keeps labor costs reasonable while still delivering serious mass and stability.
Beyond looks, limestone holds heat modestly and integrates well with plantings, making it a favorite for garden terraces and raised beds. It does have a caveat: limestone is slightly more porous than granite and can react with acidic soil or de-icing salts over many years. Sealing and good drainage address both concerns.
Types of Limestone for Retaining Walls
The stone you choose shapes both the appearance and the build method. Each option suits a different budget and skill level.
- Cut or dimensional limestone: uniform blocks that stack neatly, easiest for a clean, modern wall
- Rough or natural fieldstone: irregular pieces that create a rustic dry-stacked look, more artful to fit
- Weathered or tumbled limestone: softened edges for an aged appearance, popular in traditional gardens
- Limestone veneer: a thin facing over a concrete or block core, delivering the look at lower material cost
Cut blocks make the most stable wall for a beginner because their flat faces stack predictably. Natural fieldstone rewards patience and a good eye but takes far longer to fit together tightly.
What a Limestone Retaining Wall Costs
Budget varies with stone type, wall height, and whether you hire a mason. Materials for limestone run $10 to $30 per square face foot, and professional installation pushes the total to $25 to $60 per square foot. A modest 20-foot wall standing 3 feet tall therefore lands somewhere between $1,500 and $3,600 built by a pro.
Doing the work yourself cuts labor entirely but demands sweat and time. Factor in the base materials most people forget: gravel for the foundation and backfill, landscape fabric, and drainage pipe add a few hundred dollars but are non-negotiable for a wall that lasts. Renting a plate compactor for a day runs about $70 and pays for itself in a solid base.
Planning and Permits
Before moving any stone, check local rules. Many jurisdictions require an engineered design and a permit for retaining walls over 3 or 4 feet tall, since a failing tall wall can endanger property and people. Call 811 to mark underground utilities, and confirm your property line so the wall does not encroach on a neighbor.
Walls taller than 4 feet, or any wall holding back a steep slope or supporting a structure above, usually need a professional engineer and often a deadman or geogrid reinforcement tied back into the hillside. For those, hire a pro. The DIY guidance here applies to walls under roughly 3 feet in stable soil.
The Critical Foundation and Drainage
Every durable retaining wall starts below grade. Dig a trench wide enough for the base course plus several inches on each side, and deep enough to bury the first course of stone at least partially. Fill the trench with 4 to 6 inches of compacted crushed gravel, leveling it carefully, because an unlevel base throws off every course above it.
Drainage is what separates a wall that lasts from one that fails. Water trapped behind the stone freezes, expands, and pushes the wall outward. Install a perforated drain pipe at the base, wrapped in landscape fabric, sloped to daylight or a drain. Backfill the space behind the wall with gravel rather than soil so water flows down to the pipe instead of building pressure against the stone.
Building the Wall Course by Course
With a solid, level base, the stacking begins. Working methodically pays off in a wall that stands straight and holds its line.
- Set the largest, flattest stones as the first course, checking level constantly
- Stagger the joints on each new course so no vertical seam runs through two rows
- Tilt the wall back into the slope slightly, about one inch of setback per foot of height, called batter
- Fill gaps behind each course with gravel as you go
- Use smaller stones and mason’s chips to shim wobbly pieces solid
For a dry-stacked wall, the weight of the stone and the batter hold everything in place. For added strength on taller walls, a construction adhesive rated for landscape stone can bond the courses, and capstones set in adhesive give a finished top edge.
Sealing and Long-Term Maintenance
Because limestone is porous, a breathable masonry sealer helps repel water and resist staining, especially in climates with hard freezes or road salt. Apply it after the wall cures and reapply every few years. Skip film-forming sealers, which can trap moisture inside the stone and cause spalling.
Maintenance is otherwise light. Keep the drainage outlet clear of debris so water always has an escape route. Inspect the wall each spring for any stones that have shifted after winter, and reset them promptly before a small movement becomes a bulge. Pull invasive roots that could pry joints apart over time.
Dry-Stack vs Mortared Construction
Limestone walls come together two ways, and the choice affects both look and longevity. A dry-stacked wall relies on the weight and fit of the stones, with gravel backfill and batter holding it in place. It flexes slightly with frost heave, drains freely through the joints, and has a timeless, natural appearance, which is why many homeowners prefer it for garden walls under 3 feet.
A mortared wall bonds the stones with mortar for a more rigid, formal structure that can go taller and resist lateral movement. The trade-off is that mortar joints can crack if the wall shifts or if water gets behind them and freezes, so a mortared wall demands an even more robust footing, often a poured concrete foundation below the frost line, and meticulous drainage. For a first-time builder, dry-stacking is far more forgiving; save mortared construction for formal designs where you are prepared to pour a proper footing.
Estimating Materials and Quantities
Ordering the right amount of stone prevents both shortfalls and costly leftovers. Calculate the wall’s face area by multiplying length times height, then ask your stone supplier how many square feet a ton of your chosen limestone covers, since coverage varies with stone thickness. Buy roughly 10 percent extra to account for breakage, odd-shaped pieces, and the inevitable trimming.
- Base gravel: enough crushed stone for a 6-inch compacted pad the full length, plus a foot of width
- Drainage gravel: clean angular stone to fill a foot-deep zone behind the entire wall
- Drain pipe: perforated pipe running the full length with a slope to daylight
- Landscape fabric: to wrap the drain and separate gravel from soil
- Capstones: flat pieces for a finished, water-shedding top
Have heavy materials delivered close to the work site, because moving tons of stone by wheelbarrow across a yard is grueling and slow.
Landscaping and Finishing Touches
A finished limestone wall becomes a canvas for the landscape around it. Terracing a slope with a wall creates flat planting beds that were impossible before, and the stone’s warm tones pair beautifully with ornamental grasses, creeping perennials, and low shrubs that soften the hard edge. Tucking small plants into the joints of a dry-stacked wall, a technique borrowed from traditional stone gardens, blurs the line between structure and garden.
Grade the soil at the top of the wall to slope gently away, so surface runoff sheds over the back rather than pouring down the face and staining the stone. A layer of mulch or gravel behind the capstones keeps weeds down and reinforces the drainage path, giving your wall both a clean look and the water management it needs to last.
Is a Limestone Retaining Wall Right for You
For a garden terrace, a raised planting bed, or a modest slope, a limestone retaining wall delivers natural beauty and decades of service at a reasonable cost, and a wall under 3 feet is well within reach for a determined DIYer. The stone forgives minor imperfections and only grows more handsome with age. Just remember that the wall lives or dies by its base and drainage, so never skimp on the gravel foundation and drain pipe. Get those unglamorous details right, and your limestone wall will hold its ground long after trendier materials have crumbled.