Good living room half wall paneling ideas can turn a flat, builder-grade room into something with real character without the cost or commitment of paneling the whole wall. Wainscoting-style paneling that stops partway up — typically between 32 and 48 inches — adds texture, protects the lower wall from scuffs and furniture dings, and gives you a natural line to break up paint colors or wallpaper. I’ve installed and specified this kind of trim work in dozens of living rooms, and the projects that turn out best usually come down to picking the right style and height for the room’s proportions, not just whatever looks good in a photo.
Choosing the Right Panel Height
Height is the first decision, and it matters more than people expect. Go too low and the room looks chopped off; go too high and it can feel heavy, especially in a room with standard 8-foot ceilings.
- 32 to 36 inches: A classic wainscoting height that works well in most living rooms, roughly chair-rail level. Good for rooms where you still want plenty of open wall above for art or a gallery wall.
- 40 to 42 inches: A slightly taller option that reads as more substantial and works well with taller ceilings or when you want the paneling to feel like a deliberate design statement rather than just trim.
- 48 inches or higher: Sometimes called “high wainscoting,” this height works best in rooms with 9-foot-plus ceilings and gives a more formal, architectural look. In an 8-foot room it can start to feel cramped.
A simple rule of thumb: the panel height should be roughly one-third of your total wall height for a balanced look. In a standard 96-inch (8-foot) wall, that lands you right around 32 to 36 inches, which is why that range remains the most common choice.
Shiplap
Shiplap remains one of the most requested looks, and for good reason — it’s relatively inexpensive, forgiving to install, and reads as both farmhouse and modern-casual depending on the paint color. Horizontal boards, typically 5.5 to 7.25 inches wide, are installed with a small consistent gap between each row to create shadow lines.
Material costs run $2 to $5 per square foot for basic pine or MDF shiplap boards, with prefabricated shiplap panels sometimes running a bit less. For a typical 12-by-14-foot living room with paneling on two or three walls at 36 inches high, expect to spend $300 to $700 in materials for a DIY install, or $1,200 to $2,500 including professional labor.
Painted white or a soft warm white remains the most popular choice, but darker shiplap in navy, charcoal, or deep green has become increasingly common for a moodier, more modern living room.
Board-and-Batten
Board-and-batten uses vertical battens (narrow strips of wood or MDF) spaced evenly over a flat or slightly recessed base, creating a grid of clean vertical lines. It reads more traditional and formal than shiplap and tends to make a room feel taller because of the vertical emphasis.
Spacing is the key design decision here. Battens spaced 12 to 16 inches apart create a tighter, more detailed look, while 18 to 24 inch spacing feels more relaxed and works well in larger rooms. Costs run similar to shiplap, roughly $3 to $6 per square foot in materials, with labor bringing a full living room project to $1,500 to $3,500 depending on room size and finish level.
This style pairs particularly well with a mantel or built-in shelving above the paneled section, since the vertical battens create a natural rhythm that complements millwork elsewhere in the room.
Shaker-Style Recessed Panels
For a more formal, traditional living room, shaker-style panels — flat rectangular panels set within a frame of stiles and rails — offer a timeless option that works especially well in older homes or anywhere you want the paneling to look original to the house. This style typically costs more than shiplap or board-and-batten, running $2,000 to $4,500 for a full living room installation because of the additional trim pieces and labor involved in building out each frame.
Panel proportions matter a lot here. Squares or slightly vertical rectangles tend to look more balanced than wide, short panels. Many installers use a 2:3 or 3:4 width-to-height ratio for each individual panel section.
Slat Wood Paneling
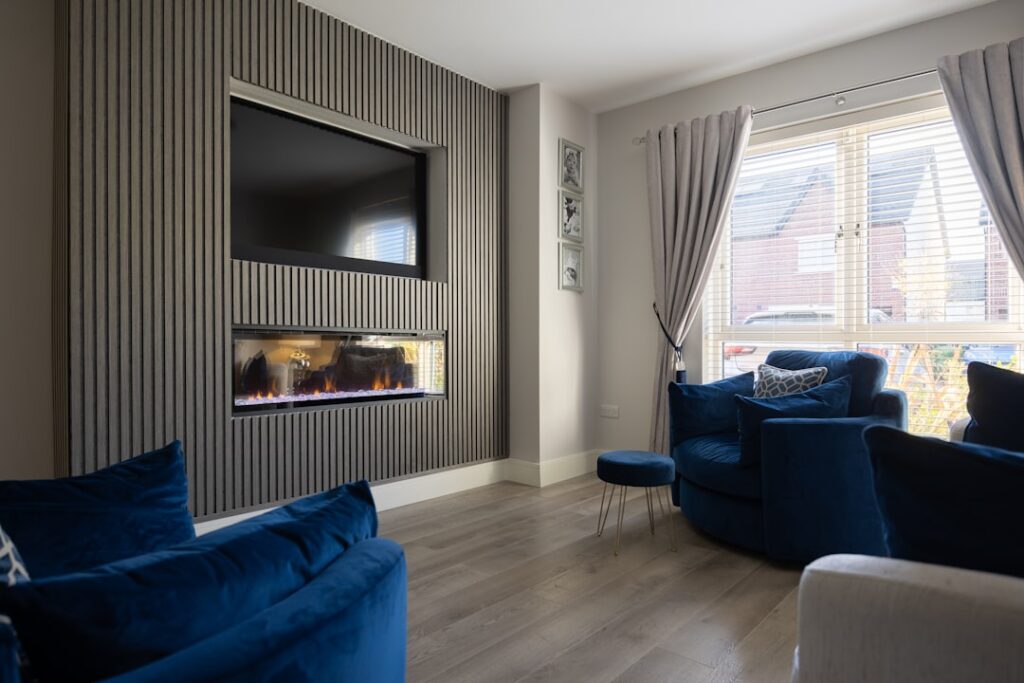
Vertical slat paneling — thin strips of wood, sometimes with felt or acoustic backing — has become a popular modern option, especially for a feature wall behind a sofa or entertainment center. Unlike traditional wainscoting, slat paneling is sometimes run floor-to-ceiling on a single accent wall rather than half-height throughout the room, but a half-wall version works nicely as a lower-profile alternative that pairs well with a TV mounted above it.
Prefabricated slat panels run $8 to $20 per square foot, noticeably more than paint-grade board options, but installation is often faster since many come in modular panels that click together or mount with adhesive and a few fasteners.
Beadboard
Beadboard — narrow vertical planks with a distinctive groove or “bead” between each board — is the classic cottage and coastal look. It’s typically sold in 4-by-8-foot sheets of MDF or in individual tongue-and-groove boards, and it’s one of the more budget-friendly options at $1.50 to $4 per square foot in sheet form.
Beadboard works especially well in living rooms adjacent to a kitchen or dining area with a matching or complementary trim scheme, helping tie open-concept spaces together visually.
Planning the Install: What to Budget For
Beyond the paneling material itself, a realistic budget should include a few line items people often forget:
- Cap rail or chair rail trim: $1 to $4 per linear foot, needed to cleanly finish the top edge of the paneling.
- Baseboard integration: If your existing baseboard doesn’t align with the new panel depth, you may need to remove and reinstall it, adding $200 to $500 in labor for a typical room.
- Outlet and switch extensions: Any electrical outlets falling within the paneled zone need outlet extenders to sit flush with the new wall depth, generally $5 to $15 per outlet in parts.
- Caulk and paint: Budget $150 to $400 for primer, paint, and caulk for a typical room, more if you’re using a premium finish.
One detail worth planning ahead of time: decide on outlet and switch locations before installation day, since cutting openings after the paneling is up is far more time-consuming than measuring twice and cutting once.
Color and Finish Choices
White remains the most popular finish for half-wall paneling because it brightens the room and pairs with nearly any wall color above it, but painting the paneling a contrasting or complementary color to the upper wall — rather than matching everything to one color — tends to create a more polished, intentional look. Two-tone rooms, where the paneling is a deeper tone like sage green, navy, or warm terracotta and the upper wall is a soft neutral, have become especially popular in recent years and photograph well for listings if you’re planning to sell.
What’s the best height for half wall paneling in a living room?
Most living rooms look best with paneling between 32 and 36 inches high, roughly one-third of a standard 8-foot wall. Taller ceilings can support 40 to 48 inches without feeling heavy.
How much does half wall paneling cost for an average living room?
A typical 12-by-14-foot room runs $300 to $700 in materials for a DIY shiplap or board-and-batten project, or $1,200 to $3,500 including professional installation, depending on style and finish level.
Which paneling style is easiest for a DIY install?
Shiplap and beadboard sheet panels are generally the most beginner-friendly, requiring fewer precise cuts than shaker-style recessed panels, which involve building individual frames for each section.
Should the paneling match my baseboard color?
It doesn’t have to. Many designers now paint paneling a contrasting or accent color rather than matching it to white trim, which creates a more deliberate, layered look in the room.