
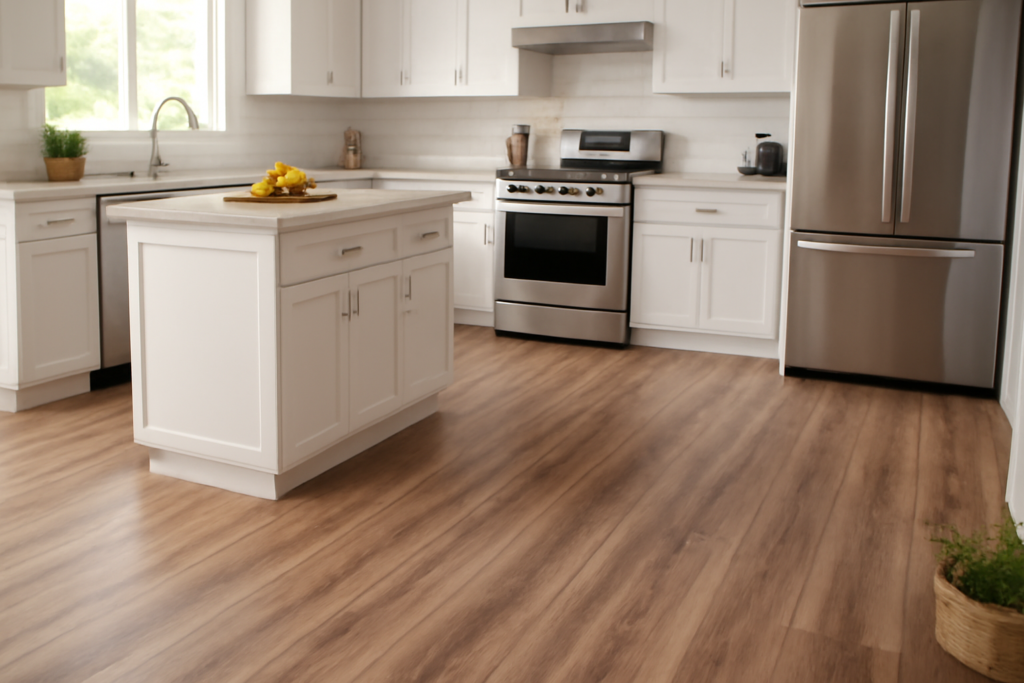
Kitchens destroy floors. Dropped pans, dragged chairs, dishwasher leaks, and grease splatter test every surface, which is why luxury vinyl kitchen flooring has overtaken hardwood and tile as the most popular choice for kitchen remodels in the US. Luxury vinyl comes in two formats — LVP (plank, styled like wood) and LVT (tile, styled like stone or ceramic) — and both are fully waterproof, warmer underfoot than tile, and installable over most existing floors. Here is an honest look at where luxury vinyl excels in kitchens, where it falls short, and how to buy a product that still looks good in year ten.
What Makes Vinyl “Luxury” — and Why Kitchens Suit It
Luxury vinyl is a layered product: a rigid or flexible core, a printed design layer with photographic wood or stone visuals, and a clear wear layer on top that takes the abuse. The rigid-core versions — SPC (stone plastic composite) and WPC (wood plastic composite) — dominate kitchen installs because they resist denting under appliances and hide minor subfloor imperfections.
Every layer is waterproof. That single fact is why luxury vinyl fits kitchens so well: a dishwasher supply line can drip for a week and the planks themselves will not swell, cup, or delaminate the way laminate or hardwood would. Water can still reach the subfloor through seams in a genuine flood, so waterproof does not mean flood-proof, but for the routine splashes and spills of daily cooking, the material simply does not care.
While you’re upgrading the kitchen floor, it might be a good time to rethink the seating too. Swapping out old bar stools is one of those small changes that makes the whole room feel more pulled together.
We may earn a commission when you purchase through our links.
LVP vs. LVT in the Kitchen
Plank and tile formats are the same material in different shapes, and the choice is mostly aesthetic. LVP planks typically run 7 to 9 inches wide and 48 to 60 inches long with wood visuals — oak, hickory, and walnut looks lead the market. LVT tiles come in 12×24 and 16×32 inch formats with stone, travertine, marble, and concrete visuals, and some products accept real grout between tiles for a convincing ceramic look.
- Choose LVP if the kitchen opens to living areas with wood-look flooring and you want one continuous surface.
- Choose groutable LVT if you love the tile look but hate cold, hard ceramic underfoot and cracked grout maintenance.
- Both install as floating click-lock floors in most product lines; glue-down versions exist for both and excel under heavy rolling loads.
The Case For Luxury Vinyl in Kitchens
Comfort is underrated until you have stood on tile for a two-hour holiday cook. Vinyl has measurable give, stays closer to room temperature than ceramic, and is dramatically more forgiving to dropped glasses and dishes. It is also quieter — no click of heels or dog nails echoing the way they do on tile.
Maintenance amounts to sweeping and damp mopping with a neutral cleaner. There is no grout to seal, no finish to recoat, no wax. Installation over existing floors is another real cost saver in kitchen remodels: quality rigid-core planks float directly over old vinyl, tile with thin grout lines, or plywood, often eliminating a demolition step that would otherwise mean pulling cabinets or paying for tear-out. Materials run roughly $2.50 to $6 per sq ft for solid mid-range product, with premium lines at $6 to $8, and professional installation adds $2 to $5 per sq ft.
The Honest Drawbacks
Luxury vinyl is plastic, and it behaves like plastic in a few specific ways. Sharp heavy impacts — a cast iron skillet dropped edge-first — can cut or gouge the wear layer, and unlike hardwood there is no sanding out the damage. Repairs mean replacing planks. Heavy appliances can dent flexible-core products over time, which is one more argument for rigid SPC cores in kitchens.
Direct sunlight through a big kitchen window can fade lower-grade vinyl, so check for UV-resistant wear layers if the room is bright. Resale perception matters too: luxury vinyl no longer carries a stigma, but in upper-end homes, buyers may still expect hardwood or tile in a kitchen. Finally, vinyl’s environmental profile is mixed — it is a PVC product, and while low-VOC certifications like FloorScore are now standard among reputable brands, verify the certification rather than assuming it.
Wear Layer: The Spec That Decides Longevity
If you compare only one number between products, make it wear layer thickness, measured in mils (thousandths of an inch, not millimeters). The wear layer is the sacrificial clear coat that stands between kitchen traffic and the printed design.
- 6 to 8 mil: Light residential. Too thin for a kitchen; skip it.
- 12 mil: The realistic minimum for a working kitchen.
- 20 mil: The sweet spot — rated for commercial use, and what I recommend for households with kids or dogs.
- 22 to 30 mil: Heavy commercial. Worthwhile in rentals and very hard-use homes.
Beyond thickness, look for ceramic-bead or aluminum-oxide-enhanced coatings (often branded, such as enhanced urethane finishes), which raise scratch resistance meaningfully at the same mil rating.
Buying Checklist Before You Order
A few details separate a smooth kitchen install from an expensive do-over. Confirm the product’s rated flatness tolerance and check your subfloor against it. Verify whether cabinets can sit on top of the flooring — most manufacturers void warranties on floating floors pinned down by cabinet weight, so floors typically go in after cabinets, with planks cut around them. Check the warranty’s pet and water language specifically, since some “lifetime” residential warranties exclude pet damage.
Order 10 percent overage for cuts and future repairs. If your kitchen connects to large open living areas, check the product’s maximum continuous run — many floating floors require transition moldings beyond 40 to 50 feet. And insist on samples at home under your actual kitchen lighting before committing; vinyl visuals that look convincing in showroom lighting can read flat under warm residential bulbs.
Living With Vinyl in a Kitchen: Care Notes
Day-to-day care is genuinely easy, but a few habits protect the wear layer. Use felt pads under table and chair legs, and slide the refrigerator out on a hardboard runner rather than dragging it bare — appliance feet cause most of the gouges I see in kitchen vinyl. Sweep grit promptly, since sand underfoot acts like sandpaper on any finish.
Skip wax, oil soaps, and abrasive powders entirely; they haze the urethane surface and void most warranties. A neutral pH cleaner and a damp microfiber mop handle everything short of dried-on messes. Steam mops are debated — many manufacturers prohibit them even on waterproof product because heat can stress click joints — so check your specific warranty before using one.
Bottom Line for Kitchen Remodelers
For most kitchens, a rigid-core plank or tile with a 20 mil wear layer is the best combination of durability, comfort, and cost currently on the market. Expect to spend $4.50 to $11 per sq ft installed depending on product tier and labor rates in your area — well under tile or hardwood once prep and finishing are counted. Luxury vinyl kitchen flooring will not fool a hardwood purist forever, but it will shrug off a decade of spills, drops, and dog traffic while staying comfortable underfoot, and that trade is exactly what most working kitchens need.
Prefer to explore on your own?
See how new flooring looks in your actual room in seconds — free, no signup.
Try the free Floor Studio →

