Stairs are where most luxury vinyl projects get tricky. The flat floor goes down fast, then you reach the staircase and realize plank alone will not wrap a step cleanly. That is exactly what luxury vinyl stair treads solve: purpose-made pieces that cover the tread and nose in one continuous, durable surface that matches your LVP floor. Getting the right type, budgeting per step, and installing them correctly turns the hardest part of the job into a clean, professional finish. Here is how.
What Luxury Vinyl Stair Treads Are
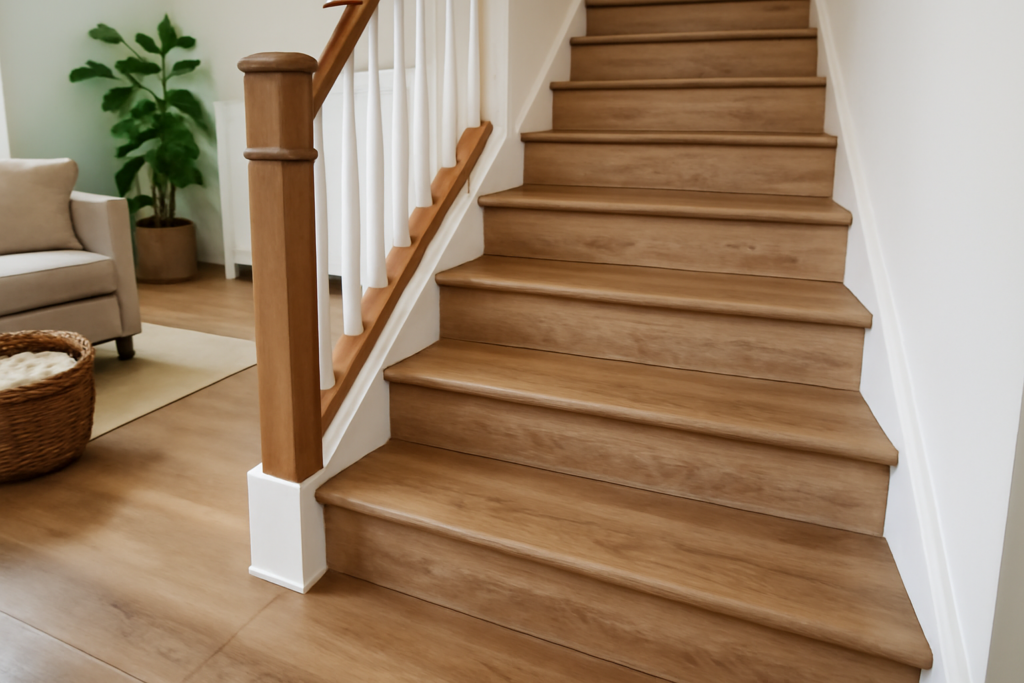
A stair tread is the horizontal part of a step you walk on; the riser is the vertical face behind it, and the nosing is the rounded front edge that overhangs. Luxury vinyl stair treads are engineered to cover the tread and wrap that nose in a single piece, giving you the same waterproof, scratch-resistant surface as your floor without the seams and gaps that come from bending flat plank over an edge.
They come in the same wood and stone visuals as popular LVP lines, so the staircase reads as a seamless continuation of the room rather than an afterthought.
Types of Vinyl Stair Tread Options
You have three main routes, each with a different look, cost, and difficulty.
Molded One-Piece Treads
These are rigid, pre-formed treads with the nosing built in, often made to color-match a specific LVP collection. They install as a single unit per step for the cleanest, most durable result. Expect the highest material cost but the most professional finish.
Plank Plus Stair Nose
Here you cut your regular LVP to fit the flat of the tread, then add a separate stair-nose molding at the front edge. It is the most budget-friendly since you use leftover floor plank, and the match is exact because it is the same product. The trade-off is a visible seam where the plank meets the nose.
Flexible Overlay Treads
Retrofit treads designed to lay over an existing step, useful when you are covering worn wood stairs without full demolition. Confirm the total height still meets your local code for step rise.
What Luxury Vinyl Stair Treads Cost
Budget per step, since staircases vary. Molded color-matched treads typically run $30 to $70 each in material, while a plank-plus-nose approach costs roughly $15 to $35 per step using leftover flooring and a $20 to $45 nose molding that covers a couple of steps.
For a standard 13-step staircase, material lands somewhere between $250 and $900 depending on the method and product. Professional installation adds roughly $40 to $100 per step, so a full stair job by a pro often totals $800 to $2,000. Doing it yourself with the plank-plus-nose method is where the real savings are.
Tools and Materials You Will Need
Gather everything before you start so you are not running to the store mid-project.
- Luxury vinyl treads or LVP plank plus matching stair-nose molding
- Construction adhesive rated for vinyl, plus a caulk gun
- Miter saw or a fine-tooth handsaw and a sharp utility knife
- Tape measure, speed square, and a pencil
- Pry bar and scraper to remove old treads or carpet
- Finishing nails or trim screws and a nail set for extra hold on the nose
- Painter’s tape and a rag for cleanup
Step-by-Step Installation
Work from the top of the staircase down so you never have to walk on a freshly set step.
- Prep the stairs. Remove old carpet, treads, or padding, pull all staples and nails, and scrape the substrate smooth. Vacuum thoroughly; adhesive will not grip dust.
- Measure each step individually. Staircases are rarely uniform, so measure the width and depth of every tread and riser separately and label your cuts.
- Cut the risers first. Cut a plank or riser piece to fit the vertical face, dry-fit it, then glue it in place with a zigzag bead of construction adhesive and press firmly.
- Install the tread and nose. For the plank-plus-nose method, cut the tread plank to sit behind the nose, then fit the stair-nose molding so its lip wraps the front edge. Spread adhesive on both, set them, and check the seam is tight.
- Secure the nosing. Add a few finishing nails or trim screws through the nose into the substrate for a solid, squeak-free front edge, then set the heads below the surface.
- Clean and cure. Wipe squeeze-out immediately, tape the nose down if needed, and keep traffic off the stairs for the adhesive’s full cure time, usually 24 hours.
Pro Tips for a Clean Result
A few details separate a solid DIY job from a wobbly one. Always dry-fit every piece before spreading adhesive, because trimming a glued tread is miserable. Use a color-matched caulk or seam filler along the joint where the nose meets the tread to hide the line. Check that each finished step meets local code for rise and run; adding thick overlay treads can push a step out of tolerance.
If your stairs are open on one side, wrap the exposed edge with a matching end cap or trim so the vinyl does not show a raw cut. And never skip mechanical fasteners on the nose, since that overhang takes the most foot pressure and is where adhesive-only installs eventually loosen.
Measuring a Staircase Correctly
Accurate measurement is where most stair projects succeed or fail. Never assume your steps are identical, because even a professionally built staircase varies by a fraction of an inch from step to step, and those fractions add up to visible gaps if you cut everything to one dimension. Measure the width and depth of every tread and the height of every riser individually, and write each number directly on a simple sketch of the staircase.
Account for the nosing overhang in your tread depth, and decide early whether you want the finished nose to project the standard 3/4 to 1 1/4 inches past the riser. Check local building code for your area, since most jurisdictions cap the variation in riser height between steps at 3/8 inch for safety. If your existing stairs are out of tolerance, address that before installing treads rather than locking in an uneven, trip-prone staircase.
Adding Slip Resistance and Safety
Stairs are the highest-risk surface in any home, so build in traction from the start. Luxury vinyl treads with a textured or embossed wear layer already grip better than smooth painted wood, but on a busy family staircase it is worth going further. Clear anti-slip strips or a bead of anti-slip additive in a matching finish along the front of each tread add grip without spoiling the look.
A runner down the center is another option that adds both traction and a decorative touch, secured with a low-profile track or double-sided tape rated for stairs. Pay special attention to the nosing, since that leading edge takes the most foot pressure and is where slips happen; some homeowners add a contrasting nosing strip so each step edge is clearly visible, which helps prevent missteps for kids, older adults, and anyone carrying a load down the stairs.
Maintenance and Longevity
Once installed, luxury vinyl stair treads need almost nothing. Sweep or vacuum regularly and damp-mop with a pH-neutral cleaner. The waterproof surface shrugs off spills, and the wear layer resists the scuffing that quickly wears down carpeted or painted stairs. Add a runner or grip strips if the treads feel slick, especially in a busy household with kids or pets.
Installed with adhesive plus fasteners over a clean substrate, a good set of vinyl treads lasts as long as the matching floor, giving you a staircase that looks intentional, holds up to daily traffic, and wipes clean in seconds.
Prefer to explore on your own?
See how new flooring looks in your actual room in seconds — free, no signup.
Try the free Floor Studio →