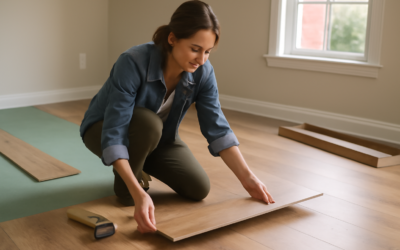
Search engines flag the name a dozen ways — Maccos, Macos, MacOS planks — and most of the results are a confusing mix of imported SPC, knockoff laminate, and rebadged factory direct lines. Maccos flooring is sold primarily through regional distributors and online importers, and the quality varies wildly between batches. Before you commit a thousand square feet at $1.69 per square foot, you need to know what you are actually buying, how it installs, and where it falls down compared to mainstream brands like Mohawk and Shaw.
What Maccos Flooring Actually Is
Most Maccos product lines are rigid-core SPC (stone-polymer composite) planks manufactured in Vietnam, China, or Korea and shipped to US distributors. The construction stack is standard for the category — a UV-cured urethane wear layer over a printed film, bonded to an SPC core, with an IXPE or EVA underlayment pre-attached. Plank dimensions usually run 48 by 7 inches at a total thickness of 5 mm to 6.5 mm.
Wear-layer thickness is where Maccos lines split into tiers. The 6 mil residential grade is suited only for low-traffic rooms. The 12 mil light-commercial tier holds up in hallways and kitchens. The 20 and 22 mil tiers are the ones to look for if you want long-term durability and a meaningful warranty.
The Price Picture
Maccos undercuts national brands because the channel skips big-box markup, but the price spread is wide:
- Entry SPC (6 mil wear layer): $1.39 to $1.79 per square foot
- Mid-tier (12 mil): $2.19 to $2.69 per square foot
- Premium (20 to 22 mil with EIR texture): $2.89 to $3.49 per square foot
- Installation labor: $2.00 to $3.50 per square foot depending on subfloor prep
For a 1,200 square foot install, all-in totals range from $4,200 on the low end to $9,000 for the premium tier with professional install and trim work.
Pros That Justify the Look
Buyers who land happy with Maccos usually cite the same handful of strengths. Cost first — the entry tier is roughly 30 percent below comparable national-brand SPC at Home Depot. The click-lock profile is angle-tap or angle-angle Unilin-style, so DIY installation is realistic for a homeowner with a tapping block and a chop saw.
Visuals have improved sharply over the last two years. The premium tier offers embossed-in-register (EIR) textures that track the grain pattern of the print film, plus painted bevels that read as real wood from standing height. Color palettes lean modern — light oaks, smoked walnuts, and weathered grays dominate the lineup.
Where Maccos Falls Short
The biggest practical problem is consistency between production runs. Two pallets of the same SKU ordered three months apart can arrive with different bevel depths or slightly different shades. Always order 15 percent extra from a single lot rather than reordering later.
Warranty support is the second weak point. Most Maccos product carries a 25-year residential warranty on paper, but claims funnel through the importer, not a manufacturer with a US service center. If a batch fails inspection during install or shows premature wear at year five, expect a long correspondence trail. Compare that to COREtec, Pergo, or Mohawk RevWood, where claims go directly to a US-based factory rep.
Off-gassing has improved across the SPC category, but verify FloorScore or Greenguard Gold certification on the specific Maccos line you choose. Generic “low VOC” claims without third-party documentation are not enough for installs in nurseries, bedrooms, or homes with sensitive occupants.
Subfloor Prep and Install Method
Maccos installs as a floating click-lock floor over almost any solid subfloor. The pre-attached pad means no separate underlayment, but two prep steps are non-negotiable:
- Verify the subfloor is flat to within 3/16 inch over a 10-foot span. Use a long straightedge and skim-coat any low spots with cement-based patch.
- Test moisture on concrete slabs with the ASTM F1869 calcium chloride method (under 5 pounds per 1,000 sq ft per 24 hours) or ASTM F2170 relative humidity probes (under 85 percent RH). SPC tolerates more moisture than glue-down LVT, but standing dampness will still cause issues.
Maintain an expansion gap of 1/4 inch at every wall and vertical obstruction. Skip the gap and you will hear ticking and see peaking within the first six months of seasonal humidity swings.
Maccos vs Mohawk SolidTech vs COREtec
The closest competitor at the mid-tier is Mohawk SolidTech Plus at $3.29 to $3.99 per square foot. SolidTech ships with a 20 mil wear layer standard, a stronger antimicrobial treatment, and a lifetime residential warranty backed by Mohawk’s US claims network. Maccos beats it on raw price by 25 to 40 percent.
Against COREtec — the brand that invented the rigid-core category — Maccos is roughly half the cost. COREtec lines like Pro Plus and Premium run $3.99 to $5.49 per square foot but ship with cork backers, longer planks (60 inches), and significantly better install support. If you plan to stay in the home a decade, the math often favors COREtec on a per-year basis.
Who Should Buy Maccos Flooring
Maccos makes sense for rental properties, flips, and DIY homeowners on tight budgets who want a clean modern look without paying for a national brand. Stick to the premium 20 mil tier, buy from a single lot, and accept that the warranty is essentially cosmetic. Skip Maccos if you are putting flooring in a forever home, a high-end remodel, or any project where claim support matters down the road — the small upfront savings rarely justify the long-tail risk.
Cleaning and Maintenance Routine
Once Maccos flooring is installed, day-to-day maintenance is simple. Sweep daily with a soft-bristle broom or vacuum on hard-floor mode with the beater bar disengaged. Damp-mop weekly using a pH-neutral cleaner such as Bona Pro Series Stone, Tile & Laminate Cleaner — about $9 for a 32 oz spray bottle. Never use vinegar, ammonia, oil soap, or steam mops — all of these damage the urethane wear layer over time and void the warranty.
For tougher spots like grease splatter near the stove or scuff marks from shoes, a Mr. Clean Magic Eraser dampened with water lifts marks without harming the finish. Use felt pads under all chair legs and replace them every six months. A two-mat entry system (coarse outdoor mat plus interior absorbent mat) catches roughly 80 percent of incoming grit before it reaches the planks — the single highest-impact upgrade for any vinyl floor’s lifespan.
Prefer to explore on your own?
See how new flooring looks in your actual room in seconds — free, no signup.
Try the free Floor Studio →