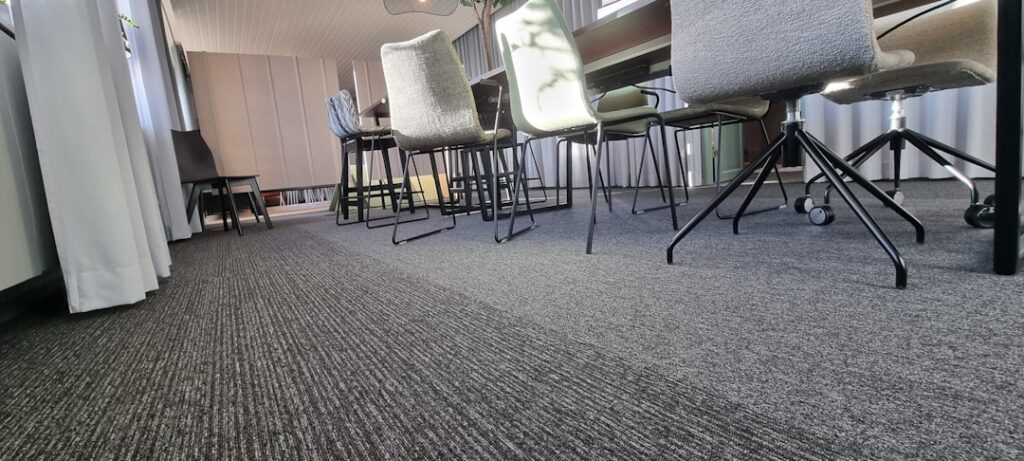
Commercial buildings figured out decades ago that carpet squares beat broadloom in any space that takes real traffic, and the same logic now applies to home offices, basements, and converted bonus rooms. Office floor carpet tiles are modular squares — most commonly 24×24 inches — with a dense, low-pile face bonded to a rigid backing, designed so a coffee spill or a chair-mat blowout means swapping one $8 tile instead of recarpeting the room. They install over concrete without padding, tolerate rolling chairs, and let you run patterns broadloom cannot. Here is how to choose, install, and maintain them like a facilities manager would.
What Makes a Carpet Tile “Commercial”
True commercial carpet tile differs from residential carpet in almost every layer. The face fiber is nearly always solution-dyed nylon (type 6 or 6,6) or polypropylene in a tight loop pile, typically 1/8 to 1/4 inch tall. Solution dyeing locks color into the fiber itself, so bleach spills and sun exposure do not leave pale spots. Below the face sits a reinforced backing — vinyl, bitumen, or a polyurethane cushion composite — that gives each square the dimensional stability to lie flat without stretching or wrinkling the way broadloom does.
Weight matters here. A quality commercial tile carries a face weight of 16 to 28 ounces per square yard with a total product weight far higher than residential carpet of the same pile height. When you handle a good tile it feels like a stiff board, not a floppy rug sample. That stiffness is what lets tiles butt tightly together and survive years of desk chairs rolling over the seams.
Sizes, Formats, and Pattern Options
The workhorse format is the 24×24-inch square (roughly 4 square feet per tile), though you will also see 18×18 and 19.7×19.7-inch (50cm metric) squares, plus 9×36 and 12×48-inch planks that mimic wood-floor layouts. Squares install in four common patterns:
- Monolithic: all tiles facing the same direction for a broadloom-like look — least forgiving of dye-lot variation.
- Quarter-turn (checkerboard): each tile rotated 90 degrees from its neighbor; hides lot variation and is the default for most offices.
- Brick or ashlar: offset rows, popular with plank formats.
- Random: some heavily patterned lines (Interface and Shaw both make them) are designed to install in any orientation, which makes single-tile replacement invisible.
Widely available brands include Shaw Contract and Philadelphia Commercial, Interface, Mohawk Group, Mannington Commercial, and budget lines from Foss and TrafficMaster at home centers. Expect $1 to $3 per square foot for entry peel-and-stick squares, $2.50 to $5 for solid mid-grade commercial tile, and $5 to $8+ for designer lines with cushion backing.
Glue-Down vs Peel-and-Stick vs Loose-Lay
Attachment method is the biggest practical decision. Full-spread glue-down uses a pressure-sensitive adhesive rolled onto the slab; it gives the most permanent, wrinkle-proof result and is standard in commercial work, but removal later means scraping. Peel-and-stick tiles arrive with factory adhesive under a release film — fast and clean for DIY, though the adhesive is only as good as your floor prep, and cheap versions let go in humid basements.
The method most pros actually use on squares is neither: tab or dot installation. TacTiles (Interface’s system) or double-sided adhesive tabs connect tiles to each other at the corners, creating a floating raft that never bonds to the slab at all. Perimeter tiles get a band of adhesive or tabs, the field floats, and any tile lifts out in seconds. For a home office up to a few hundred square feet, tab systems or quality peel-and-stick are the sensible choices; save full-spread glue for rooms with heavy rolling loads or ramps.
Installing Carpet Tiles: A Realistic Walkthrough
Carpet squares are among the most DIY-friendly floors made. A 12×12 office takes an afternoon. The sequence:
- Prep: the substrate must be clean, dry, and smooth. Scrape paint drips, vacuum thoroughly, and prime dusty concrete. Most manufacturers want slab moisture within spec (often 5 lbs MVER or 80 percent RH) — worth checking in basements with a $30 calcium chloride test.
- Find your start point: snap chalk lines through the center of the room, then dry-lay a row each direction so cut tiles at opposite walls are balanced and never slivers under 6 inches.
- Set the field: work outward from center in a stair-step pattern, butting edges snugly without compressing pile into the seams. Follow the directional arrows printed on tile backs unless you are quarter-turning.
- Cut the perimeter: flip the tile, score the backing with a fresh utility blade against a straightedge, and snap. Backing-side cuts give clean edges.
- Roll or press: walk every tile in, or rent a 75-lb roller for glue-down jobs.
Buy 5 to 10 percent extra and store the spares flat — attic leftovers are your future repair stock from the same dye lot.
The Killer Feature: Replacing One Tile
Here is the trick that sells facility managers on modular carpet. When a tile gets a burn, a bleach spot, or an ink stain that will not lift, you pry up that one square with a putty knife, peel it off its tabs or adhesive, drop in a spare, and the repair takes five minutes. With a random-pattern product, the new tile is genuinely undetectable; with monolithic installs, rotating a slightly worn tile from under a desk into the visible field hides the fresh-versus-faded contrast. You can also periodically swap high-traffic walkway tiles with tiles from under furniture to even out wear — effectively doubling the visual life of the floor. No broadloom carpet on earth offers that.
Living With Carpet Tiles: Maintenance and Wear
Low-loop commercial tile is built for neglect, but a simple routine keeps it looking installed-yesterday. Vacuum walkways twice a week with a strong suction machine — beater bars are fine on loop pile at a high setting. Blot spills immediately; solution-dyed nylon tolerates aggressive spot cleaners and even diluted bleach solutions that would ruin residential carpet. Schedule a low-moisture encapsulation cleaning or hot-water extraction annually rather than waiting for visible soiling, because ground-in grit is what actually cuts fiber.
Rolling office chairs are the one chronic stressor. A dense 1/8-inch loop tile handles casters directly without a chair mat, though a polycarbonate mat ($40 to $90) still extends life at a desk that sees eight-hour days. Expect a mid-grade commercial tile to look good for 10 to 15 years in a home office — considerably longer than builder-grade broadloom under the same chair.
Are Carpet Tiles Right for Your Space?
Choose office floor carpet tiles for basements (they handle slab moisture and lift out if a pipe leaks), home offices with rolling chairs, playrooms, and stairs-adjacent bonus rooms where single-tile repair pays off. Skip them in formal living areas where you want plush pile softness — commercial loop reads flat and firm underfoot — and in baths or laundry rooms where hard surface flooring belongs. Budget $2.50 to $5 per square foot for good tile plus $1 to $2 for professional installation, or a free weekend if you DIY. For a hardworking room, it is one of the highest-value floors you can put down.