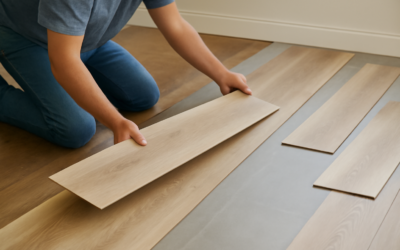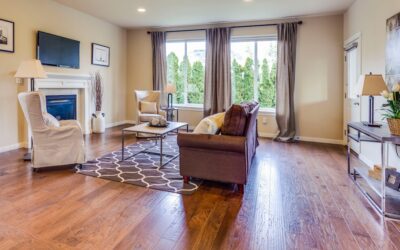
Peel and stick vinyl plank flooring is the simplest, fastest, and most affordable way to get a wood-look floor in any room of your home. With no glue to spread, no click-lock mechanism to master, and no special tools beyond a utility knife, this flooring literally peels and sticks. You remove the paper backing, press the plank onto your subfloor, and move on to the next one. It is that straightforward.
But simplicity does not mean there is nothing to learn. The difference between a peel and stick vinyl plank flooring installation that looks professional and lasts for years versus one that peels up within months comes down to preparation, product selection, and technique. This guide covers all three in detail, along with the best brands, realistic durability expectations, and current pricing.
How Peel and Stick Vinyl Plank Flooring Works
Each plank features a printed vinyl surface on top and a pressure-sensitive adhesive on the bottom, protected by a peel-away paper or film liner. The adhesive is designed to create a permanent bond with smooth, clean surfaces. When you press the plank onto a properly prepared subfloor, the adhesive creates a strong mechanical bond that holds the plank firmly in place.
Unlike click-lock vinyl flooring, which locks together at the edges and floats over the subfloor, peel and stick planks adhere directly to the subfloor surface. Each plank operates independently, which means you can replace a single damaged plank without disturbing the surrounding floor. This independence also means that subfloor flatness and cleanliness are absolutely critical, since there is no rigid structure connecting the planks to hold them in alignment.
Best Peel and Stick Vinyl Plank Brands
TrafficMaster Allure (Home Depot)
TrafficMaster Allure is arguably the most popular peel and stick vinyl plank line in America, available exclusively at Home Depot. The range includes dozens of wood species and color options with varying wear layer thicknesses. Basic Allure planks start at around $1.00 per square foot, while the Allure Ultra line with thicker construction runs $2.00 to $3.00 per square foot.
Allure planks measure 6 inches wide by 36 inches long in most styles. The adhesive is reliable when applied to properly prepared surfaces, and the product is backed by a 15 to 25-year residential warranty depending on the specific line. For a widely available, affordable, and proven product, TrafficMaster Allure is hard to beat.
SmartCore (Lowe’s)
Lowe’s carries peel and stick options within their SmartCore brand lineup. These products offer the same waterproof construction and realistic wood-grain printing that SmartCore is known for in their click-lock lines, adapted for the peel and stick format. Pricing ranges from $1.49 to $2.99 per square foot.
Achim Nexus
Achim’s Nexus line is the budget king of peel and stick vinyl, available at Walmart, Amazon, and other mass retailers. Priced as low as $0.60 per square foot, Nexus planks are ideal for temporary installations, rental property upgrades, and budget renovations where cost is the primary driver. The trade-off is thinner construction and less realistic visuals compared to premium options.
Stikwood
Stikwood offers a premium peel and stick product that uses real reclaimed and sustainably harvested wood with an adhesive backing. While technically not vinyl, Stikwood is worth mentioning because it targets the same DIY market with an authentic wood product. Pricing is significantly higher at $8 to $15 per square foot, positioning it as a luxury peel and stick option. Note that Stikwood is primarily designed for accent walls and may not be suitable for floor applications.
Art3d
Art3d has gained popularity on Amazon for their wide range of peel and stick vinyl planks in both wood and stone patterns. Their products offer decent quality at competitive prices in the $1.50 to $2.50 per square foot range. Customer reviews praise the realistic appearance and ease of installation, though some report adhesive issues on concrete subfloors.
Subfloor Preparation: The Key to Success
Subfloor preparation is the single most important factor in a successful peel and stick vinyl plank flooring installation. More than 90 percent of adhesion failures can be traced back to inadequate subfloor preparation. The adhesive needs a clean, smooth, dry, and flat surface to bond properly.
Cleaning the Subfloor
Begin by removing all furniture and existing flooring from the room. Sweep thoroughly, then vacuum using a shop vac to remove all dust, dirt, and debris. Mop the floor with a pH-neutral cleaner, avoiding soaps or detergents that can leave residue. Allow the floor to dry completely for at least 24 hours. Even a thin film of dust between the adhesive and the subfloor will cause the plank to lift over time.
Leveling and Smoothing
Peel and stick planks are thin and flexible, which means they conform to the surface beneath them. Any bumps, ridges, divots, or unevenness in the subfloor will telegraph through the vinyl and be visible and felt on the finished surface. Use a floor-leveling compound to fill low spots and a floor sander to smooth high spots. The subfloor should be flat to within 3/16 inch over a 10-foot span.
Moisture Testing
Excess moisture from concrete subfloors is a common cause of adhesion failure. Perform a calcium chloride moisture test or tape a piece of plastic sheeting to the concrete for 72 hours. If condensation appears under the plastic, moisture levels are too high for peel and stick vinyl. You will need to apply a moisture barrier or choose a click-lock floating floor product instead.
Compatible Subfloor Surfaces
Peel and stick vinyl plank flooring adheres well to concrete, plywood, OSB, existing vinyl (if firmly bonded and smooth), ceramic tile (if grout lines are filled and level), and hardboard. It does not adhere well to carpet, textured surfaces, freshly painted floors, or surfaces treated with sealers or waxes.
Installation Tips for Professional Results
Acclimate the Planks
Store the planks in the installation room for at least 48 hours at a temperature between 65 and 85 degrees Fahrenheit. This allows the vinyl and adhesive to reach room temperature. Cold planks have stiff adhesive that does not bond as well. Warm planks are more flexible and the adhesive is more aggressive.
Plan Your Layout
Measure the room and plan your layout before peeling any backing. Start from the most visible wall or the longest straight wall. Stagger end joints by at least 6 inches between adjacent rows, just like you would with hardwood flooring. Dry-lay the first two rows to check your layout before committing with adhesive.
Peel and Place Technique
Peel the backing paper halfway, align the plank, and press one end down firmly. Then pull the remaining backing out while pressing the plank down progressively from one end to the other. This technique prevents air bubbles from getting trapped under the plank. Avoid lifting and repositioning planks repeatedly, as each lift weakens the adhesive bond.
Roll for Maximum Adhesion
After placing each plank, use a hand roller or J-roller to apply firm, even pressure across the entire surface. Pay extra attention to edges and corners where lifting is most likely to occur. Roll the entire floor again after completing each section. Some professionals recommend rolling the entire floor one final time 24 hours after installation to reinforce the adhesive bond during the initial curing period.
Cutting Techniques
Peel and stick vinyl planks cut easily with a sharp utility knife and a straight edge. For straight cuts, score the surface along your line and snap the plank. For curved cuts around obstacles, use a heat gun to soften the vinyl for easier cutting. Replace your blade frequently because a dull blade produces ragged edges that look unprofessional.
Durability Expectations
Peel and stick vinyl plank flooring durability varies significantly by product quality. Budget products with thin wear layers (4-6 mil) are suitable for 3 to 5 years of light use. Mid-range products with 8-12 mil wear layers handle moderate traffic for 5 to 10 years. Premium peel and stick planks with 12-20 mil wear layers can last 10 to 15 years with proper care.
The most common durability issues with peel and stick flooring are edge lifting, seam separation, and surface scratching. Edge lifting is almost always caused by subfloor preparation issues. Seam separation can result from temperature fluctuations that cause the vinyl to expand and contract. Surface scratching depends on the wear layer thickness and the type of traffic the floor receives.
For areas with heavy traffic, moisture, or demanding conditions, consider upgrading to a click-lock LVP flooring system, which offers superior durability and a more secure connection between planks.
Pricing Guide
Material Costs
Budget peel and stick vinyl planks cost $0.50 to $1.00 per square foot. Mid-range products run $1.00 to $2.50 per square foot. Premium options with thick wear layers and realistic textures cost $2.50 to $4.00 per square foot.
Room Cost Examples
A 120-square-foot bedroom using mid-range planks at $1.50 per square foot costs approximately $180 for materials. A 200-square-foot kitchen at $2.00 per square foot costs $400. A 500-square-foot basement at $1.50 per square foot costs $750. Since installation is virtually always DIY, there are no labor costs to add.
Cost vs Click-Lock Vinyl
Peel and stick vinyl planks cost 30 to 60 percent less than comparable click-lock vinyl products. A mid-range peel and stick plank at $1.50 per square foot compares to a mid-range click-lock product at $3.00 to $4.00 per square foot. The trade-off is durability and longevity, so the right choice depends on whether you prioritize upfront savings or long-term value.
Maintenance
Sweep or vacuum regularly with a soft-bristle attachment to prevent grit from scratching the surface. Damp mop with a vinyl-safe, pH-neutral cleaner. Avoid excessive water, as standing puddles can seep through seams and weaken the adhesive bond from below. Do not use steam mops, ammonia-based cleaners, or abrasive scrubbing pads. Place doormats at entries and felt pads under furniture to protect the surface.
Final Thoughts
Peel and stick vinyl plank flooring is the ultimate quick-fix, budget-friendly flooring solution. When installed on a properly prepared subfloor with a quality product, it delivers a surprisingly attractive wood-look floor that can last five to fifteen years. The key to success is investing time in subfloor preparation, choosing a product with an adequate wear layer for your traffic level, and following proper installation techniques. For renters, budget renovators, and DIY enthusiasts, peel and stick vinyl plank flooring remains one of the best values in the flooring market.
Prefer to explore on your own?
See how new flooring looks in your actual room in seconds — free, no signup.
Try the free Floor Studio →