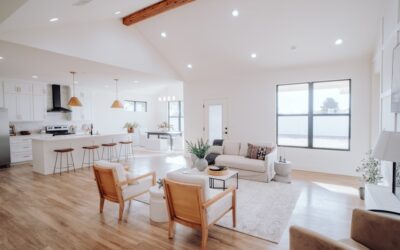
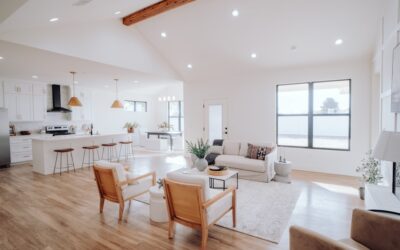
When a kitchen island doesn’t fit, a peninsula often does. A peninsula kitchen floor plan uses an extended counter that connects to a wall or cabinet run on one end, creating an L-shape or U-shape work zone with seating along the open end. Compared to a freestanding island, peninsulas use less floor area, allow tighter aisle widths, and integrate plumbing or electrical runs more easily because of the wall connection. Done right, they deliver 85 percent of an island’s function in 60 percent of the floor space.
Here is how to design a peninsula that works in your actual home — not just in the magazine photos.
When a Peninsula Beats an Island
Three space conditions where a peninsula is the better choice. Kitchens under 200 square feet where a freestanding island would block the work triangle. Open-plan layouts where the kitchen flows into a living or dining area and needs a visual divider without a wall. And galley kitchens with one open end where extending the counter creates a U-shape closure.
The defining feature is the wall or cabinet attachment on one end. This typically gives you 4 to 6 feet of countertop extension before the unsupported end caps off. Anything longer feels disconnected and visually awkward.
While you’re upgrading the kitchen floor, it might be a good time to rethink the seating too. Swapping out old bar stools is one of those small changes that makes the whole room feel more pulled together.
We may earn a commission when you purchase through our links.
Standard Peninsula Dimensions
The base cabinet run measures 24 inches deep, matching the rest of the kitchen. The countertop typically overhangs the back 12 to 15 inches to create knee space for seated diners, bringing total peninsula depth to 36 to 39 inches.
Length varies. Compact peninsulas run 4 feet long and accommodate two stools. Medium peninsulas at 6 feet handle three stools comfortably. Long peninsulas at 8 to 10 feet can seat four but require structural support under the overhang because granite or quartz over 24 inches of cantilever will crack. Steel corbels or knee-wall framing handle this; a bracket every 36 inches is the rule.
Aisle Width and Traffic Flow
Aisle width is the single biggest factor in whether a peninsula works or feels claustrophobic. Plan for 42 inches minimum between the peninsula and the opposite cabinet run for a single-cook kitchen. Bump to 48 inches if two cooks share the space, or if a dishwasher and oven sit across from each other (both require open-door clearance).
Behind the seating side of the peninsula, plan 36 inches minimum between the stools and any wall or backed furniture. This allows comfortable walk-by traffic when someone is seated. Anything tighter and dinner guests feel trapped at the counter.
Flooring Considerations Around a Peninsula
Two flooring decisions matter most. First, the seam between kitchen and adjacent room flooring. Many peninsula layouts mark the visual transition from kitchen to living area, which is a natural place for a flooring change. A transition strip (T-molding for matched heights or reducer for different heights) at the end of the peninsula reads cleaner than a strip that runs across an open doorway.
Second, durability under the seating zone. Stools scrape the floor every time someone sits or stands. Hardwood scratches within 18 months in busy households. Luxury vinyl plank with a 20-mil wear layer (COREtec Pro Plus or Shaw Floorte Pro) handles this abuse and looks like wood at half the price. Tile works too but is hard on feet during long meal-prep sessions.
Cooktop, Sink, or Just Storage?
Three configuration choices drive the peninsula’s role. A pure prep peninsula with no plumbing or electrical is the cheapest build at $1,800 to $3,500 installed. Just base cabinets, countertop, and outlets every 24 inches along the back wall side for small appliances.
A sink peninsula adds plumbing complexity. The drain has to either connect through the floor to a basement drain line or vent through the wall connection back into the existing kitchen plumbing stack. Expect to add $1,500 to $3,000 for plumbing, depending on your house’s existing layout. A cooktop peninsula adds ventilation requirements. A downdraft vent ($800 to $1,800 for the unit) is the only realistic option since a standard hood would block the open kitchen sightlines.
Electrical Code Requirements
The 2023 NEC code requires GFCI-protected outlets every 24 inches along the back wall of the peninsula counter. For peninsulas without a back wall (countertop-only peninsulas with seating on both long sides), at least one outlet is required on the cabinet side, typically in a pop-up or under-counter mount.
Plan for one 20-amp circuit dedicated to peninsula outlets. If you include a small appliance like a built-in microwave, a coffee station, or a wine cooler, add a second circuit. Have your electrician map this before the cabinets go in — retrofitting outlets after the fact is messy and expensive.
Stools and Overhang Height
Counter-height seating (24-inch stools) pairs with a standard 36-inch counter. Bar-height seating (30-inch stools) requires a raised counter section at 42 inches. The bar-height option creates a visual divider that hides cooking mess from the adjacent living area, which is its main appeal.
For knee comfort, allow 12 to 15 inches of countertop overhang past the cabinet face. Less than 12 inches and seated knees hit the cabinet front; more than 15 inches needs structural support. Stool width should match the peninsula length divided by the number of seats plus six inches. A 6-foot peninsula with three stools means 18-inch-wide stools — most stools fall in this range.
Common Mistakes to Avoid
Three planning errors that ruin peninsula kitchens. First, putting the dishwasher next to the peninsula on the cabinet side — the open door blocks the only walkway in and out of the kitchen during cleanup. Place the dishwasher on the main cabinet run instead.
Second, undersizing the connection cabinet at the wall side. The corner where the peninsula meets the main cabinet run needs either a blind corner cabinet (with a pull-out organizer) or an angled cabinet. Skipping this leaves a wasted dead corner. Third, no electrical outlets on the seating side at all. A peninsula without a phone-charging outlet next to a stool feels dated by 2026 standards.
Get these details right and a peninsula kitchen floor plan delivers the social, multitasking heart of the home that everyone wants — without the floor space an island demands.
Prefer to explore on your own?
See how new flooring looks in your actual room in seconds — free, no signup.
Try the free Floor Studio →