Pergo practically invented laminate flooring in the late 1970s, so it is fitting that the brand still sets the bar for a floating floor a homeowner can install in a weekend. A clean Pergo laminate flooring installation depends far more on prep and patience than on carpentry skill, which is why so many first-timers pull it off. This guide walks through acclimation, subfloor prep, underlayment, the PerfectFold locking system, expansion gaps, and the small details that separate a floor that looks factory-perfect from one that peaks and gaps a year later.
Know Your Pergo Product Line First
Pergo sells several collections in the US, and the install steps vary slightly by line, so confirm what you bought.
- Pergo Outlast+: A Home Depot exclusive rated AC4 for heavy residential and light commercial use, with SpillProtect surface sealing that resists water up to 24 hours. Roughly $2.50 to $3.50 per square foot.
- Pergo TimberCraft + WetProtect: A thicker 12 mm premium line with a lifetime waterproof warranty. Around $3.50 to $5 per square foot.
- Pergo Extreme: This is actually rigid vinyl (SPC), not laminate, so its instructions differ. Do not confuse it with the laminate lines.
- Pergo Gold and Pergo Elements: Value and specialty lines sold through Lowe’s and other retailers.
Most Pergo laminate is 8 mm or 12 mm thick with a high-density fiberboard (HDF) core and uses the PerfectFold V or angle-drop-lock joint. AC4 is the common abrasion rating, meaning the wear layer handles busy households, kids, and pets without prematurely dulling.
Step 1: Acclimate the Planks
This is the step people skip and later regret. Lay the unopened Pergo cartons flat in the room where they will be installed for at least 48 hours before you start. The space should sit at a normal living temperature between 65 and 85 degrees Fahrenheit with relative humidity between 35 and 75 percent. Acclimation lets the HDF core reach equilibrium so the floor does not expand and buckle, or shrink and gap, after install. Do not stack cartons more than three high and keep them away from exterior walls.
Step 2: Prep the Subfloor
Pergo floats over almost any hard surface: plywood, OSB, concrete, existing vinyl, or ceramic tile. What it will not tolerate is an uneven or damp subfloor.
- Flatness: The subfloor must be flat within 3/16 inch over a 10-foot span. Sand down high spots and fill low spots with a cementitious leveling compound.
- Cleanliness: Sweep and vacuum thoroughly. A single trapped pebble telegraphs through the plank and can crack a joint.
- Moisture: On concrete, run a calcium chloride or in-slab RH test. Concrete should read below the level specified in your product’s warranty, and you must lay a 6-mil polyethylene vapor barrier over any below-grade or on-grade slab.
- Carpet: Always remove carpet and pad first. Never float laminate over carpet.
Step 3: Choose and Install Underlayment
Many Pergo lines, including much of the Outlast+ and TimberCraft ranges, come with an attached foam or cork pad pre-bonded to the plank. If yours has attached underlayment, do not add a second foam layer, because doubling up makes the floor too spongy and stresses the joints. You still need a moisture barrier over concrete in that case.
If your planks have no attached pad, roll out a compatible 2-in-1 or 3-in-1 underlayment, seams butted (not overlapped) and taped. This adds cushioning, dampens sound, and on concrete provides the required vapor protection. Expect to spend $0.30 to $0.70 per square foot on quality underlayment.
Step 4: Plan the Layout
Measure the room and calculate whether the final row will be at least 2 inches wide. If it will not, rip the first row narrower so both edge rows are balanced, which looks intentional rather than accidental. Run the planks parallel to the longest wall or toward the main light source for the most flattering result. Dry-lay a few rows first to preview color and grain distribution, mixing planks from several cartons so repeated patterns do not cluster.
Step 5: Set Expansion Gaps
Laminate is a floating floor that expands and contracts with humidity, so it can never be pinned in place. Leave a 1/4-inch to 3/8-inch expansion gap around the entire perimeter, against every wall, pipe, cabinet, and doorframe. Use spacers to hold the gap consistent as you work. For runs longer than about 40 feet or rooms wider than about 30 feet, add an intermediate expansion joint or a T-molding transition. Skipping the gap is the single most common cause of a Pergo floor that buckles into a ridge.
Step 6: Lay the Floor with PerfectFold
Pergo’s PerfectFold V system uses an angle-and-drop mechanism that clicks together without glue, tape, or nails.
- Start in a left corner with the tongue side facing the wall, spacers in place.
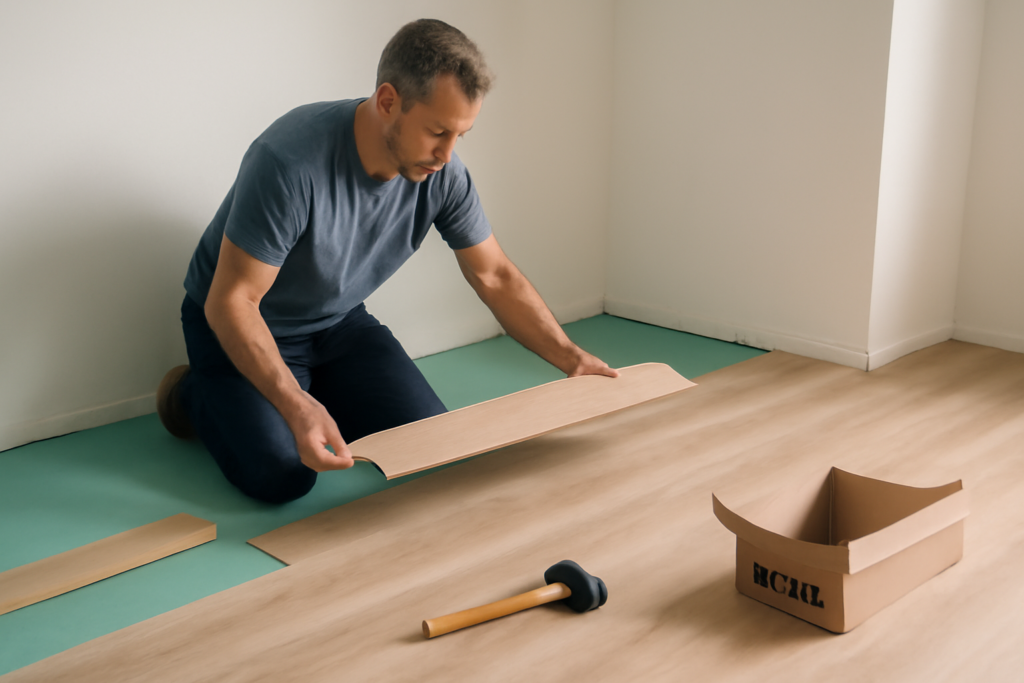
- Connect planks end to end along the first row by angling the short end into the previous plank and folding it down until it clicks flat.
- Cut the last plank of the row to length, keeping the offcut to start the next row if it is at least 8 to 12 inches long.
- Stagger end joints at least 8 to 12 inches from row to row so seams never line up, which is both stronger and better looking.
- Begin each new row by angling the long edge into the completed row and folding down. The joint should close with a soft click and sit perfectly flush.
- Use a tapping block and pull bar for the final tight rows and against walls. Never strike the plank edge directly with a hammer.
Step 7: Finish the Perimeter
Remove all spacers once the field is complete. Reinstall baseboard or add quarter-round molding to cover the expansion gap, and nail the trim into the wall, never into the floor, so the laminate can still move freely. Install T-moldings in doorways and where the floor meets other surfaces, and add end caps or reducers where laminate transitions to lower flooring like tile or carpet.
Tools and Time
You need a tape measure, a circular saw or laminate cutter, a jigsaw for notches, a tapping block, a pull bar, spacers, and a rubber mallet. A typical 200-square-foot room takes a motivated DIYer roughly 6 to 10 hours. If you hire out, laminate installation labor generally runs $2 to $5 per square foot, so a 400-square-foot install lands around $800 to $2,000 in labor on top of material.
Frequently Asked Questions
Do I need underlayment if my Pergo has attached padding?
No extra foam pad. Adding a second cushion layer voids many warranties and makes joints flex. You do still need a 6-mil poly vapor barrier over concrete, since the attached pad is not a moisture barrier.
How long should Pergo acclimate before installation?
At least 48 hours flat in the install room at 65 to 85 degrees Fahrenheit. In very dry or very humid climates, give it a full 72 hours to be safe.
Can Pergo laminate be installed in a bathroom?
Only the WetProtect lines like TimberCraft carry a waterproof warranty suitable for full baths. Standard laminate can go in a half bath but should not sit in a room with a tub or shower unless it is a WetProtect product.
What size expansion gap does Pergo require?
Leave 1/4 inch to 3/8 inch around the entire perimeter and every fixed object. This is non-negotiable and prevents buckling as the floor expands with seasonal humidity.
Can I install Pergo over existing tile?
Yes, as long as the tile is well bonded and flat. Fill deep grout lines wider than about 1/4 inch and add underlayment if the planks lack an attached pad.
Nail the prep work, respect the acclimation window and the expansion gap, and a Pergo laminate flooring installation is well within reach for a first-time DIYer. Take your time on the first three rows, keep your joints staggered, and the rest of the floor almost lays itself.
Prefer to explore on your own?
See how new flooring looks in your actual room in seconds — free, no signup.
Try the free Floor Studio →