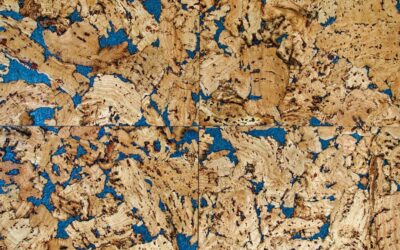
Every backyard pond that fails early fails the same way: a slow leak nobody can find, caused by something sharp under the liner that took two seasons to work its way through. Pond underlayment is the sacrificial cushion layer between excavated soil and the waterproof liner, and after years of building and repairing water features, I’ll say it flat out — it’s the least glamorous, highest-return material in the whole project. A 45-mil EPDM liner is tough, but it’s lying on a bed of rocks, roots, and freeze-heaving soil while supporting more than 62 pounds per cubic foot of water pressing it into every point below. The underlayment is what turns those point loads into shrugs.
What the Underlayment Layer Is Actually Defending Against
People assume the threat list is just “sharp rocks at dig time,” but liners get attacked from below for the life of the pond.
- Stones you missed. No matter how carefully you groom the excavation, soil holds hidden stones that surface as everything settles under load.
- Roots. Tree and shrub roots grow toward water and can press into a liner over years. Underlayment doesn’t stop aggressive roots outright (bamboo and willow need a real root barrier), but it blunts the point of ordinary root contact.
- Frost heave and settling. In cold climates the soil profile literally moves each winter, dragging the liner across whatever it touches. Abrasion, not puncture, is the slow killer here.
- Burrowers. Voles, gophers, and crayfish tunnel against liners. A dense fabric layer discourages casual chewing and tunneling contact.
- Gas buildup. Decomposing organics in some soils release gases that can balloon a liner. Quality fabric underlayment lets gas migrate laterally to the edges instead of pocketing under your pond floor.
Your Options, From Purpose-Made to Improvised
Non-Woven Geotextile (The Right Answer)
Purpose-sold pond underlayment is needle-punched non-woven polypropylene, typically 6 to 8 ounces per square yard. It’s rot-proof, chemically inert against soil and EPDM, lets gas and water vapor pass, and its felted structure absorbs point loads beautifully. Cost runs $0.30 to $0.60 per square foot retail from pond suppliers — often cheaper if you buy the identical commodity fabric from a landscape or erosion-control supplier as “8 oz non-woven geotextile.” Same material, better price. This is what I use on every build.
Old Carpet (The Classic Improvisation)
Free is a compelling spec, and synthetic (nylon/polyester/olefin) carpet laid pile-up genuinely cushions well — I’ve torn out 20-year-old ponds with carpet underlayment that did the job. Caveats matter though: it must be synthetic (wool and jute-backed carpet rots into slime and leaves voids), staples and tack strips must be gone completely, and seams should overlap generously. It’s also heavy, awkward on vertical walls, and doesn’t pass gas as freely as geotextile. Acceptable for budget builds; not what I’d sell a client.
Sand
A 2-inch sand blinding layer is great on pond floors — it grades out sharp soil perfectly — but it’s useless on any slope steeper than about 20 degrees because it slides, and most ponds are mostly slope. Use sand as a supplement under the flat bottom where soil is stony, with fabric everywhere else. Cost: about $5 to $10 per 50-pound bag, or far less by the delivered yard.
What Not to Use
Newspaper and cardboard rot into nothing within a couple of seasons, exactly when settling exposes new stones. Woven landscape weed fabric is too thin to cushion anything — a stone pressed through it dents a liner nearly as if it weren’t there. And skip fiberglass insulation, which is a miserable, useless mess underwater.
How Much to Buy: The Sizing Formula
Underlayment is cut with the same formula as the liner itself:
- Length = pond length + (2 × maximum depth) + 2 feet of edge allowance
- Width = pond width + (2 × maximum depth) + 2 feet of edge allowance
So an 11-by-16-foot pond at 2 feet deep needs roughly a 17-by-22-foot piece — call it 375 square feet, which at $0.40 per square foot is about $150. Against a $400 to $700 EPDM liner and everything else in the build, that’s cheap. Buy a little extra: offcuts double as liner-top padding under rock work, which I’ll get to, and as pads under pump vaults.
Installation: The Hour That Determines the Next Twenty Years
- Groom the excavation. Walk every surface and pull anything sharp — stones, cut roots, old construction debris. Cut protruding roots flush and, if a nearby tree owns the area, consider relocating the pond rather than fighting the tree for a decade.
- Compact and smooth. Tamp shelves and the floor. Fill any voids; underlayment bridges small imperfections but liners eventually stretch into big ones.
- Optional sand blinding on a stony floor — 1 to 2 inches, raked flat.
- Lay the fabric with all seams overlapped 6 to 12 inches. Work it into shelf corners and against vertical cuts. Don’t stretch it tight like a drum — leave a relaxed fit so it can move with the liner rather than resist it.
- Temporary pinning. A few sod staples high on the walls, or bricks at the rim, keep wind from undoing your work before the liner lands. Never staple where water pressure will later hold everything anyway — every penetration low in the profile is a hole you didn’t need.
- Liner immediately after. Don’t leave underlayment exposed for days to collect windblown debris and UV. Fabric, then liner, then water-weighted fitting in the same work session if you can manage it.
The Trick Most DIYers Miss: Padding Above the Liner Too
Here’s a pro habit worth stealing. The liner gets attacked from above as much as from below — by the boulders, cobble, and gravel you place on it to make the pond look natural, and by you standing on those rocks during cleanouts. On every rock-lined pond and waterfall I build, offcut strips of underlayment go on top of the liner wherever stone sits: under boulder bases, beneath cobble beds, under stream rock. Double-fabric at a waterfall’s weir, where water and rock vibrate against the liner constantly, is the difference between a 5-year and a 25-year water feature. This is also why you over-order fabric by 10 to 15 percent.
Special Cases
Preformed rigid ponds: still worth a fabric wrap in stony soil — rigid shells crack against point loads as backfill settles.
Natural clay-bottom ponds: no liner, no underlayment; different craft entirely.
Koi ponds with bottom drains: cut fabric neatly around drain flanges; never let fabric wick between the flange gasket and liner, because that wick becomes a permanent slow leak. Same rule at skimmer faceplates.
High water tables: where groundwater can push up under an empty pond, fabric plus a gravel-and-perforated-pipe underdrain relieves the pressure that would otherwise balloon the liner during cleanouts.
The Cost-Benefit Reality
Run the numbers the way I give them to clients. Underlayment for a typical backyard pond: $100 to $200. Finding and repairing a leak in a finished, stocked, rock-lined pond: draining it, moving a ton of stone, hunting a pinhole across a black rubber sheet, patching, rebuilding — a full weekend if you’re lucky, $500 to $1,500 if a pro does it, plus stressed or lost fish. And a puncture from below almost never happens where you can see it. I’ve been called to exactly this repair too many times, and in the ponds that had real underlayment, the leak almost always turns out to be at a fitting or the edge — fixable spots — not through the floor.
So here’s the bottom line from someone who’s built them and autopsied them: never lay a liner on bare soil, buy 8-ounce non-woven geotextile unless free synthetic carpet falls in your lap, overlap seams like you mean it, and save the scraps to pad every rock that touches rubber. Your liner carries the pond; the underlayment carries the liner. Cheap layer, long memory.