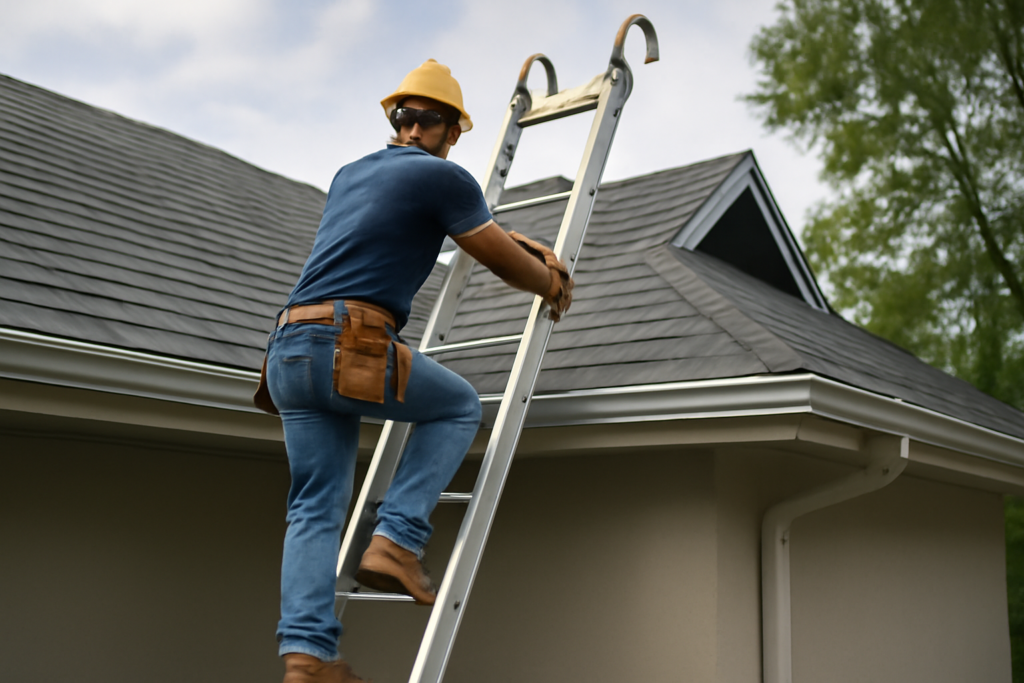
Ladders put more people in the emergency room than any other tool in home improvement — over 160,000 ER visits a year in the US — and roof work is where the falls turn serious. A proper roofing ladder setup involves two distinct things people often conflate: the extension ladder that gets you to the eave, and the ridge-hook ladder that lets you work on the slope itself without sliding off. Choosing the right duty rating, length, and hook hardware, then setting it all up correctly, is most of what separates a routine repair from a 911 call. Here’s the full rundown, from what to buy to the setup rules pros follow without thinking.
The Two Ladders of Roof Work
An extension ladder handles access: ground to eave. For a single-story home with 10-foot eaves you need at least a 20-foot extension ladder; two-story homes with 18- to 20-foot eaves need 28 to 32 feet. The sizing rule is eave height plus 3 feet of extension above the roofline (so you have something to hold stepping on and off) plus the overlap the ladder loses between sections — extension ladders only reach about 3 feet less than their labeled length when properly overlapped and angled.
A roof ladder (ridge ladder) handles the slope: it’s a straight ladder fitted with a ridge hook — a large steel J-hook with a wheel — that rolls up the shingles, flips over the ridge, and locks the ladder flat against the slope. Your weight then loads the ridge, not the shingles, and you climb the slope with rungs underfoot instead of trusting friction on granules. On anything steeper than about 6:12, or on wet, mossy, or brittle roofing (old shingles, slate, tile), a hooked roof ladder isn’t optional — it’s the difference between working and skating.
Buying: Materials, Duty Ratings, and Real Prices
Material first. Fiberglass is the professional default — stiff, weather-resistant, and non-conductive, which matters because service drops and roof work share airspace; aluminum near power lines is how electrocutions happen. Aluminum’s advantage is weight (a 28-foot aluminum runs about 55 pounds versus 70-plus for fiberglass) and price. Wood is obsolete for this purpose.
Duty rating matters more than most buyers realize. The rating covers you plus clothing, tools, and materials:
- Type II (225 lbs): light household use — undersized for roofing work with a tool belt and bundle of shingles.
- Type I (250 lbs): minimum for serious roof work.
- Type IA (300 lbs): the sweet spot — what most pros carry.
- Type IAA (375 lbs): heavy commercial duty.
Expect to pay $220 to $400 for a 24- to 28-foot Type IA fiberglass extension ladder (Werner D6228-2, Louisville FE3228 class). Ridge hooks sell separately for $40 to $90 a pair (Acro 11084, Qualcraft 2481) and bolt onto a straight ladder or extension section in fifteen minutes with the included U-bolts — always install as a pair, one hook per rail, never a single hook centered. Purpose-built aluminum roof ladders with integrated hooks run $250 to $500 in 12- to 20-foot lengths.
Extension Ladder Setup: The 4-to-1 Rule and Friends
Set the base 1 foot away from the wall for every 4 feet of height to the support point — a ladder touching the eave 16 feet up gets its feet 4 feet out. Steeper risks tipping backward; shallower risks the base kicking out, which is the classic ladder accident. Quick field check: stand with your toes at the ladder’s feet and extend your arms straight — your palms should land on the rung at shoulder height.
Beyond the angle: level the feet (dig the high side, or use a ladder leveler like the Werner PK80-2 for $60 — never stack blocks), extend 3 feet above the eave, and tie off the top to a gutter spike, eye lag, or anchor before making repeated trips. A $15 pair of rubber ladder mitts protects the gutter and stops sideways skating on aluminum. On the climb: three points of contact always, belt buckle between the rails (never lean past them — reposition instead), and haul tools up with a rope bucket rather than carrying them in hand. Stay off the top three rungs of an extension ladder, and never set up within 10 feet of power lines regardless of ladder material.
Using a Ridge-Hook Roof Ladder
- Fit both hooks tight to the rails with the wheels facing down and hook points facing the ladder’s underside.
- From the eave (or a scaffold), push the ladder up the slope on its wheels, rungs facing up, until the hooks pass the ridge.
- Flip the ladder over so the hooks drop behind the ridge and seat against the opposite slope. Pull back hard to confirm the hooks are fully engaged — the whole system depends on this bite.
- Test-load the bottom rung before committing your weight, then climb the slope on the rungs, keeping your body centered.
- Work within an arm’s reach of the ladder. Sliding sideways to “just reach” one more course is precisely how people leave the roof.
Two cautions: ridge hooks assume a structurally sound ridge — on rotted decking or fragile old ridge caps, they can pull through, so probe first. And on tile or slate, pad the ladder rails with foam pipe insulation or purpose-made standoffs to spread load, because rails resting on brittle tiles crack them by the dozen.
Accessories Worth the Money
A ladder stabilizer/standoff ($40 to $80, Werner AC78 type) spans the ladder across the roof edge, holding it off the gutter and giving a wider, steadier top bearing — it’s the single best upgrade for gutter cleaning and eave work. Ladder levelers handle sloped driveways and flowerbeds. A ladder hoist wheel or rope-and-pulley setup beats carrying bundles. And pair the ladder with actual fall protection on steep work: a harness, rope grab, and ridge anchor kit runs $100 to $250 and turns a slip into a non-event. Foot-level friction helps too — cougar-paw style roofing boots or clean soft-soled shoes grip far better than worn sneakers.
Renting vs. Buying
Occasional users should run the rental math before spending $400. Tool rental yards and big-box rental counters carry 24- to 32-foot fiberglass extension ladders at $30 to $60 per day or $90 to $150 per week — perfect for a one-time gutter project or a chimney inspection. Ridge-hook roof ladders rent less commonly; if your job needs one, buying a $60 hook pair for a rented straight ladder section is often the workaround, or rent a tower scaffold ($80 to $150 per week) for extended eave-height work, which beats any ladder for comfort and safety on long gutter or fascia jobs.
Buy when you’ll climb more than twice a year — which describes most homeowners once gutters, holiday lights, and roof checks are counted honestly. A quality Type IA fiberglass extension ladder is a 25-year tool with zero moving parts to wear out beyond the rope and pulleys, both replaceable for under $25. Splitting the difference, many households do well with a 22- to 26-foot multi-position ladder (Little Giant type, $200 to $350) for general use plus rented big ladders for the rare two-story roofline job. Whatever you own, resist lending it out unsupervised; the most common way a good ladder becomes a bent one is a borrower and a windy afternoon.
Inspection and the Habits That Keep You Off the Statistics List
Before every use, walk the ladder: cracked or gouged fiberglass, bent rungs, sloppy rung locks, missing feet pads, frayed halyard rope, and loose hook bolts are all grounds to fix or retire it. Store ladders horizontally on wall hooks out of the sun — UV degrades fiberglass resin over years — and never repaint a wooden or damaged ladder, since paint hides cracks.
The behavioral rules do the heaviest lifting: don’t work a roof alone, don’t climb wet or frosted shingles, don’t work in wind above roughly 20 mph, and give the job a realistic once-over before you start — a roofing ladder solves access and footing, but a 10:12 pitch two stories up is professional territory with scaffolding and harnesses, not a Saturday experiment. Buy the Type IA fiberglass extension, bolt on a pair of ridge hooks, set everything at 4-to-1, tie off the top, and you’ll have eliminated the failure modes behind the overwhelming majority of ladder injuries for less than the cost of one urgent-care visit.