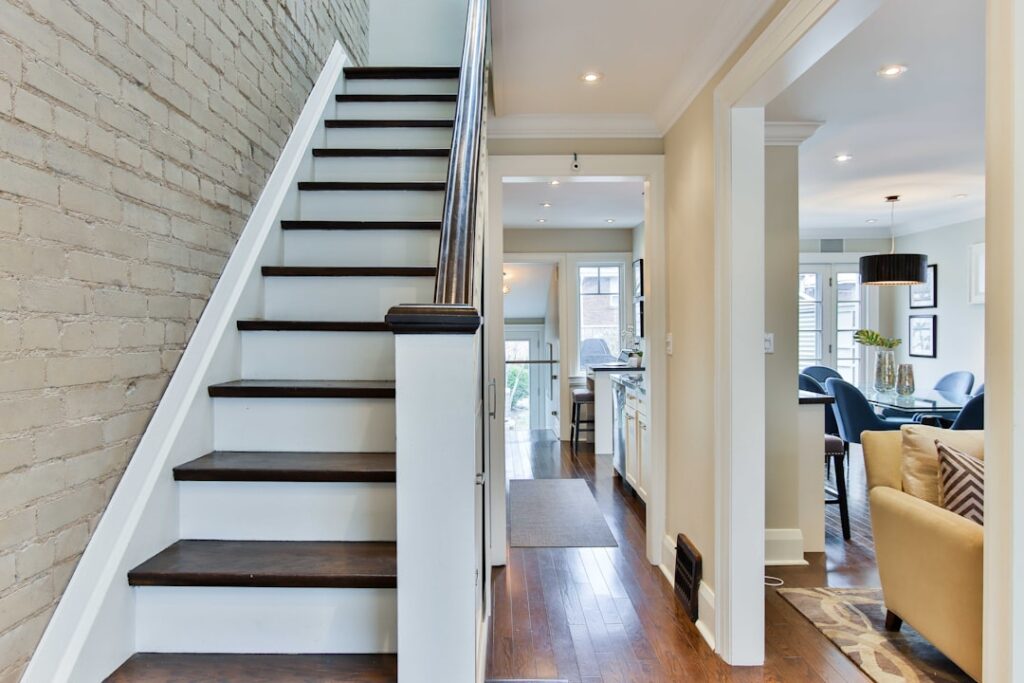
Stairs account for more household falls than any other surface in the home, and a laminate staircase without proper edge trim makes those odds worse. Choosing the right stair nosing for laminate flooring is the difference between a staircase that looks built-in and lasts twenty years, and one with chipped edges, squeaks, and a genuine trip hazard. Nosing protects the vulnerable cut edge of each plank, covers the required expansion gap, and gives your foot a defined, slip-resistant landing point. This guide walks through the profile types, the building-code dimensions that actually matter, realistic pricing, and how to fasten nosing so it never works loose.
What Stair Nosing Actually Does
Laminate planks are a photographic layer over a high-density fiberboard core. That core is tough underfoot but fragile at a cut edge, and every stair tread ends in a cut edge that takes direct impact hundreds of times a day. Nosing caps that edge with a rounded or angled profile, usually made from the same decor material as the plank or from anodized aluminum, so the impact lands on solid trim instead of exposed fiberboard.
Nosing also solves an expansion problem. Laminate needs a gap of roughly 1/4 inch to 3/8 inch at every fixed edge so it can expand and contract with humidity swings. On a stair tread there is nowhere to hide that gap under baseboard, so the nosing bridges it while still allowing movement underneath. Finally, the front edge of a nosing creates a visual break between treads. On a staircase where every tread is the same wood-look pattern, that contrast line helps your eye judge depth, which is a real safety benefit for older family members and anyone carrying laundry down in poor light.
Flush Nosing vs Overlap Nosing
Almost every profile you will find falls into one of two families, and the choice affects both looks and installation method.
- Flush (or bullnose) stair nosing sits level with the tread surface. The laminate plank butts into a rabbeted edge on the nosing, creating one continuous plane. It looks like a solid hardwood stair and feels seamless underfoot. The tradeoff: the tread plank must be glued down fully, because the nosing does not hold it in place, and installation tolerances are tight.
- Overlap stair nosing has a lip that sits on top of the laminate edge, typically adding 1/8 inch to 1/4 inch of height at the front of the tread. It is more forgiving to install, holds the plank edge down mechanically, and accommodates the expansion gap easily. The downside is a visible ridge you can feel underfoot, and on shallow treads that ridge effectively steals a little usable depth.
Contractors generally prefer flush profiles on primary staircases for the cleaner look, and overlap profiles on basement stairs or where the subfloor steps are uneven. Aluminum overlap nosings with a ribbed, anti-slip surface are the standard choice for rental properties and commercial-adjacent settings because they shrug off abuse that would destroy a laminate-wrapped profile.
Building Code and Safety Dimensions
Residential stair geometry in most of the US follows the International Residential Code, and nosing dimensions are written directly into it. If you are replacing treads or adding material thickness, these are the numbers your inspector will check:
- Nosing projection: the nose must overhang the riser below by at least 3/4 inch and no more than 1 1/4 inches on stairs with solid risers.
- Uniformity: the largest nosing projection cannot differ from the smallest by more than 3/8 inch across the whole flight. The same 3/8 inch tolerance applies to riser heights and tread depths.
- Riser height: maximum 7 3/4 inches in most IRC jurisdictions. Adding a 12 mm laminate plank plus underlayment to the bottom tread only, without adjusting, can push the first riser out of tolerance.
- Tread depth: minimum 10 inches measured nose to nose.
That uniformity rule is the one DIY installs break most often. Your brain calibrates to a stair rhythm within the first two steps; a single tread that lands 1/2 inch off is where people fall. When you add laminate and nosing to every tread, the whole flight rises together and stays uniform, but the top and bottom steps meet floors that did not change height. Measure those transition steps before you buy anything, and plan to trim riser height or feather the adjacent floor if either one drifts past 3/8 inch.
Matching Nosing to Your Laminate
Every major laminate manufacturer sells coordinated stair nosing matched to specific decor codes, and buying the matching profile is almost always worth it. The wrap material comes from the same print run, so the color and gloss level line up exactly. Expect coordinated nosing to come in 78 inch to 94 inch lengths that you cut to tread width.
When a matching profile is discontinued or the flooring came from a clearance lot, you have two workable fallbacks. Universal wood-look nosings from trim specialists come in a few dozen finishes, and a slightly contrasting tone reads as intentional far better than a near-miss does. The other route is metal: satin nickel or bronze anodized aluminum nosing pairs surprisingly well with gray and blonde laminates and adds grip. Whatever you choose, confirm the profile’s rabbet height matches your total plank-plus-adhesive thickness, usually 8 mm, 10 mm, or 12 mm. A nosing milled for 12 mm plank sitting over an 8 mm floor leaves a hollow lip that cracks within months.
Installation: Why Fastening Method Matters Most
Stairs are the one place laminate is never installed floating. Every tread piece and every riser piece gets glued down with construction adhesive, and the nosing itself needs both adhesive and mechanical fastening. A nosing held by glue alone will eventually creep loose from the daily lever action of feet landing on the overhang, and a loose nosing is a serious hazard.
- Strip the stairs to clean, sound wood or plywood. Remove any existing overhang by cutting it flush with the riser, or fill under it with a nailed-on filler strip so you have a square edge.
- Dry-fit each tread: nosing first, then plank ripped to fill back to the riser, leaving the expansion gap at the rear where the riser piece will cover it.
- Bed the nosing in a full serpentine of polyurethane construction adhesive, then screw it down through the milled recess or pre-drilled holes, roughly every 8 inches. Many systems use a metal track screwed to the subfloor that the nosing snaps into; the track handles the mechanical load while adhesive stops squeaks.
- Glue treads and risers, working bottom riser to top, and keep traffic off for 24 hours.
Budget a full day for a straight 13-tread flight. Winders and open-sided stairs with returns can double that.
What Stair Nosing Costs
Manufacturer-matched laminate nosing typically runs $25 to $60 per 78 inch to 94 inch length, and most treads need one length each since splicing mid-tread looks poor. Aluminum anti-slip profiles run $15 to $40 per length. For a standard 13-tread staircase, expect $350 to $800 in nosing alone, plus $80 to $150 for adhesive, screws, and track hardware.
Professional installation of laminate on stairs, including nosing, runs $75 to $150 per tread in most markets, so a full flight lands between $1,000 and $2,000 installed. That is notably more per square foot than flat flooring, and it reflects the fit-up time each tread demands. Getting quotes itemized per tread makes comparison between installers much easier.
Pros and Cons at a Glance
Weigh these before committing a staircase to laminate rather than carpet or hardwood treads:
- Pros: matches the laminate flooring above and below the flight, costs far less than solid wood tread replacement, wear layer resists claw and heel scratches, coordinated profiles look factory-finished, aluminum options add genuine slip resistance.
- Cons: hard and louder underfoot than carpeted stairs, laminate-wrapped noses can chip at the corner from heavy impacts, glue-down install is permanent and slow, overlap profiles create a small ridge, and a failed nosing is a safety issue rather than a cosmetic one.
Buying Checklist
Before ordering, run through this list and you will avoid the most common returns and rework:
- Count treads and add one spare length for miscuts, especially on returns or angled treads.
- Verify the profile’s rabbet or channel height against your exact plank thickness.
- Choose flush profiles for showcase stairs, overlap or aluminum for utility and rental stairs.
- Confirm projected nosing overhang lands between 3/4 inch and 1 1/4 inches after installation.
- Check that first and last riser heights stay within 3/8 inch of the rest of the flight.
- Buy polyurethane construction adhesive rated for wood-to-wood, about one 10 oz tube per three treads.
Done right, stair nosing for laminate flooring disappears into the staircase, and that is the goal: a flight that feels solid, meets code, and never announces that it was a retrofit.
Prefer to explore on your own?
See how new flooring looks in your actual room in seconds — free, no signup.
Try the free Floor Studio →