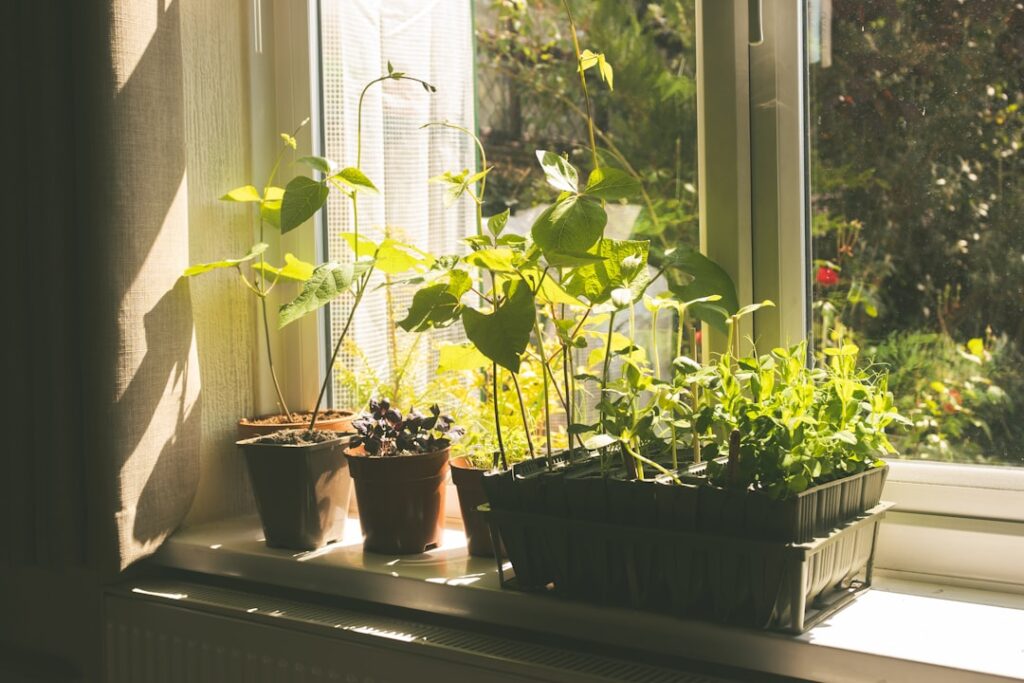
Starting seeds indoors gives you a massive head start on the growing season, saving money, expanding your plant variety options, and producing healthier transplants than store-bought seedlings. Whether you are growing vegetables, herbs, or flowers, indoor seed starting is one of the most rewarding gardening skills you can learn.
- Why Start Seeds Indoors
- What to Start Indoors vs. Direct Sow
- Timing Your Seed Starting
- Essential Supplies
- Best Seed Starting Soil Mix
- Lighting Requirements
- Step-by-Step Process
- Step 1: Prepare Your Containers
- Step 2: Sow Seeds
- Step 3: Cover and Warm
- Step 4: Provide Light
- Step 5: Water Properly
- Step 6: Thin Seedlings
- Step 7: Begin Feeding
- Step 8: Pot Up If Needed
- Troubleshooting Common Problems
- Hardening Off & Transplanting
- Frequently Asked Questions
This 2026 guide walks you through every step, from choosing the right seeds and timing your start to providing optimal light, temperature, and watering for strong, transplant-ready seedlings.
Why Start Seeds Indoors
Starting seeds indoors offers advantages that buying transplants from a garden center simply cannot match.
- Cost savings: A packet of 50+ seeds costs $2-$5, while a single nursery transplant costs $3-$6. Starting from seed can save hundreds of dollars for a full garden.
- Variety selection: Seed catalogs offer thousands of varieties, while nurseries stock only a few dozen. Rare heirlooms, specialty cultivars, and unique colors are available only from seed.
- Earlier harvest: Indoor-started plants can be 6-10 weeks ahead of direct-sown seeds, extending your growing and harvesting season significantly.
- Healthier plants: You control the growing conditions from day one, avoiding the stress, disease exposure, and root-binding that nursery plants often endure.
- Satisfaction: Growing a plant from a tiny seed to a producing garden specimen is deeply rewarding.
What to Start Indoors vs. Direct Sow
Not every plant benefits from indoor starting. Here is a guide to which plants should be started indoors and which prefer direct sowing.
| Start Indoors | Weeks Before Last Frost | Direct Sow Outdoors | Reason for Direct Sowing |
|---|---|---|---|
| Tomatoes | 6-8 weeks | Beans | Fast growing, dislikes transplanting |
| Peppers | 8-10 weeks | Peas | Fast growing, prefers cool soil |
| Eggplant | 8-10 weeks | Corn | Needs space, dislikes transplanting |
| Broccoli | 6-8 weeks | Carrots | Taproot dislikes disturbance |
| Cauliflower | 6-8 weeks | Radishes | Extremely fast growing |
| Cabbage | 6-8 weeks | Turnips | Fast growing root crop |
| Lettuce | 4-6 weeks | Squash | Fast growing, large roots |
| Herbs (basil, parsley) | 6-8 weeks | Sunflowers | Fast growing, strong taproot |
| Flowers (marigolds, zinnias) | 4-6 weeks | Nasturtiums | Easy, fast, dislikes transplanting |
Timing Your Seed Starting
Getting the timing right is critical when starting seeds indoors. Start too early and seedlings become leggy and root-bound before they can go outside. Start too late and you lose the advantage of indoor starting.
How to Calculate Your Start Date
- Find your average last frost date (check your local cooperative extension or USDA hardiness zone map).
- Count backward by the number of weeks specified on the seed packet.
- Mark that date on your calendar as your seed starting day.
2026 Seed Starting Timeline (Example: Zone 6, Last Frost April 15)
| Month | Week | Start These Seeds |
|---|---|---|
| February | Week 2 | Peppers, eggplant, onions |
| February | Week 4 | Broccoli, cauliflower, cabbage |
| March | Week 1 | Tomatoes, basil, parsley |
| March | Week 3 | Lettuce, kale, Swiss chard |
| April | Week 1 | Marigolds, zinnias, cucumbers (for transplant) |
Essential Supplies
Here is everything you need to get started. Most supplies are reusable year after year.
Must-Have Supplies
- Seed trays or cell packs: Standard 1020 trays with 72-cell inserts are the most versatile. Reusable for many seasons.
- Seed starting mix: A sterile, lightweight mix specifically formulated for germination (not regular potting soil).
- Grow lights: LED shop lights or dedicated grow lights providing full-spectrum illumination.
- Heat mat: A seedling heat mat raises soil temperature by 10-20 degrees for faster germination.
- Spray bottle: For gentle watering of surface-sown seeds and delicate seedlings.
- Labels and markers: Essential for tracking varieties and planting dates.
- Humidity domes: Clear plastic covers that retain moisture during germination.
Nice-to-Have Supplies
- Small fan: Gentle air circulation strengthens stems and prevents damping off disease.
- Timer: Automates your grow light schedule (16 hours on, 8 hours off).
- Bottom watering tray: Allows seedlings to absorb water from below, promoting stronger root growth.
- Soil thermometer: Monitors soil temperature for optimal germination.
Supply Cost Breakdown
| Supply | Cost | Reusable? |
|---|---|---|
| Seed trays & cell packs (5 sets) | $15 – $30 | Yes (3-5 years) |
| Seed starting mix (16 qt) | $8 – $15 | No (annual purchase) |
| LED grow light (2-foot, 2-pack) | $25 – $60 | Yes (5+ years) |
| Heat mat (20×20 inch) | $20 – $40 | Yes (5+ years) |
| Humidity domes (5 pack) | $10 – $20 | Yes (3-5 years) |
| Seeds (10 packets) | $20 – $50 | No (some last 2-3 years) |
| Total First Year | $98 – $215 | |
| Subsequent Years | $28 – $65 |
Set up your seed starting station in a spare room, garage, or near a laundry room sink where water access and cleanup are convenient.
Best Seed Starting Soil Mix
Regular garden soil and standard potting mix are too heavy and harbor disease organisms. Seed starting mix needs to be sterile, lightweight, and moisture-retentive.
Commercial Options
Pre-made seed starting mixes from brands like Espoma, FoxFarm, and Pro-Mix are convenient and reliable. Look for mixes containing peat moss or coconut coir, perlite, and vermiculite.
DIY Seed Starting Mix Recipe
- 4 parts coconut coir (or peat moss)
- 1 part perlite
- 1 part vermiculite
Mix thoroughly and moisten until it feels like a wrung-out sponge before filling cells. The mix should hold together when squeezed but not drip water.
Avoid These Mistakes
- Do not use garden soil (contains pathogens, too dense)
- Do not add fertilizer to the starting mix (seedlings do not need it until their first true leaves appear)
- Do not reuse seed starting mix from previous years without sterilizing it first
Lighting Requirements
Lighting is the single most important factor for starting seeds indoors successfully. Without adequate light, seedlings become tall, weak, and leggy.
Natural Light
A south-facing window provides adequate light for germination but is usually insufficient for growing strong seedlings. Even the brightest window provides only 4-6 hours of usable light, while seedlings need 14-16 hours. Window-grown seedlings almost always lean toward the light and develop weak stems.
Artificial Lighting
LED grow lights are the standard in 2026. They are energy-efficient, produce minimal heat, and provide the full light spectrum seedlings need.
Lighting Guidelines
- Duration: 14-16 hours of light per day, followed by 8-10 hours of darkness.
- Distance: Position lights 2-4 inches above seedling tops. Raise the lights as plants grow.
- Intensity: Full-spectrum LEDs rated at 2,000-4,000 lumens per 2-foot fixture are ideal.
- Timer: Use an automatic timer to maintain consistent light cycles.
Step-by-Step Process
Follow these steps for successful starting seeds indoors.
Step 1: Prepare Your Containers
Clean trays and cell packs with a 10% bleach solution if reusing from previous years. Rinse thoroughly and let dry. Fill cells with pre-moistened seed starting mix, pressing gently to eliminate air pockets.
Step 2: Sow Seeds
Plant seeds at the depth specified on the packet. A general rule: plant seeds twice as deep as their diameter. Very small seeds (lettuce, basil) should be pressed onto the surface and lightly covered. Place 2-3 seeds per cell to ensure at least one germinates.
Step 3: Cover and Warm
Place humidity domes over the trays and set them on a heat mat. Most vegetable seeds germinate best at 70-80 degrees Fahrenheit soil temperature. Check daily for moisture and germination.
Step 4: Provide Light
As soon as seedlings emerge, remove the humidity dome and position grow lights 2-4 inches above the seedlings. Begin the 14-16 hour light cycle immediately. Inadequate light in the first few days leads to irreversible legginess.
Step 5: Water Properly
Keep the soil consistently moist but never waterlogged. Bottom watering (pouring water into the tray and letting cells absorb from below) encourages deeper root growth and reduces disease risk. Allow the surface to dry slightly between waterings.
Step 6: Thin Seedlings
Once seedlings develop their first set of true leaves (the second pair that appears), thin to one plant per cell. Snip the weaker seedlings at soil level with scissors rather than pulling them, which can disturb the remaining plant’s roots.
Step 7: Begin Feeding
Once true leaves appear, begin feeding with a half-strength liquid fertilizer every 7-10 days. Fish emulsion and seaweed extract are excellent organic options.
Step 8: Pot Up If Needed
If seedlings outgrow their cells before transplanting time, move them to larger 3-4 inch pots. This prevents root binding and keeps plants growing vigorously.
Troubleshooting Common Problems
| Problem | Cause | Solution |
|---|---|---|
| Leggy seedlings (tall & thin) | Insufficient light | Lower lights to 2 inches above plants, increase light duration |
| Damping off (seedlings collapse at base) | Fungal disease from overwatering | Improve air circulation, reduce watering, use sterile mix |
| Seeds not germinating | Wrong temperature, old seeds | Use heat mat, check seed viability with wet paper towel test |
| Yellow leaves | Nutrient deficiency or overwatering | Begin feeding, let soil dry slightly between waterings |
| Mold on soil surface | Too much moisture, poor air flow | Remove dome, increase ventilation, reduce watering |
| Purple-tinged leaves | Phosphorus deficiency or cold stress | Feed with balanced fertilizer, raise temperature above 60 degrees F |
| Seedlings falling over | Weak stems from no air movement | Add a small fan for gentle air circulation |
Hardening Off & Transplanting
Seedlings grown indoors must be gradually acclimated to outdoor conditions before transplanting. This process, called hardening off, is essential for transplant success.
Hardening Off Schedule
- Day 1-2: Place seedlings outdoors in a sheltered, shaded spot for 1-2 hours. Bring inside.
- Day 3-4: Increase outdoor time to 3-4 hours with some filtered sunlight.
- Day 5-6: Move to 5-6 hours with more direct sun exposure.
- Day 7-8: Full-day outdoor exposure in direct sunlight. Bring inside at night if frost is possible.
- Day 9-10: Leave outdoors overnight if temperatures stay above 50 degrees F.
- Day 11+: Transplant into the garden.
Transplanting Tips
- Transplant on a cloudy day or in the late afternoon to reduce transplant shock.
- Water seedlings thoroughly before removing from cells.
- Dig the hole slightly larger than the root ball.
- For tomatoes, bury the stem up to the first set of leaves for stronger root development.
- Water deeply after planting and mulch around the base.
- Protect from wind and intense sun for the first few days with row cover if needed.
For your outdoor garden beds and pathways, consider what flooring or ground cover works best. Our concrete floor guide covers patio and pathway options that complement garden spaces.
Frequently Asked Questions
When should I start seeds indoors?
Most vegetables should be started 6-10 weeks before your last frost date. Peppers and eggplant need 8-10 weeks, tomatoes need 6-8 weeks, and lettuce and herbs need 4-6 weeks. Check your seed packet for specific timing recommendations.
Do I need grow lights for starting seeds indoors?
For best results, yes. While a bright south-facing window can work for germination, seedlings need 14-16 hours of light daily to develop strong, stocky stems. Window light alone almost always produces leggy, weak seedlings. Basic LED shop lights cost $25-$60 and make a dramatic difference.
What temperature do seeds need to germinate?
Most vegetable seeds germinate best at 70-80 degrees Fahrenheit soil temperature. Cool-season crops (lettuce, broccoli) can germinate at 60-70 degrees, while warm-season crops (peppers, eggplant) prefer 75-85 degrees. A seedling heat mat is the easiest way to maintain optimal temperature.
How often should I water seedlings?
Keep the soil consistently moist but not soggy. For most setups, this means watering every 1-2 days. Bottom watering is preferred. The soil surface should be allowed to dry slightly between waterings to prevent damping off disease.
Why are my seedlings leggy?
Legginess is almost always caused by insufficient light. Seedlings stretch toward the light source, growing tall and thin stems that cannot support themselves. The fix is to position grow lights 2-4 inches above the seedlings and provide 14-16 hours of light daily. A small fan also helps by forcing stems to strengthen against air movement.
Can I use regular potting soil for seed starting?
No. Regular potting soil is too heavy, retains too much moisture, and may contain disease organisms that kill tender seedlings. Use a dedicated seed starting mix made from coconut coir or peat moss with perlite and vermiculite.
Last updated: March 2026