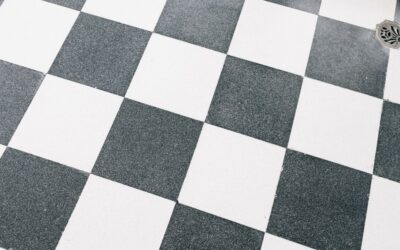
Peel the backing, press it onto the subfloor, and move on to the next piece. Stick down flooring is about as straightforward as installation gets, which explains why it has become a go-to product for budget renovations, rental property refreshes, and weekend DIY projects. But simplicity does not mean you can skip the details. Subfloor prep, temperature control, and product selection determine whether your stick-down floor lasts ten years or starts peeling in ten weeks.
How Stick Down Flooring Differs From Other Install Methods
Three installation methods dominate the residential flooring market: floating (click-lock), glue-down with separate adhesive, and stick-down with factory-applied adhesive. Stick down flooring falls into the self-adhesive category, meaning the bonding agent is already applied to the back of each tile or plank. You simply remove a paper or film liner and press the piece into place.
Floating floors rely on tongue-and-groove edges that snap together, sitting loosely on an underlayment pad. Glue-down products require you to trowel a wet adhesive onto the subfloor and work within an open time window. Stick down eliminates both the underlayment and the separate adhesive, which reduces material costs and simplifies the tool list. All you really need is a utility knife, a straightedge, a tape measure, and a roller.
Advantages That Make Stick Down Worth Considering
Cost is the biggest draw. Peel-and-stick vinyl tiles start at $0.50 per sq ft, and even premium options from brands like TrafficMaster and Achim rarely exceed $2.50 per sq ft. Compare that to click-lock LVP at $2.00 to $5.00 per sq ft, and the savings are substantial for large areas.
- Thin profile: Most stick down tiles and planks measure 1.5mm to 3mm thick, adding almost nothing to your floor height. Doors rarely need trimming.
- No underlayment required: The adhesive bonds directly to the subfloor, eliminating $0.20 to $0.50 per sq ft in underlayment costs.
- Quiet underfoot: Because the flooring is bonded to the subfloor, there is no hollow drumming sound that plagues some floating floors.
- Easy partial repairs: A damaged tile can be heated with a hair dryer, peeled up, and replaced individually without disturbing surrounding pieces.
Drawbacks You Should Know Before Buying
Stick down flooring is not without compromises. The thinner construction means less rigidity and less ability to mask subfloor imperfections. Every bump, ridge, and trowel mark in the subfloor will telegraph through the surface within a few months. Floating LVP with a rigid SPC core hides minor imperfections far better.
Durability is the other concern. Budget stick down flooring typically has a wear layer of 4 to 8 mils, compared to 12 to 28 mils on mid-range click-lock LVP. That thinner wear layer means less resistance to scratches, scuffs, and fading. In high-traffic hallways and kitchens, a 6-mil wear layer may show visible paths within 3 to 5 years. For bedrooms, closets, and low-traffic spaces, the thinner wear layer is perfectly adequate.
Adhesive failure is the most common complaint in online reviews. Nearly every case traces back to one of three causes: dusty subfloor, installation temperature below 65 degrees Fahrenheit, or moisture coming through a concrete slab. Prevent all three and the adhesive performs reliably.
Choosing the Right Product
Not all peel-and-stick products are created equal. Here is what separates reliable options from the ones that end up in landfills within a year.
- Wear layer thickness: Look for at least 6 mils for residential use. Products with 12-mil wear layers exist in the stick-down category and are worth the premium for kitchens and entryways.
- Adhesive type: Pressure-sensitive adhesive allows repositioning during installation and can be removed later without destroying the subfloor. Permanent adhesive creates a stronger bond but makes removal much harder.
- Core material: Standard peel-and-stick tiles use flexible PVC. Some newer products feature a semi-rigid core that bridges minor subfloor imperfections better than traditional flexible tiles.
- Realistic pattern: Higher-end stick-down planks use multi-layer printing and embossed textures that mimic real wood grain. Budget products often have flat, repetitive patterns that look obviously fake.
Step-by-Step Installation Process
A 150 sq ft room takes most DIYers about 2 to 4 hours from start to finish, not counting subfloor prep time.
Prepare the Subfloor
Sweep and vacuum thoroughly, then damp-mop to pick up fine dust. Fill any cracks, holes, or low spots with floor-patching compound and sand smooth once dry. The subfloor must be flat within 3/16 inch over 10 feet. On concrete, run a moisture test; readings above 5 lbs per 1,000 sq ft on a calcium chloride test mean you need a moisture barrier or a different product.
Plan Your Layout
Snap chalk lines at the room’s center. Dry-lay tiles along both axes to confirm that edge pieces at opposite walls are at least half a tile wide. Adjust your starting point if needed. Stagger plank end joints by at least 6 inches row to row for a natural look and stronger overall bond.
Peel, Place, and Roll
Work from the center outward, one quadrant at a time. Peel the backing from each tile, align it precisely, and press down. After every 8 to 10 tiles, go back over the section with a 75-lb floor roller or a hand J-roller, applying firm pressure to ensure full adhesive contact. Pay extra attention to edges and corners, where lifting is most likely to start.
Cut and Finish
Score vinyl tiles on the face side with a sharp utility knife against a metal straightedge. Bend along the score and the tile snaps cleanly. For curves around toilet flanges or door frames, use a cardboard template and transfer the shape to the tile. Avoid using baseboards to cover large gaps; precision cuts look better and last longer.
Maintenance and Longevity Tips
Sweep or vacuum daily in high-traffic zones and damp-mop weekly with a pH-neutral vinyl cleaner. Avoid steam mops, which can soften the adhesive and cause tiles to shift. Place felt pads under all furniture legs and use protective mats under rolling office chairs. Direct sunlight through large windows can cause adhesive softening and color fading; UV-filtering window treatments extend the floor’s life significantly.
With proper subfloor prep, correct installation, and regular maintenance, quality stick down flooring lasts 8 to 15 years in residential settings. Budget products in high-traffic areas may need replacement in 3 to 5 years. Factor the replacement timeline into your cost comparison when deciding between stick-down and more durable click-lock alternatives.
Who Should Choose Stick Down Flooring?
Stick down products make the most sense for landlords refreshing rental units between tenants, homeowners covering a small room on a tight budget, and DIYers tackling their first flooring project. The low cost per sq ft, minimal tool requirements, and forgiving installation process lower the barrier to entry. If you need a permanent, high-durability solution for a busy family home, click-lock LVP or glue-down LVT with a thicker wear layer will serve you better over the long run.
Prefer to explore on your own?
See how new flooring looks in your actual room in seconds — free, no signup.
Try the free Floor Studio →