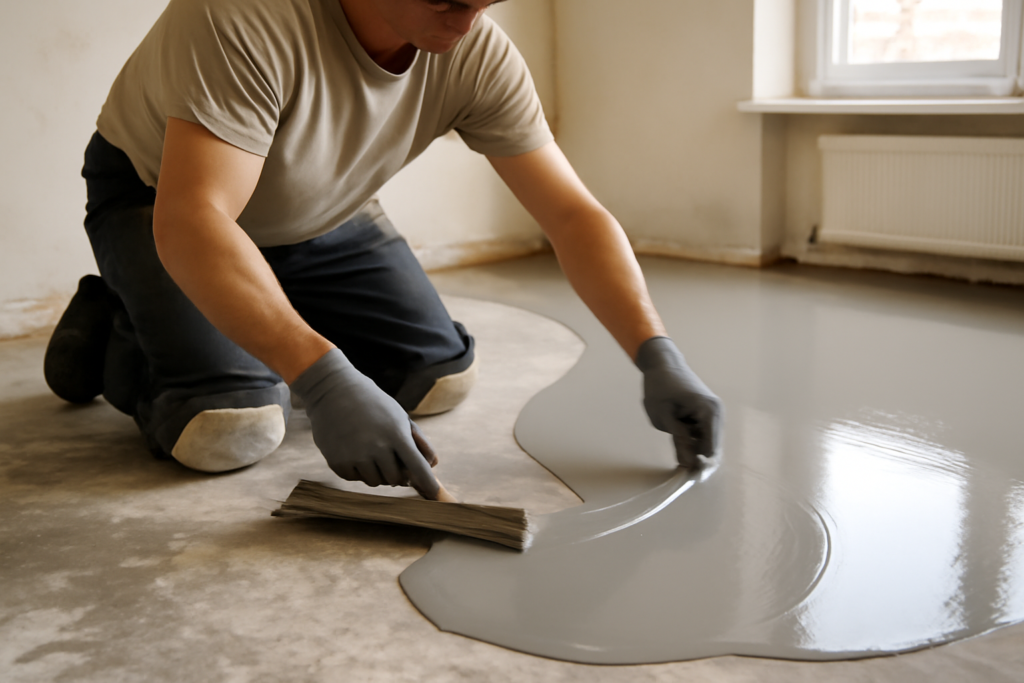
The most common reason new floors fail early is not the flooring itself; it is the uneven subfloor underneath. Subfloor leveling compound, also sold as self-leveling underlayment or floor leveler, is a cement-based product that flows out and cures into a smooth, flat surface ready for tile, vinyl, laminate, or hardwood. Skip this step on a wavy floor and you get cracked grout, flexing planks, and hollow spots. Done right, it gives every floor above it a true, dead-flat foundation. The job is approachable, but it is unforgiving about prep and timing, so understanding the process before you mix is essential.
What Subfloor Leveling Compound Does
Leveling compound is a pourable, fast-setting cementitious slurry that flows into low spots and self-levels under its own weight, filling depressions and smoothing transitions. Some products are true self-levelers that find their own flat plane; others are trowel-applied patches and feathering compounds for smaller corrections. Both turn an irregular slab or wood subfloor into a flat substrate.
It is used over concrete slabs and properly prepared wood subfloors to correct dips, divots, trowel ridges, and gradual slopes. It is not a structural product; it cannot fix a bouncy or failing subfloor, only flatten the surface of a sound one. Reinforce or repair structural problems first, then level.
Substrate Prep Comes First
Most leveling failures trace back to bad prep, not bad product. The surface must be clean, sound, and ready to bond.
- Remove all old adhesive, paint, sealers, dust, and debris. The compound bonds to the substrate, not to a layer of grime.
- Repair cracks and secure any loose subfloor sections. On wood, screw down squeaky or loose panels.
- Check the floor with a long straightedge or level to map the high and low spots so you know how thick to pour.
- Dam off doorways, drains, and edges so the liquid compound cannot escape the area, because it flows freely and will run wherever gravity takes it.
Priming Is Not Optional
Primer is the step DIYers most often skip, and it is the one that wrecks the most jobs. Primer does two critical things: it promotes a strong bond between the compound and the substrate, and it seals porous surfaces so the substrate does not suck water out of the mix too fast, which causes weak, dusty, or debonded results. On wood subfloors, primer also helps the compound grip a surface it otherwise bonds to poorly.
Apply the manufacturer’s recommended primer evenly and let it dry to the specified state, often a tacky or clear film, before pouring. Highly porous surfaces may need two coats. Always follow the specific primer and timing instructions on your product, since they vary by brand.
Mixing and Pouring
Self-leveling compound sets fast, sometimes workable for only 15 to 20 minutes, so organization matters. Have everything staged before you open a bag. Mix with cold water in the exact ratio on the label, using a drill and paddle mixer, to a lump-free, pourable consistency. Do not eyeball the water; too much weakens the compound and causes cracking, too little keeps it from flowing.
Pour in a steady, continuous motion, working from one side toward your exit. Help it spread with a gauge rake or smoothing trowel, and use a spiked roller to release trapped air bubbles. Because it self-levels, you guide it rather than screed it flat. For larger floors, mix and pour in overlapping batches quickly so the edges blend before they skin over.
Pour Thickness: Feathering vs. Full Pour
How thick you go depends on the product and the problem.
- Feathering: Tapering a thin skim, sometimes down to a feather edge, to smooth minor dips and trowel marks. Use a feathering or patch compound rated for thin application.
- Standard pour: Most self-levelers pour in a range commonly from about 1/8 inch up to 1 inch in a single application, with the exact minimum and maximum on the bag.
- Deep fills: For depressions deeper than the product’s maximum, build up in lifts or use an aggregate-extended mix per the manufacturer, since over-thick pours can crack.
Always respect the stated minimum and maximum thickness. Pour too thin and it can crack or fail to bond; pour too thick in one shot and it may crack from shrinkage.
Cure and Dry Times
Two clocks run after a pour, and people confuse them. Set time is when the compound is firm; many self-levelers are walkable within a few hours, often 2 to 4 hours. Dry or cure time before installing finish flooring is longer and depends on the product and what goes on top, typically ranging from overnight to 24 hours or more, with moisture-sensitive flooring like vinyl and wood needing the longest and a moisture check.
Do not rush the topcoat. Trapping moisture under vinyl or wood causes adhesive failure and cupping. Follow the label’s cure times, and on concrete, test moisture before laying any moisture-sensitive floor.
Common Mistakes and How to Avoid Them
Most leveling jobs that go wrong share a short list of causes, and every one is preventable. Keep these front of mind:
- Skipping primer: The number-one cause of debonding and dusty, weak results. Always prime per the product instructions.
- Wrong water ratio: Too much water weakens the mix and invites cracking; too little stops it from flowing and self-leveling.
- Working too slowly: The material sets fast, so a single person pouring a large floor can get caught with a batch skinning over before it blends. Recruit a helper.
- Pouring outside the thickness limits: Too thin cracks or fails to bond; too thick in one lift shrinks and cracks. Respect the bag’s minimum and maximum.
- Installing flooring too soon: Trapping moisture under vinyl or wood causes adhesive failure and cupping. Wait for the full cure.
One more field reality: leveling compound is not a structural fix. If the floor flexes or bounces, address the framing or subfloor first, because a rigid compound poured over a moving substrate will crack along the same lines that move.
Final Tips for a Flat Floor
Work fast once mixed, keep a helper ready to mix the next batch, and never add water to a stiffening batch to extend it. Clean your tools immediately, because cured compound is brutal to remove. Get the prep, priming, and timing right, and subfloor leveling compound rewards you with a flat, solid base that lets your new flooring lie true and last for years.
Prefer to explore on your own?
See how new flooring looks in your actual room in seconds — free, no signup.
Try the free Floor Studio →