Most homeowners ruin grout long before they ruin tile, and the culprit is almost always the wrong cleaner. The right tile cleaning solution respects the pH of the surface, dissolves grime without etching, and rinses clean without leaving a slippery film. Get this wrong on natural stone and you can dull a $12 per sq ft travertine in a single mop. Get it right on porcelain and a $0.30 mix of warm water and a neutral pH cleaner outperforms anything in a $9 spray bottle.
Match the Cleaner to the Tile
Ceramic and porcelain tolerate a wider pH range than natural stone, but tolerate is not the same as benefit. Glazed ceramic at 4.5 Mohs and porcelain at 7 Mohs can handle mildly acidic and mildly alkaline cleaners. Slate, marble, travertine, and limestone are calcium-based and will etch on contact with anything below pH 7.
For everyday porcelain mopping, dilute a neutral cleaner like Bona Hard-Surface Floor Cleaner or Aqua Mix Concentrated Stone & Tile Cleaner at 2 oz per gallon. For natural stone, stick with a stone-safe formula like StoneTech Revitalizer or MB-1 from MB Stone Care. Pine-Sol Original at pH 10 to 11 works on ceramic but is rough on grout sealer over time.
DIY Mixes That Actually Work
You do not need a $25 jug for routine cleaning. A homemade neutral mix handles most porcelain and ceramic just fine, and it is gentle on grout sealer.
- Neutral daily mix: 1 gallon warm water + 1/4 cup white vinegar + 2 drops Dawn dish soap. Use only on glazed ceramic, porcelain, or sealed grout, never natural stone.
- Heavy grease mix: 1 gallon hot water + 1/2 cup OxiClean Versatile + 1 tablespoon Dawn. Strong on kitchen floors near range hoods.
- Grout brightener: 1/2 cup baking soda + 1/4 cup hydrogen peroxide 3% + 1 teaspoon dish soap. Scrub with a grout brush, dwell 10 minutes, rinse twice.
- Stone-safe mix: 1 gallon warm water + 1 tablespoon Castile soap. Never add vinegar, lemon, or ammonia.
Skip the vinegar on travertine and marble. The calcium carbonate dissolves on contact, leaving a dull white halo that is almost impossible to polish out without diamond pads.
How to Mop Without Streaks
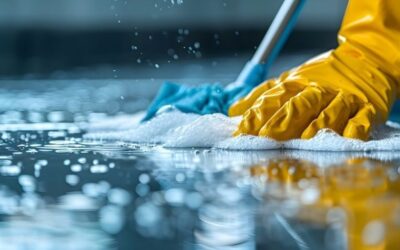
Streaks come from three places: too much cleaner, dirty water, and the wrong mop head. Rinse the mop head in fresh water after every 25 sq ft on a soiled floor. Swap the bucket water once it turns gray. A microfiber flat mop like the O-Cedar EasyWring at $30 outperforms a string mop because it leaves about 70% less standing water on the surface, which means faster drying and fewer mineral spots.
Work in 4 ft sections, drag the mop in a figure-8 pattern, and finish with a dry microfiber pass. On 24 by 24 inch porcelain, you can clean a 200 sq ft kitchen in under 12 minutes once your bucket setup is dialed in.
Tackling Grout Without Wrecking the Sealer
Most homeowners scrub grout with bleach and wonder why it darkens again in three weeks. Bleach strips the penetrating sealer, which lets dirt soak right back into the porous cementitious joint. Use a hydrogen peroxide based product like OxiClean or a dedicated grout cleaner such as Aqua Mix Heavy-Duty Tile & Grout Cleaner. Reseal every 12 to 18 months with a quality sealer like Miracle Sealants 511 Impregnator at around $35 per pint.
For deeply stained grout, an oxygen bleach paste left to dwell for 15 minutes lifts more without the chlorine damage. A stiff nylon grout brush, not a metal one, protects the joint edges.
Steam Mops, Yes or No
Steam mops like the Bissell PowerFresh and Shark Steam Pocket can be excellent on properly installed, fully cured porcelain over uncoupling membrane like Schluter DITRA. They are bad news on natural stone, vinyl-tile look-alikes, and any tile with hairline cracks where moisture can reach the substrate. If the install is over plywood with mastic instead of thinset, steam can soften the adhesive over time.
Run steam mops on the lowest mist setting for routine cleaning. Higher steam settings are for tough kitchen grease, not weekly maintenance.
What to Avoid
Some products feel like they belong on tile but quietly cause damage. A short list to keep off the floor:
- Ammonia-based glass cleaners on grout. They strip sealer and yellow over time.
- Oil soaps like Murphy Oil Soap on porcelain. They build up film and make floors slippery.
- Bleach on colored grout. It fades pigment within a few applications.
- Acid-based bathroom cleaners on natural stone. Even one pass etches the surface.
- Wax-based mop-and-shine products on porcelain. They yellow and trap dirt.
Routine That Keeps Tile Looking New
The best tile cleaning solution is paired with a routine that prevents soil from setting in the first place. Sweep or run a robot vacuum like a Roomba j7+ or a Roborock S8 daily in high-traffic kitchens, mop weekly with a neutral cleaner, and deep clean the grout every six months. A doormat at every exterior entry traps about 80% of incoming grit, which is the abrasive that actually wears down glaze over years. Two doormats stacked, a coarse coir mat outside and a microfiber wipe-down mat inside, catch nearly all tracked-in soil before it lands on tile.
Stick with a stone-safe formula on natural materials, use a neutral pH cleaner on porcelain, and reserve heavy-duty alkaline cleaners for once-a-quarter deep cleaning. Done this way, a quality install lasts 30 plus years looking sharp.
Seasonal Deep Clean Schedule
Twice a year, set aside 90 minutes for a true deep clean. Spring and fall are the right intervals because grit tracks heaviest in muddy and salty seasons. Pull rugs, runners, and floor mats out of the room. Vacuum thoroughly, including corners and toe-kick gaps under cabinets. Mix a stronger alkaline cleaner, around 4 oz per gallon for porcelain and ceramic only, and let it dwell for 5 to 8 minutes before scrubbing. A dwell time gives the chemistry time to break the bonds holding grease and soap scum to the glaze.
Use a soft-bristle deck brush on the floor and a small detail brush for corners and grout lines. Rinse twice with clear water. The double rinse is what separates a deep clean from a cleaner-residue film that attracts dirt within a week. Pro cleaners charge $0.50 to $1.25 per sq ft for this service, so the DIY savings are real on a 400 sq ft kitchen.
Prefer to explore on your own?
See how new flooring looks in your actual room in seconds — free, no signup.
Try the free Floor Studio →