Anyone who has cut ceramic or porcelain tile knows the problem: the cut itself is easy enough, but the fresh edge comes off rough, sharp, and often slightly chipped. That is where a tile file earns its place in the toolbox. This simple hand abrasive smooths and dresses cut tile edges, knocks down the razor-sharp burr a snap cutter or wet saw leaves behind, and lets you fine-tune a cut for a clean, professional fit. For small jobs and detail work, it is often faster and more precise than firing up a power tool.
In this guide I will explain what a tile file actually is, the types you will encounter, and the hand technique that turns a jagged cut edge into a smooth, safe one ready to set into your wall or floor.
What a Tile File Is
A tile file is a hand tool coated with an abrasive hard enough to cut through fired ceramic and porcelain, which ordinary metal files cannot do. Most modern versions use a diamond grit abrasive bonded to a flat or rounded surface, because diamond is one of the few materials tough enough to grind glazed tile without simply wearing out. Older or budget versions may use a coarse carbide or silicon-carbide abrasive, which works on softer ceramic but struggles with dense porcelain.
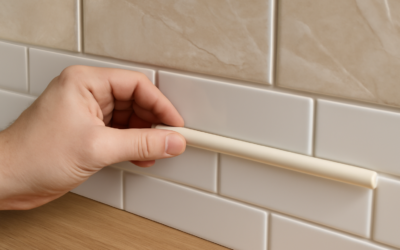
The tool comes in a few forms. Some are flat rectangular blocks or paddles you grip in one hand, some are shaped like a traditional file with a handle, and some are diamond-coated sponges or pads that conform slightly to the edge. There are also rubbing stones, essentially a coarse abrasive block, that do a similar job on softer tile. What they all share is the ability to abrade the hard edge of a tile by hand, giving you control that a spinning grinder does not.
Why You Need One
A freshly cut tile edge is genuinely sharp, sharp enough to slice a finger, and it is usually rough and slightly ragged, especially where the glaze meets the cut. Left as is, that edge is unpleasant to handle, can catch and chip further, and looks unfinished anywhere it will be visible, such as an exposed outside corner, a windowsill return, or the edge of a niche. Dressing the edge with a file makes it safe to handle and clean to look at.
Just as valuable is fine-tuning the fit. Tile cuts rarely land perfectly the first time, and a cut that is a hair too long or that needs a slight relief to clear a pipe or an uneven wall can be dressed back with a few strokes of the file rather than recutting the whole piece. That kind of small, controlled material removal is exactly what hand filing excels at, and it saves tiles that would otherwise end up in the scrap pile from an over-aggressive saw cut.
Choosing the Right File for the Tile
Match the abrasive to the tile you are cutting. For dense porcelain, which is extremely hard, you want a genuine diamond file or diamond pad, because coarse carbide abrasives dull quickly against porcelain and leave you working twice as hard. For softer wall ceramic, a carbide rubbing stone or a coarse diamond block both work well, and the softer material files down quickly with modest effort.
Grit matters too. A coarser abrasive removes material faster and is right for knocking down a substantial burr or reshaping an edge, while a finer grit gives a smoother, more polished finish for edges that will be visible. Many people keep both, using a coarse file to do the bulk removal and a finer pad or a higher-grit diamond hand pad to smooth the edge afterward. For glazed edges you want to keep looking crisp, finishing with a finer grit prevents the ragged, chalky look a coarse file alone can leave on the glaze.
The Filing Technique
Good technique is mostly about direction and pressure. Hold the tile firmly, ideally clamped or braced against a solid surface so it cannot shift, and work the file along the cut edge in one consistent direction rather than sawing back and forth, which can chip the glaze. Angle the file slightly to ease, or chamfer, the top corner where the glaze meets the cut; a tiny beveled edge there both removes the sharpness and looks cleaner than a dead-square corner that is prone to chipping.
Use moderate, even pressure and let the abrasive do the work rather than forcing it. Bearing down too hard on a glazed edge can pop chips off the surface, which is the opposite of what you want. Work in stages, checking the edge frequently, and stop as soon as it is smooth and the fit is right, because you cannot put material back. Removing a little at a time and testing the fit against the adjoining tile keeps you from filing past the line.
Wet Versus Dry Filing
You can file tile edges dry, but working with a little water offers real advantages, especially with diamond abrasives. Wetting the file and the edge keeps down the fine dust that tile grinding produces, and that dust is something you genuinely want to avoid breathing, particularly from porcelain and any material that may contain silica. Water also cools the abrasive and helps it cut cleaner, reducing the chance of overheating a diamond pad.
Keep a bucket or a wet sponge handy, dip the file or wet the edge periodically, and wipe away the resulting slurry to check your progress. If you file dry, do it in a ventilated area and wear a proper dust mask or respirator, because dry-grinding tile throws off a lot of very fine particulate. Either way, eye protection is smart, since small chips can flick off the edge as you work. A little water and basic protection make the job cleaner and safer.
Files Versus Power Tools
It helps to know where a hand file fits among the other edge-finishing options. For high-volume work, an angle grinder fitted with a diamond cup wheel or a diamond polishing pad removes material fast and can even polish a cut edge to a shine, but it is aggressive, throws dust, and takes practice to control without gouging. A wet saw with a good blade leaves a cleaner cut to begin with, reducing how much finishing any edge needs. These tools shine when you have many edges to dress.
The hand file wins on precision, control, and convenience for small jobs. When you only have a few edges to smooth, need to ease a single sharp corner, or must fine-tune a fit by a hair, dragging out and setting up a power tool is overkill, and the file does the job in less time with zero risk of an over-aggressive slip. Many tile setters use both: the saw and grinder for the bulk of the cutting and rough finishing, and the file for the last touches and the detail work that power tools are too blunt to handle gracefully.
Finishing and When to Reach for a File
Once the edge is smooth, run a finger along it, carefully, to confirm the sharpness is gone and the surface feels even. For visible edges, a final pass with a fine diamond pad leaves a clean, slightly softened profile that looks intentional and holds up better than a raw saw cut. Wipe the tile clean of slurry and dust before setting it, so nothing interferes with the thinset bond or shows through on a polished edge.
A tile file is not a replacement for a wet saw when you have dozens of cuts to make, but for smoothing edges, easing corners, fine-tuning a stubborn fit, and finishing the occasional exposed edge, it is indispensable. It is inexpensive, requires no power, and gives you a level of control that power tools cannot match on small work. Keep one in your tile kit, learn the simple stroke-in-one-direction technique, and you will turn rough, sharp cuts into clean, safe, professional-looking edges every time.
Prefer to explore on your own?
See how new flooring looks in your actual room in seconds — free, no signup.
Try the free Floor Studio →