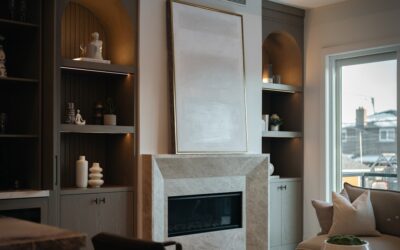
The hairline ridges you see on a freshly painted wall at 9 a.m. sunlight are not a paint problem — they are a drywall finish problem that was decided weeks earlier and never disclosed by the contractor. The Gypsum Association publishes six standardized types of drywall finishes (Levels 0 through 5) and most builders default to Level 4 unless you specifically request Level 5. Knowing the difference saves you from staring at telegraphed seams for the next decade or paying for a finish you do not need.
- What the Levels Actually Mean
- Level 0 and Level 1: Concealed Spaces
- Level 2: Garages, Storage, and Tiled Walls
- Level 3: Textured Walls Only
- Level 4: The Residential Standard
- Level 5: The Skim Coat Solution
- Cost Differences Between Levels
- When to Pay for Level 5 and When to Skip It
- Primer and Paint Choices Affect Final Look
- What to Ask Your Contractor
- How to Spot Finish Problems After the Fact
What the Levels Actually Mean
The Gypsum Association GA-214 standard defines six levels based on the number of joint compound coats and the final treatment. Each step up adds labor and material cost while improving how the wall reads under different lighting conditions.
Level 0 and Level 1: Concealed Spaces
Level 0 means drywall hung with no taping or finishing — used in temporary construction or behind permanent furring. You will never see this in a residential remodel except briefly during installation.
Level 1 includes tape embedded in joint compound on all joints and interior angles. Tool marks and ridges are acceptable. This level shows up in plenum spaces above suspended ceilings, attics, and behind walls — places nobody looks.
Level 2: Garages, Storage, and Tiled Walls
Level 2 adds a thin coat of joint compound over the tape and fasteners. Tool marks remain visible and the surface is rough. This is the standard finish for garage walls (where code-required Type X drywall meets the firewall requirement without needing a pretty surface), unfinished basements, and walls that will be covered with tile or paneling.
If your bid says “drywall to Level 2 in garage and laundry,” that is normal. If it says Level 2 in the living room, push back.
Level 3: Textured Walls Only
Level 3 includes two coats of joint compound over the tape plus one coat on fasteners and accessories. The surface is sanded smooth enough to receive heavy texture — knockdown, orange peel, or skip trowel.
This is the appropriate finish under textured walls in entry-level production homes. It is not appropriate under flat or eggshell paint, semi-gloss, or anywhere directional light will hit the wall at a low angle.
Level 4: The Residential Standard
Level 4 adds a third coat of joint compound on joints and interior angles plus a second coat on fasteners. The surface is sanded smooth and free of tool marks. This is the default for most residential remodels and new construction with flat or eggshell paint, light wallpaper, or matte finishes.
Level 4 looks great straight on. Where it falls short: under raking light (windows along a wall, recessed cans pointed at a wall) or under any glossier sheen than eggshell. Tape ridges, butt joint humps, and screw dimples can telegraph.
Level 5: The Skim Coat Solution
Level 5 adds a thin skim coat of joint compound (or a sprayed and back-rolled skim) over the entire wall surface, not just the joints. After sanding, the wall reads as a single uniform plane.
Specify Level 5 in any of these conditions:
- Walls receiving semi-gloss, high-gloss, or any specialty paint finish
- Walls with strong raking light from clerestory or large windows
- Walls receiving wallpaper, especially metallic, grasscloth, or thin papers
- Accent walls in modern, minimalist interiors with no other detail to distract
Skim coat methods vary — full hand-troweled compound, sprayed Level 5 primer surfacers like Sheetrock Tuff-Hide, or roll-on skim products. All deliver similar results when applied correctly.
Cost Differences Between Levels
Realistic labor costs per square foot of drywall (hang, tape, finish):
- Level 2: $1.30 to $1.80 per sq ft
- Level 3: $1.60 to $2.20 per sq ft
- Level 4: $1.90 to $2.60 per sq ft
- Level 5: $2.50 to $4 per sq ft
On a 2,000 sq ft remodel, jumping from Level 4 to Level 5 typically adds $1,200 to $2,800. That is the cost of never noticing tape lines under a south-facing window for the next 20 years.
When to Pay for Level 5 and When to Skip It
Spend on Level 5 in: open-plan living rooms with large windows, primary bedrooms with directional light, hallways with sconces or recessed wall washers, and any room receiving a finish above eggshell sheen.
Skip Level 5 in: bedrooms with diffuse light and matte paint, dining rooms with heavy art or wallpaper that hides imperfections, closets, and laundry rooms. Level 4 with a quality primer (Sherwin-Williams ProBlock, Zinsser 123) and a satin or eggshell paint covers more sins than people realize.
Primer and Paint Choices Affect Final Look
Finish level interacts with primer and paint. PVA primer (the cheap stuff included in most builder packages) sinks into joint compound differently than into paper, exaggerating the texture differential. A higher-quality acrylic drywall primer like Sherwin-Williams Drywall Pro/Mar or Benjamin Moore Fresh Start equalizes absorption and reduces joint flashing.
Two coats of quality paint matter as much as the finish level. Skimping on paint coats reveals every drywall imperfection regardless of finish quality.
What to Ask Your Contractor
Before signing a drywall contract, ask three questions:
- What Gypsum Association finish level are you bidding on each room?
- How many coats of joint compound on butt joints, tapered joints, and fasteners?
- Will you install a corner bead or paper-faced corner bead at outside corners?
Get the answers in writing. The difference between “drywall finish included” and “GA-214 Level 5 finish in living room and primary bedroom, Level 4 elsewhere” determines what your walls look like for the next 30 years.
How to Spot Finish Problems After the Fact
Once drywall is painted, finish issues become harder to fix but easier to diagnose. Walk each wall at three different times of day, ideally with a 500-watt halogen work light placed parallel to the wall about 24 inches off the surface. Tape ridges appear as horizontal bands at 4 and 8 feet up the wall (the seams between 4×8 sheets). Butt joint humps show as 8 to 12 inch wide vertical lines. Fastener pops appear as small circular dimples or bumps. Document each issue with photos and measurements before calling the contractor back — many warranties cover finish issues for the first year.