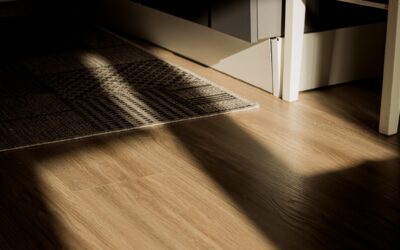
Vinyl laminate click flooring is the catch-all name homeowners use for floating, tongue-and-groove planks that snap together edge-to-edge without any glue or nails. The term blends two related products, luxury vinyl plank and traditional laminate, both of which now use nearly identical angle-and-tap or fold-down click systems. Understanding the difference between the two, and how the click mechanism actually works, is the key to buying a floor that installs in a weekend and lasts for decades.
The appeal is obvious the first time you install it. There’s no adhesive, no drying time, and no walking on wet mastic. You lay an underlayment, click the planks together, and walk on the floor the same afternoon. That convenience has made click flooring the most popular DIY floor in America, and it’s why remodelers reach for it on tight timelines.
What “Click” Flooring Actually Means
The click refers to the interlocking edge profile milled into each plank. Most systems use a two-step angle-tap method: you insert a plank’s long edge into the previous row at roughly a 20- to 30-degree angle, drop it flat, and it locks. The short ends then either tap together horizontally or fold down into place. Once locked, the joints resist separating even under foot traffic, which is why a properly installed floating floor stays tight.
Because the floor floats, it isn’t fastened to the subfloor at all. It rests on top, held flat by its own weight and the perimeter walls, and it expands and contracts as a single sheet with temperature and humidity. That’s why every click floor requires a 1/4- to 3/8-inch expansion gap around the entire perimeter, hidden later by baseboard or quarter-round. Skip that gap and the floor will buckle when it grows on a hot day.
The click system is engineering-agnostic to the material above it. The same locking profile appears on rigid vinyl and on high-pressure laminate, which is why homeowners lump them together as vinyl laminate click flooring even though the plank bodies are made of very different stuff.
Vinyl vs. Laminate: The Core Difference
The distinction lives in the core. Luxury vinyl plank is built on a plastic-based SPC or WPC core that is 100 percent waterproof. Traditional laminate uses a high-density fiberboard (HDF) core, essentially compressed wood, topped with a photographic layer and a tough melamine wear surface. HDF is not waterproof; get it wet at the seams and it can swell and peak.
That single property drives most buying decisions. If the floor is going in a kitchen, bath, basement, or anywhere water is a risk, vinyl’s waterproof core is the clear winner. Laminate, however, still holds two advantages: its melamine surface is often harder and more scratch-resistant than vinyl’s wear layer, and it tends to feel more like real wood underfoot with a more realistic embossed texture at a given price.
Newer water-resistant laminates narrow the gap with tighter seams and treated cores rated to resist water for up to 24 to 72 hours, but water-resistant is not waterproof. For true wet areas, vinyl remains the safer specification.
Installation Step by Step
Start with the subfloor. It must be clean, dry, and flat to within 3/16 inch over a 10-foot span; grind down high spots and fill low ones. Then roll out the correct underlayment, a thin foam or cork pad for products without an attached backing, or a vapor barrier over concrete slabs to block ground moisture.
Lay the first row along the straightest wall with spacers holding the expansion gap, working left to right. Stagger the end joints at least 6 to 8 inches from row to row so seams don’t line up, which both looks better and makes the floor stronger. Use a tapping block and a pull bar for the last plank in each row and along the final wall where there’s no room to swing a mallet.
The whole job is genuinely DIY-friendly. A confident homeowner can cover 300 to 400 square feet in a weekend with a utility knife or a fine-tooth saw, a tapping block, a pull bar, and spacers. Just resist the urge to rush the layout, because a crooked first row haunts the entire room.
Pros of Click Flooring
The number-one advantage is glueless installation. No adhesive means no fumes, no cure time, and immediate use of the room. It’s forgiving of mistakes too, because a floating floor can be unclicked and relaid if you misjudge a cut, something a glued-down floor never allows.
Maintenance is minimal for both materials: sweep and damp-mop with a pH-neutral cleaner. Repairs are manageable as well; a damaged plank near a wall can be reached by unclicking rows, and mid-floor planks can be cut out and replaced with a bit of care. Keep spares from your original lot.
Cost is friendly. Vinyl laminate click flooring runs roughly $1.50 to $5.00 per square foot for materials, and because most homeowners install it themselves, the all-in cost often lands well under professional hardwood or tile.
Cons and Limitations
Floating floors can feel slightly hollow or bouncy underfoot compared to a glued or nailed floor, especially over an uneven subfloor or a thin pad. A quality underlayment and a flat subfloor minimize this, but it’s a real characteristic of the floating method.
Laminate’s Achilles’ heel is water at the seams, so it’s the wrong choice for bathrooms and below-grade basements unless it’s a premium water-resistant product installed with sealed edges. Vinyl solves the water problem but can dent under heavy point loads and may soften near strong heat sources above about 85 degrees Fahrenheit.
Both materials need that perimeter expansion gap and a flat subfloor, and neither can be refinished the way solid hardwood can. When the wear layer eventually gives out after 15 to 25 years, you replace rather than sand and recoat.
How to Choose and Buy
Match the core to the room first: waterproof vinyl for kitchens, baths, and basements; laminate or vinyl for dry living areas and bedrooms where you want maximum scratch resistance and a realistic wood feel. Then check the wear layer on vinyl (12 mil minimum for busy homes) or the AC rating on laminate (AC3 for residential, AC4 to AC5 for heavy traffic).
Confirm the plank thickness is at least 8 mm for laminate or 5 mm for rigid vinyl so the click joints stay strong and the floor feels solid. Order 8 to 10 percent overage from a single dye lot, buy the manufacturer’s recommended underlayment, and read the warranty for the exact rooms and moisture conditions it covers. Nail those details and vinyl laminate click flooring gives you a durable, attractive floor you can install yourself and enjoy for two decades.
Underlayment and Sound: The Overlooked Details
Underlayment does more than cushion a floating floor; it controls sound, moisture, and how solid the floor feels. Many rigid-core vinyl planks ship with an attached IXPE or cork pad, and stacking a second separate pad under those is a mistake, it makes the floor too spongy and can overstress the click joints. For products without an attached backing, a 1 mm to 2 mm foam underlayment is standard, while cork pads offer better acoustic dampening in upstairs rooms and condos.
Over a concrete slab, moisture is the real concern regardless of the material above. Concrete continually wicks vapor, and even a waterproof vinyl floor benefits from a 6-mil poly vapor barrier or a pad with a built-in moisture film, because trapped moisture can foster mold in the seam gaps and, with laminate, destroy the HDF core outright. Always run a simple calcium-chloride or plastic-sheet moisture test on a slab before installing.
Sound transmission matters if you have neighbors below or want to quiet a busy household. Look for an IIC (impact insulation class) rating on the underlayment; a rating in the low 60s noticeably reduces the click and thud of foot traffic. Condo associations often mandate a minimum IIC, so check your building’s rules before you buy, since retrofitting better sound control means pulling the whole floor.
Acclimation and Temperature Rules
Every click floor needs to acclimate before installation, and skipping this step causes more failures than any other single mistake. Let the boxes sit flat and unopened in the actual installation room for 48 hours so the planks reach the room’s temperature and humidity. Vinyl in particular expands and contracts with heat, and a plank installed cold will grow and buckle once the room warms up.
Install within the manufacturer’s temperature window, typically between 65 and 85 degrees Fahrenheit, and keep the room in that range for at least 48 hours after. Rigid vinyl is the most temperature-sensitive of the click products; laid in an unconditioned space during a cold snap, it can develop gaps at the seams when the room later heats up, or peak when it expands against a too-tight perimeter. Run the HVAC or a space heater to stabilize the room before, during, and after the job, and the floor will settle in flat and stay tight for its full 15- to 25-year service life.
Prefer to explore on your own?
See how new flooring looks in your actual room in seconds — free, no signup.
Try the free Floor Studio →