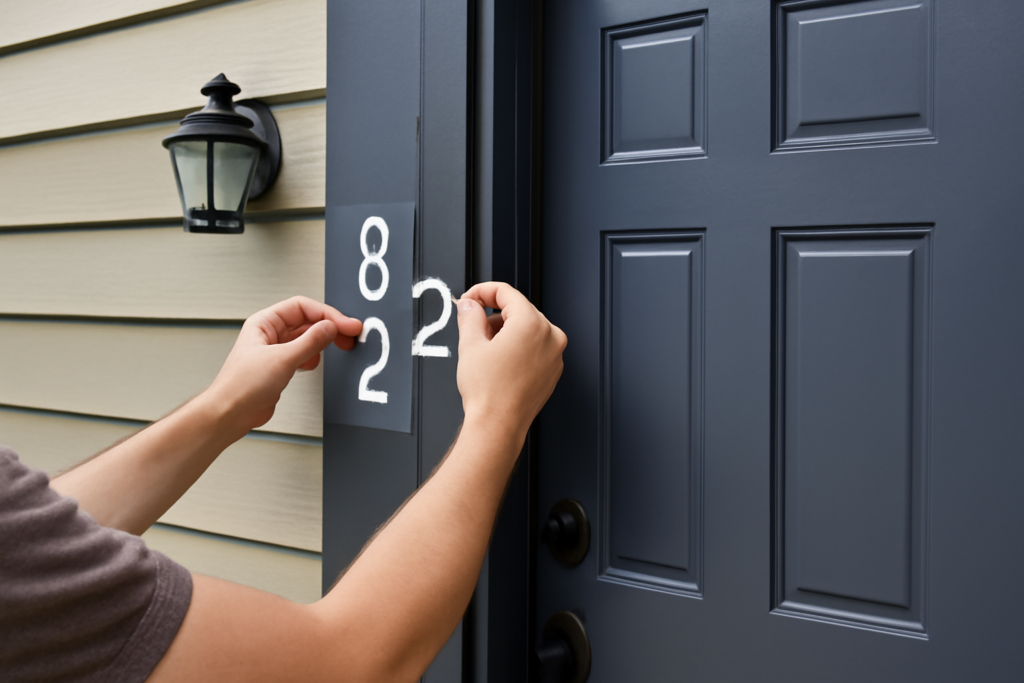
Vinyl numbers are adhesive-backed die-cut digits used to label everything from mailboxes and house fronts to trash bins, lockers, sports jerseys, and storefront windows. They give you sharp, professional-looking characters without the cost of custom signage or the mess of stencils and paint. Peel, position, press, and you have crisp numbering that holds up to weather and washing.
This guide explains the types of vinyl numbers available, how to choose the right size and material, and how to apply them so they last.
What Vinyl Numbers Are Made Of
These are precision-cut characters made from self-adhesive vinyl film, the same material used for vehicle graphics and commercial signs. The number itself is the vinyl; there is no surrounding background, so once applied it looks painted directly onto the surface.
The film comes in two broad families. Calendered vinyl is thicker and more economical, well suited to flat surfaces and shorter-term use. Cast vinyl is thinner, more flexible, and far more durable, conforming to curves and lasting many years outdoors. For a mailbox or house number that will sit in the sun and rain, cast vinyl is the better long-term investment.
Common Uses Around the Home
Vinyl numbers solve a surprising number of everyday labeling needs. Their clean look and weather resistance make them genuinely versatile.
- House and address numbers on doors, siding, columns, or curbside posts
- Mailbox identification that meets postal visibility expectations
- Trash and recycling bins labeled with your unit or house number
- Lockers, cabinets, and storage bins in garages and workshops
- Jerseys, helmets, and sporting equipment for teams and clubs
- Parking spaces, windows, and equipment for small businesses
Choosing the Right Size
Sizing depends entirely on viewing distance. A house number meant to be read from the street needs to be much larger than a label on a storage bin a few feet away. A practical rule of thumb is roughly one inch of character height for every 25 to 30 feet of viewing distance.
For curbside address visibility, many homeowners choose numbers in the 3- to 6-inch range, and some municipalities specify a minimum height for emergency-responder readability, so check your local requirements. Mailbox numbers usually fall between 2 and 3 inches. Bin and locker labels often work fine at 1 to 2 inches.
Fonts, Colors, and Finishes
Style is more than decoration; the right combination keeps your numbers legible. Bold, simple fonts read more easily at a distance than thin or ornate ones. High contrast against the background is essential, which is why black on light siding or white on a dark door is so common.
Finishes range from matte and gloss to reflective and metallic. Reflective vinyl is worth considering for address numbers because it catches headlights and porch light at night, helping deliveries and emergency services find you. Color choice should account for fading; darker colors and quality cast films resist UV bleaching far better than cheap bright hues.
How to Apply Vinyl Numbers
Application is simple, but a few minutes of care produces a cleaner, longer-lasting result. Most quality numbers come on a backing sheet with a clear transfer tape on top that keeps multi-digit sets aligned.
- Clean the surface. Wipe it with rubbing alcohol and let it dry completely. Adhesive will not bond well to dust, grease, or wax.
- Plan the placement. Use a level and light pencil marks or painter’s tape to set your baseline before you peel anything.
- Peel the backing. Separate the paper backing from the vinyl and transfer tape, leaving the numbers stuck to the clear tape.
- Position and press. Lay the tape against your guideline and smooth it down from the center outward with a squeegee or credit card to push out air bubbles.
- Remove the transfer tape. Peel it back slowly at a sharp angle, and the numbers stay behind on the surface.
Apply in mild temperatures, ideally between 50 and 90 degrees Fahrenheit, since extreme cold or heat affects how the adhesive grabs. For exterior surfaces, give the vinyl 24 to 48 hours before exposing it to heavy rain or pressure washing so the bond can fully set.
Buying Pre-Cut Versus Custom
You have two basic paths when sourcing vinyl numbers. Pre-cut sets in standard fonts, sizes, and colors are inexpensive, widely stocked at hardware and craft stores, and perfect for straightforward jobs like a mailbox or bin. They ship ready to apply and rarely cost more than a few dollars per character.
Custom-cut numbers, ordered from a sign shop or made on a home cutting machine, give you control over font, color, exact size, and finishes like reflective or metallic film. Custom is the way to go when you want numbers to match house trim, hit a specific dimension for code compliance, or use a distinctive typeface. The trade-off is a higher price and a short turnaround wait.
Tips for a Professional Result
A handful of habits separate a clean application from a crooked, bubbled one. Patience at the layout stage matters most.
- Always use a level and measure twice; vinyl is unforgiving once the adhesive grabs.
- For multi-digit sets, keep them on the transfer tape so spacing stays consistent.
- Apply the hinge method on long sets: tape the top edge, peel the backing, and roll the vinyl down gradually.
- Smooth from the center outward to chase air toward the edges.
- Pop any trapped bubbles with a pin and press flat rather than peeling and restarting.
Durability and Lifespan
How long vinyl numbers last depends on the film grade and the environment. Indoor labels can last a decade or more without trouble. Outdoors, economical calendered vinyl may hold up two to four years before fading or edge-lifting, while premium cast vinyl commonly lasts five to eight years or longer.
Surface matters as well. Smooth, non-porous materials like metal mailboxes, glass, and finished doors give the best, longest bond. Rough, textured, or chalky surfaces such as weathered wood or unsealed brick are harder for the adhesive to grip, so those may need a primer or simply a different labeling approach.
Removal and Replacement
When it is time to update or remove your numbers, the process is forgiving. Warm the vinyl gently with a hair dryer to soften the adhesive, then peel from one corner at a slow, steady angle. Any leftover residue lifts away with adhesive remover or rubbing alcohol.
That easy reversibility is part of the appeal. Unlike painted or engraved numbers, vinyl numbers let you change a unit designation, refresh a faded set, or correct a placement mistake without damaging the surface underneath. For inexpensive, sharp, and weatherproof labeling around the home, they are hard to beat.
Prefer to explore on your own?
See how new flooring looks in your actual room in seconds — free, no signup.
Try the free Floor Studio →