The kitchen is the hardest room in the house on a floor: dropped cans, splashed water, a leaking dishwasher you do not notice for a week, and appliances heavy enough to leave permanent dents. Vinyl plank flooring kitchen installs have exploded in popularity precisely because LVP handles that abuse better than almost anything at its price. But choosing the right vinyl plank for a kitchen means paying attention to specs that do not matter as much in a bedroom.
- Why Vinyl Plank Suits Kitchens So Well
- Waterproofing Is the Whole Point
- Handling Spills, Grease, and Cleaning
- Appliance Denting and the Rigid-Core Solution
- Comfort and Sound Underfoot
- Installation Notes for Kitchens
- Honest Pros and Cons
- Should the Flooring Go Under the Cabinets?
- Style Options for the Kitchen
- Bottom Line
Why Vinyl Plank Suits Kitchens So Well
Luxury vinyl plank is a plastic-core flooring with a printed wood or stone look and a clear wear layer on top. In a kitchen, its two headline traits shine: it is waterproof, and it is comfortable underfoot. Unlike hardwood or laminate, LVP does not swell, warp, or stain when water sits on it, which is exactly the insurance a kitchen needs. And unlike tile, it has a little give and warmth, so standing at the counter cooking dinner does not punish your feet and back.
Waterproofing Is the Whole Point
In a kitchen, water is the number-one floor killer, and this is where LVP earns its keep. The plank itself is 100 percent waterproof because the core is plastic, not wood. Spills, mopping, and splashes cause no damage as long as you wipe up standing water in a reasonable time.
The vulnerability is not the plank, it is the seams. Water can seep through the locking joints and get trapped against the subfloor, where it can breed mold even though the vinyl itself is fine. To guard against that in a kitchen, choose planks with tight, waterproof-rated locking systems, and for extra protection around dishwashers and sinks, some installers run a bead of silicone at the perimeter and under the toe-kick.
Handling Spills, Grease, and Cleaning
Day to day, LVP is one of the easiest kitchen floors to keep clean. Its non-porous surface does not absorb grease, wine, tomato sauce, or coffee, so stains wipe away rather than soaking in. A damp mop with a pH-neutral cleaner is all it needs. Avoid abrasive scrubbers and harsh solvents, which can dull the wear layer over time, and skip steam mops, since forced hot vapor can work into the seams and soften the adhesive on glue-down products.
Appliance Denting and the Rigid-Core Solution
Here is the kitchen-specific issue people overlook: appliances. A refrigerator can weigh 300 pounds on four small feet, and that concentrated load dents softer flooring. Flexible, thin LVP is the most prone to permanent indentation under heavy point loads.
The fix is choosing a rigid-core product, either SPC (stone plastic composite) or WPC, which resists denting far better than flexible glue-down vinyl. Look for these specs for a kitchen:
- Rigid core (SPC preferred) for dent resistance under appliances and furniture.
- Wear layer of 12 to 20 mil to handle dropped pans and dragged stools.
- Overall thickness of 5mm or more for a solid, stable feel.
Even with rigid core, use appliance sliders and wide-footprint protectors when rolling the fridge in and out so you do not gouge the surface.
Comfort and Sound Underfoot
Cooks spend hours standing in the kitchen, and LVP is meaningfully more comfortable than porcelain tile or concrete. WPC (wood plastic composite) cores have a slightly softer, warmer feel than dense SPC, which some people prefer for a kitchen where they stand a lot, at the cost of a bit less dent resistance. An attached cork or foam underlayment pad adds cushioning and cuts the hollow, clicky sound that bare rigid vinyl can make on a hard subfloor.
Installation Notes for Kitchens
Most kitchen LVP is click-lock floating, which is DIY-friendly, but kitchens add wrinkles. You typically install the floor and then set the range and refrigerator on top, but built-in cabinets and islands usually sit on the subfloor with the floor butting up to them, so plan your layout around what is fixed. Undercut door casings for a clean fit, and leave the required expansion gap around the perimeter, hidden by baseboard and toe-kick. Make sure the subfloor is flat within the manufacturer’s tolerance, since dishwasher and fridge weight will telegraph any dips over time.
Honest Pros and Cons
Weigh both sides before committing:
- Pros: waterproof, stain-resistant, comfortable, warm, quiet with underlayment, DIY-friendly, budget range of $2 to $5 per square foot, convincing wood and stone looks.
- Cons: softer LVP dents under appliances, seams can trap water if not sealed at sink and dishwasher, cannot be refinished, quality varies wildly so cheap products disappoint, and it does not add resale value the way real hardwood or tile can.
Should the Flooring Go Under the Cabinets?
This is the kitchen question that trips up DIYers, and the answer depends on your product and layout. With a floating click-lock LVP floor, the standard practice is to install the flooring up to the cabinets and appliances, not underneath the cabinets, because the floating floor needs room to expand and contract and cabinets screwed through it would pin it in place and cause buckling. You then set freestanding appliances like the range and dishwasher on top of the finished floor so they can be pulled out later without trapping them.
If you are replacing flooring in an existing kitchen where cabinets are staying, you simply run the new floor up to the toe-kick and finish the edge with a matching trim or a bead of color-matched caulk. Plan your first-row layout with the cabinet runs in mind so the visible field of the floor looks balanced.
Style Options for the Kitchen
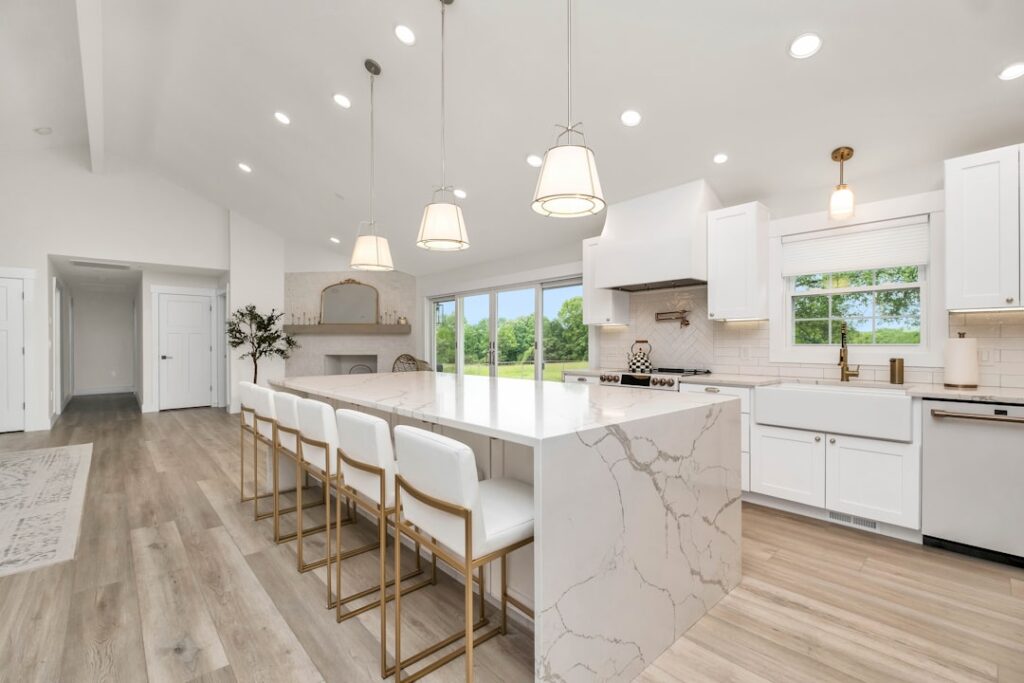
Beyond performance, LVP gives you a wide design range to match your kitchen’s look. Wood-look planks in white oak, hickory, or weathered gray suit farmhouse and transitional kitchens, while stone- and tile-look LVP can mimic slate, marble, or terrazzo for a more classic or contemporary feel without the cold, hard grout lines of real tile. Wider planks and larger tile formats make a small kitchen feel more open, and running the planks parallel to the longest sightline stretches the room visually. Choosing a matte, textured finish also hides the crumbs, footprints, and light scuffs that a busy kitchen floor collects daily.
Bottom Line
Vinyl plank flooring kitchen installs work because LVP is waterproof, forgiving of spills, and easy on your feet, exactly what a kitchen demands. The keys to getting it right are choosing a rigid SPC core with a thick wear layer to survive appliances and dropped pans, sealing the seams near water sources, and skipping the steam mop. Buy the right spec rather than the cheapest box, and a vinyl plank kitchen floor will outlast a decade of daily cooking.
Prefer to explore on your own?
See how new flooring looks in your actual room in seconds — free, no signup.
Try the free Floor Studio →