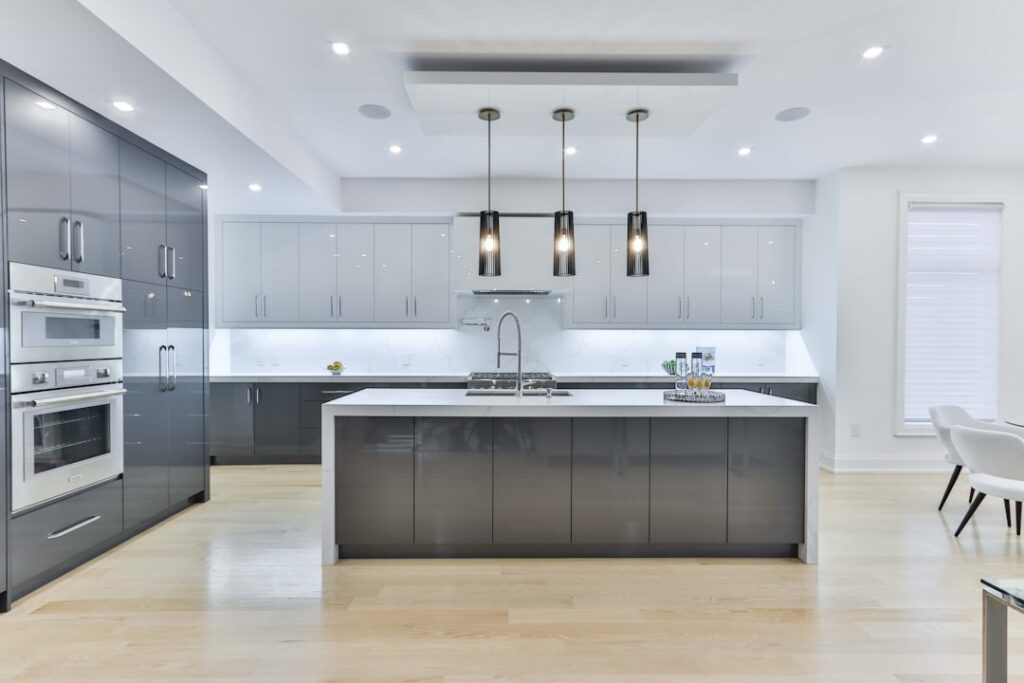
Great task lighting is the difference between a kitchen that merely looks finished and one that actually works after dark. WAC under cabinet lighting has become a go-to for homeowners and designers who want clean, even illumination on the countertop without the shadows and hot spots cheaper strips leave behind. WAC Lighting builds a full ecosystem of linear bars, tape, and puck fixtures designed to tie together on a single low-voltage system, which means you can light an entire kitchen with matched color and consistent brightness instead of a patchwork of mismatched products. For anyone tired of squinting while chopping vegetables in their own shadow, upgrading under-cabinet lighting is one of the most satisfying improvements you can make.
This guide explains the main fixture types, the specs that matter — color temperature, brightness, and dimming — and how the components come together so you can plan a clean, professional-looking install.
Why Under-Cabinet Lighting Matters
Overhead ceiling lights sit behind you when you stand at the counter, casting your own shadow onto the exact surface you’re working on. Under-cabinet fixtures solve that by lighting the countertop directly from above the backsplash, eliminating shadows and making prep, reading recipes, and cleanup dramatically easier. Beyond function, a warm strip of light washing down the backsplash adds ambiance and depth to the room, and a low-level version makes an excellent nightlight that doesn’t require flipping on the harsh main lights.
The Main Fixture Types
WAC’s system centers on a few fixture families, and choosing the right one depends on your cabinets and the look you’re after.
Linear Bar Fixtures
Rigid linear light bars are the most popular choice for a clean, built-in appearance. They come in fixed lengths, mount with clips or screws under the cabinet, and link together end to end with connectors to span a run. Because they’re rigid and low-profile, they hide neatly behind the cabinet’s face frame and throw even, continuous light with no visible dots. They’re the easiest way to get a uniform, glare-free wash on the counter.
LED Tape Light
Flexible tape light is the most versatile option, ideal for curved cabinets, tight spaces, or continuous runs of any length. It’s cut to size at marked intervals, sticks or clips into an aluminum channel, and can wrap around corners a rigid bar can’t. Mounting tape in an extruded aluminum channel with a diffuser is the pro move — it hides the individual diodes, spreads the light evenly, and acts as a heat sink that extends the LEDs’ life.
Puck Lights
Round puck fixtures cast individual pools of light and suit shallow cabinets or spots where a bar won’t fit. They create a slightly more dramatic, spotlighted look than continuous bars, and are a fine choice for accenting a glass-front cabinet or a small run. For general task lighting across a long counter, though, linear fixtures give more even coverage.
Color Temperature: Getting the Warmth Right
Color temperature, measured in Kelvin, has an outsized effect on how your kitchen feels. It’s worth choosing deliberately rather than grabbing whatever’s on the shelf.
- 2700K–3000K (warm white): Cozy and inviting, similar to a traditional incandescent bulb. Flatters warm wood tones and most kitchens.
- 3500K (soft/neutral white): A balanced middle ground that reads clean without feeling cold.
- 4000K (cool white): Crisp and energizing, good for a modern, high-contrast kitchen, though it can feel clinical to some.
Some WAC fixtures offer selectable or tunable color temperature, letting you dial the exact warmth or even shift it throughout the day. Whatever you choose, keep it consistent with your other kitchen lighting so the room reads as one cohesive space rather than a mix of warm and cool zones. A high color rendering index (CRI) of 90 or above is also worth prioritizing — it makes food and finishes look true to color.
Brightness and Dimming
Brightness is measured in lumens per foot for linear systems. For task lighting on a work counter, you generally want a robust output, while accent or ambiance-only lighting can be dimmer. The real luxury, though, is dimming. Pairing your fixtures with a compatible dimmer lets you run bright light for chopping and cleanup, then drop it to a soft glow for evenings and entertaining. Not every dimmer works with every LED driver, so match the dimmer to WAC’s compatibility guidance to avoid flicker or buzz.
How the System Comes Together
Most under-cabinet setups are low-voltage, which means a power supply (driver) converts your home’s line voltage down to the level the LEDs use. Planning the system means accounting for a few connected parts.
- Fixtures: The bars, tape, or pucks you’ll mount under the cabinets.
- Power supply/driver: Sized to handle the total wattage of all your fixtures combined, with headroom to spare.
- Connectors and leads: Link fixtures together and route wiring back to the driver, hidden along the cabinet undersides.
- Control: A switch or compatible dimmer, and optionally a smart or occupancy sensor.
Add up the wattage of every fixture before choosing a driver, and don’t run it at maximum capacity — leaving a margin keeps it cool and prolongs its life. Plan your runs so connectors and wiring stay hidden behind the cabinet’s front lip.
Installation Basics
Many under-cabinet systems are designed for straightforward installation. Fixtures mount to the underside of the cabinet, positioned toward the front edge so light falls on the counter rather than reflecting off the backsplash. Wiring routes back along the cabinet bottoms to the power supply, which is often tucked inside a cabinet or above the toe kick. Plug-in drivers let you power the system from an existing outlet, while hardwired installations tie into a switch and should be handled by a licensed electrician if you’re not comfortable working in a junction box.
Mount linear fixtures as close to the front of the cabinet as the face frame allows, and use channel with a diffuser for any tape light so you never see individual dots reflected in a glossy countertop. Test the full run before permanently securing everything, and confirm the dimmer behaves smoothly across its range.
Positioning for Even, Glare-Free Light
Where you mount the fixtures matters as much as which ones you buy. The goal is even light on the countertop with no glare bouncing back into your eyes and no visible dots reflected in a glossy backsplash or stone counter. For that, mount linear fixtures toward the front edge of the cabinet’s underside, behind the face frame’s lip so the light source is hidden from view. This throws light forward and down onto the work surface rather than straight down against the backsplash.
Spacing between fixtures affects evenness too. Long continuous runs give the smoothest wash, while gaps between shorter fixtures can create scalloped bright-and-dark patterns on the counter. When a cabinet run has breaks — over a range hood or a window — plan the fixtures so the lit sections stay balanced. A high-gloss countertop is the most demanding: any exposed diode will reflect as a row of dots, which is exactly why a diffused linear bar or channel-mounted tape beats bare strip light in these installations.
Smart Controls and Sensors
Modern under-cabinet systems can do far more than switch on and off. Occupancy or motion sensors turn the lights on automatically when you enter the kitchen and off when you leave — convenient and energy-saving, especially for a low nightlight setting. Smart-home integration lets you control the lights by voice or app, group them into scenes, and schedule them to follow your day, warming up in the evening and brightening for cooking.
Tunable-white fixtures take this further by letting you shift the color temperature on demand: a crisp, cool light for detailed prep and a warm, relaxed glow for entertaining, all from the same fixtures. If you’re building a system from scratch, deciding on controls early is wise, since the driver, dimmer, and any smart hub need to be compatible from the start. Retrofitting smart control onto an incompatible driver later often means replacing components you already installed, so plan the whole chain — fixtures, driver, dimmer, and control — as one coordinated system.
Is It Worth It?
For the impact it delivers, quality under-cabinet lighting is one of the best returns in a kitchen. It sharpens function where you actually work, adds warmth and depth to the room, and — with dimming — flexes from bright task light to soft evening glow. Building the system on a single matched platform means consistent color and brightness across every fixture, which is exactly where cheap mismatched strips fall short.
Whether you outfit a compact galley or a sprawling chef’s kitchen, a well-planned WAC under cabinet lighting system brings the countertop to life with even, shadow-free light. Choose a color temperature that suits your space, size the driver with headroom, dim it to taste, and you’ll wonder how you ever cooked without it.