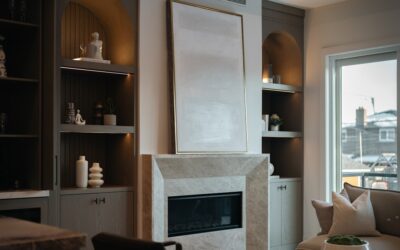
Few millwork details transform a room as quickly as wainscoting. The right wainscoting patterns can make a 1990s tract home feel like a restored colonial or anchor a modern entryway with quiet sophistication. Most homeowners get stuck choosing between flat panel and beadboard, but the actual menu of patterns is much broader and the right choice depends on ceiling height, trim profiles, and your overall design language. Pricing also varies more than you might expect, from about $7 per linear foot for prefab beadboard up to $42 for site-built raised panel.
Beadboard: The Classic Workhorse
Beadboard remains the most installed wainscoting in American homes for good reason. Vertical 1.5 to 3 inch grooves with rounded beads scale well in cottages, mudrooms, and bathrooms, and the look has been familiar since the 1880s. You can buy 4 by 8 foot MDF panels at Home Depot for about $26, or solid pine tongue and groove planks for $1.80 per square foot at lumber yards.
Standard installation height is 36 to 42 inches, capped by a 1×3 top rail and a 4 to 6 inch base. For a more elevated look, run beadboard at 54 inches with a deeper crown-style cap and shallow chair rail. Paint with Benjamin Moore Advance in semi-gloss for cabinet-grade durability, especially in bathrooms where moisture cycling will crack a basic latex finish.
Board and Batten: Bold, Architectural, Flexible
Board and batten uses flat vertical battens, usually 1×3 or 1×4 poplar, applied over a smooth backer panel or directly on drywall at 12 to 16 inch spacing. It is the most forgiving DIY pattern because the battens cover most installation sins. Material cost runs $4 to $6 per square foot in poplar, or $8 to $10 in primed maple. The dramatic vertical rhythm scales beautifully on tall walls and works equally well in modern farmhouses and craftsman bungalows.
Run battens floor to ceiling for the most architectural impact, or stop at 60 inches and cap with a thick top shelf. A 1.5 inch deep cap gives you a useful ledge for picture frames or a row of hooks. Use 16 gauge brad nails plus construction adhesive on each batten and caulk every seam before painting in Sherwin-Williams Emerald Urethane Trim Enamel.
Raised Panel: Formal Period Style
Raised panel wainscoting is the traditional choice in formal dining rooms, libraries, and stairwells. Each panel sits inside a stile-and-rail frame, with the panel field raised on a beveled profile cut on a shaper or router table. Done right, this is the most expensive style at $30 to $42 per linear foot installed because the rail-and-stile joinery needs precise miters and consistent reveals.
Standard heights are 32 inches for dining rooms and 54 to 60 inches for grander rooms. Use 5/8 inch poplar or paint-grade maple for the frame and 1/2 inch MDF panels for cost control. For stain-grade work, switch to quartersawn white oak panels with rift-sawn frames so the grain reads cleanly. Hire a finish carpenter unless you have a chop saw, table saw, and several test pieces of patience.
Flat Panel and Shaker Style
Flat panel wainscoting, also called recessed panel or shaker, uses a smooth flat panel inset within a square-edged frame. The clean lines suit transitional and modern homes, and you can build the effect with applied moldings over existing drywall rather than full panels. This trick cuts material cost in half, around $9 to $14 per linear foot in materials, and works particularly well around stairwells where curved walls make panel installation tricky.
Lay out the pattern carefully. Most rooms look balanced with panels 16 to 24 inches wide and 28 to 36 inches tall, separated by 3 inch stiles. Snap chalk lines, then nail 1×2 primed poplar over the wall to create the frame. Caulk inside corners, fill nail holes with Dap Crackshot, and roll on two coats of paint. The faux flat panel look survives close inspection if your reveals are consistent.
Picture Frame Molding: Budget-Friendly Drama
Picture frame wainscoting skips the panels entirely and uses only applied moldings to suggest recessed boxes. Pre-primed 1/2 inch decorative trim from Metrie or House of Fara costs about $1.40 per linear foot, so an average dining room runs $250 to $400 in materials. Sketch the layout in chalk first since panel proportions are everything. Boxes look right when they sit at roughly the 3:2 width-to-height ratio, with equal margins from top to bottom rails.
This is the easiest pattern for first-time DIYers. You only need a miter saw, brad nailer, level, and a steady hand. Caulk every joint, both inside and outside of the boxes, and prime any raw cut ends. Painted in a single color matched to the wall above, the look is subtle and architectural. Painted in contrasting colors or with a deeper hue in the boxes, it becomes a focal wall.
Overlay and V-Groove Variations
Overlay wainscoting layers small applied moldings on top of a base panel to create panels with raised borders. Common in Georgian and Federal style homes, the layered profile reads more formal than flat panel without the cost of true raised panel. Use 1/4 inch chair rail molding glued and pinned over a smooth MDF field, then top with a 5 inch profiled cap.
V-groove paneling delivers a more rustic, beachy feel than beadboard since the grooves are sharper and the beads are absent. Manufacturers like DPI Decorative Wall Paneling sell 4 by 8 foot panels for $32. V-groove is excellent for ceilings in screened porches and works well as wainscoting in coastal cottages painted in a soft white or pale gray.
Choosing the Right Height and Cap
Wainscoting height changes the way a room feels. Cap at 32 inches for a low chair rail look, 36 to 42 inches for the classic standard, 54 inches for high wainscot that elevates ceilings, or full height for total drama. Always measure ceiling height and adjust accordingly. A room with 8 foot ceilings looks compressed with full-height wainscot, while a room with 10 foot ceilings can carry it beautifully.
The cap rail finishes the pattern. Use a simple square-edged 1×3 for shaker style, a thicker bullnose cap with picture frame molding, or a profiled chair rail with traditional patterns. Whichever pattern and cap you choose, paint the entire assembly in one sheen, prime every cut edge, and budget two or three weekends for a careful job. Done right, wainscoting outlasts every other finish in the house.