A washer dryer countertop is one of the most practical upgrades you can make to a laundry room. It gives you a clean, stable surface for folding clothes, sorting laundry, and keeping supplies organized, while also improving the look of what is often an overlooked room. With over 30 years of home improvement experience, we have built and installed dozens of washer dryer countertops and can tell you exactly how to do it right. This guide covers measurements, materials, structural support, installation steps, costs, and design ideas to help you build the perfect laundry countertop.
Why Add a Washer Dryer Countertop
A washer dryer countertop transforms a utilitarian laundry space into a functional, organized room. Here are the practical benefits that make this project worthwhile:
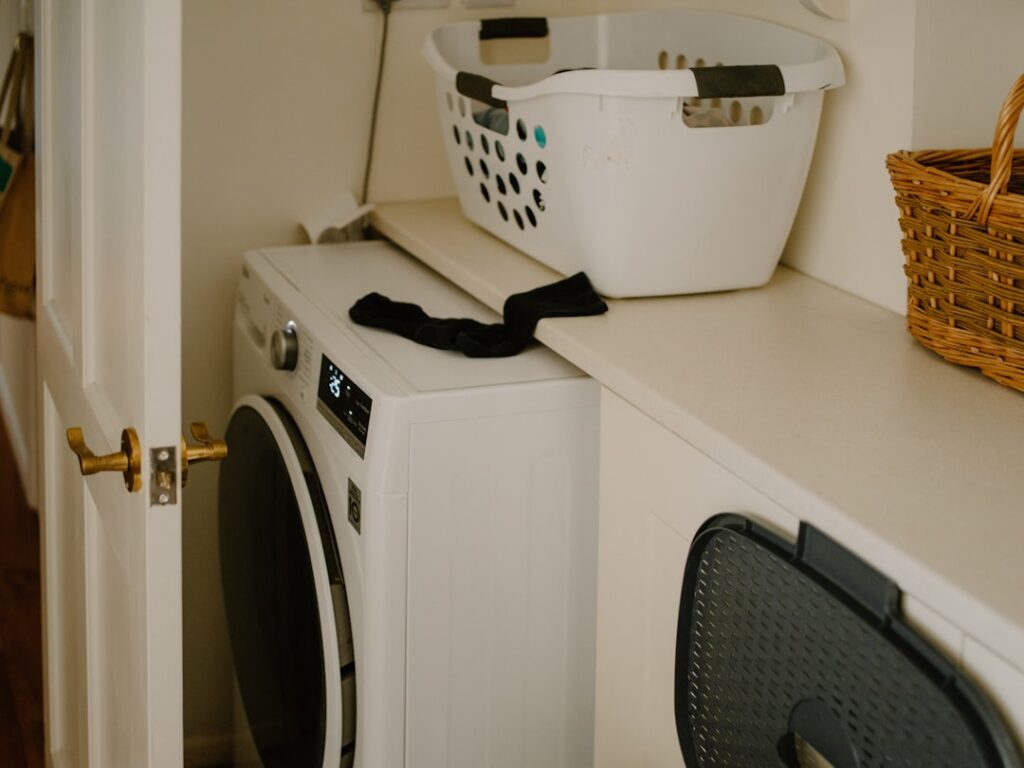
Folding surface. The countertop creates a waist-height work surface that is perfect for folding clothes straight out of the dryer. Without a countertop, most people fold on top of the vibrating dryer lid or haul laundry to a bed or table in another room. A solid countertop right at the machines is more convenient and reduces laundry time.
Prevents items from falling behind machines. The gap between the washer, dryer, and wall is a black hole for socks, dryer sheets, and small items. A countertop that spans the full width eliminates this gap and keeps everything accessible.
Improved aesthetics. A countertop visually unifies the washer and dryer, making the laundry room look intentional and finished rather than like a utility closet with appliances shoved in. When combined with a backsplash and cabinet storage, a washer dryer countertop can make the laundry room feel like a designed part of the home.
Added storage. The countertop can incorporate a shelf above for supplies, hooks underneath for hangers, or a rod across the front for air-drying garments. It becomes the anchor for an organized laundry system.
Home value. A finished laundry room with a countertop is a selling point that buyers notice. It signals that the home has been thoughtfully maintained and updated.
Measurements and Planning
Accurate measurements are essential for a washer dryer countertop that fits correctly and looks professional. Here is what you need to measure and plan before buying materials:
Width: Measure the total width from the left wall to the right wall (or to the point where you want the countertop to end). Most laundry spaces are 50 to 65 inches wide for a side-by-side washer and dryer. Standard residential washers and dryers are 27 inches wide each, so two machines side by side occupy 54 inches. Add 1 to 2 inches between machines for vibration clearance and 1 to 3 inches on each side for clearance from walls. Your countertop should span the full width of the space, wall to wall.
Depth: Measure from the back wall to the front of the machines. Standard washers and dryers are 27 to 33 inches deep. The countertop should extend to the front of the machines or overhang by 1 to 2 inches for a finished look. A typical countertop depth is 27 to 34 inches. Account for water connections and dryer venting behind the machines, which usually require 4 to 6 inches of clearance from the wall.
Height: Measure the height of your machines from the floor to the top. Standard front-load washers and dryers (without pedestals) are 36 to 39 inches tall. With pedestals, they are 50 to 55 inches tall. The countertop sits on top of this, adding 1 to 2 inches for the countertop material thickness and any support framework. Your final countertop height will be approximately 38 to 41 inches for machines without pedestals, which is a comfortable working height for most adults.
Critical planning notes:
- Ensure you can still access water supply valves and the dryer vent connection behind the machines after the countertop is installed
- Leave enough clearance above the machines for the countertop structure (the countertop cannot rest directly on the machines due to vibration)
- Plan for a 1/4-inch gap between the countertop and the top of each machine to prevent vibration transfer
- Consider whether you need to slide the machines out for maintenance and ensure the countertop design allows this
Front-Load vs Top-Load Considerations
The type of machines you have fundamentally determines whether and how you can install a washer dryer countertop:
Front-load washers and dryers are ideal for a countertop installation. The doors open from the front, so a countertop above does not interfere with machine operation. The flat top surfaces of front-load machines provide a visual base for the countertop, and the machines are a consistent height. This is the standard configuration for washer dryer countertops and what this guide primarily addresses.
Top-load washers present a significant challenge. The lid must open upward, which means a fixed countertop above the washer blocks access to the drum. There are three workarounds:
- Build the countertop over only the dryer and leave the washer side open. This is the simplest approach but loses some of the visual and functional benefits.
- Build a hinged countertop section over the washer that lifts up on a piano hinge. This works but adds complexity and the hinge can wear over time.
- Build the countertop high enough to clear the open washer lid. This usually means the countertop is too high for comfortable folding (46 to 50 inches), negating one of the main benefits.
Our recommendation: if you are planning a washer dryer countertop and your current machines are top-load, consider upgrading to front-load machines the next time one needs replacement. The countertop experience with front-load machines is dramatically better.
Top-load dryers are rare in residential settings (most residential dryers are front-load), so this is typically only a concern for the washer side.
Countertop Material Options
The material you choose for your washer dryer countertop affects cost, durability, appearance, and ease of installation. Here are the most common options:
Butcher block (hardwood) is the most popular DIY choice. It is warm, attractive, easy to cut and install, and available at Home Depot, Lowe’s, and IKEA in standard countertop sizes. Birch, maple, and acacia are common species. Butcher block costs $5 to $15 per square foot and can be finished with polyurethane, tung oil, or left unfinished for a natural look. Seal it well if your laundry room sees moisture.
Laminate countertop (Formica, Wilsonart) is affordable, low-maintenance, and available in hundreds of colors and patterns including convincing stone and wood looks. Pre-formed laminate countertops with integrated backsplashes cost $10 to $25 per linear foot at home improvement stores. Laminate is waterproof on the surface but the particleboard substrate can swell if water penetrates through seams or edges.
Plywood with paint or laminate is the most budget-friendly option. A sheet of 3/4-inch cabinet-grade plywood costs $40 to $80 and can be cut to any dimension. Paint it with a quality semi-gloss or satin paint, or apply peel-and-stick laminate for a cleaner finish. Edge-band the exposed plywood edges with iron-on veneer for a finished look.
Quartz or granite provides a premium, stone surface that is waterproof, stain-resistant, and extremely durable. Quartz costs $40 to $100 per square foot installed, and granite is similar. For a 55×28-inch washer dryer countertop, expect to pay $450 to $1,000+ for material and fabrication. This is overkill for most laundry rooms but creates a high-end look that matches kitchens and bathrooms.
Solid surface (Corian) offers seamless, non-porous surfaces that are easy to clean and repair. It costs $25 to $60 per square foot installed. Solid surface is an excellent middle ground between laminate and stone in both cost and appearance.
MDF with melamine or paint is similar to plywood but with a smoother surface. MDF is heavier and does not handle moisture well, so it should only be used in laundry rooms with good ventilation and must be thoroughly sealed on all surfaces and edges.
Support and Structural Requirements
A washer dryer countertop must be properly supported. It cannot rest directly on the machines because the vibration from the washer’s spin cycle would shake the countertop, create noise, and potentially crack stone or laminate materials. Here is how to build a support structure:
Wall cleat support (most common method): Attach a 2×4 or 2×2 cleat to the back wall at the desired countertop height using 3-inch screws driven into wall studs. The countertop rests on this rear cleat. For the front, install side cleats on the left and right walls (if available) or build vertical support legs at the front corners.
Side panel support: Build two vertical panels from 3/4-inch plywood, one on each side of the machines. These panels attach to the wall and floor and support the countertop at the front and sides. This creates a built-in, furniture-like appearance and also closes off the gap beside the machines.
Leg support: If there are no walls on the sides (like an island laundry configuration), build a freestanding frame from 2×4 lumber that sits around the machines like a table frame. The countertop attaches to this frame. This is less common in residential laundry rooms but works for open-concept utility spaces.
Key structural requirements:
- The countertop must be level and stable enough to support 50 to 75 pounds of folded laundry and supplies without sagging
- Rear cleats must be screwed into wall studs, not just drywall, as drywall anchors alone cannot support the weight
- The countertop should be isolated from the machines by at least 1/4 inch to prevent vibration transfer
- For spans greater than 48 inches without side support, add a center support bracket or leg to prevent sagging
- Use anti-vibration pads under the washer and dryer feet to minimize vibration that could affect the countertop and surrounding structure
Step-by-Step DIY Build Guide
This washer dryer countertop build guide uses the most common configuration: a butcher block or plywood countertop supported by wall cleats and side panels, installed over front-load machines.
Tools needed: Circular saw or table saw, drill/driver, level, stud finder, tape measure, sander, and finish supplies (paint, stain, or polyurethane).
Materials needed: Countertop material (butcher block, plywood, or laminate), 2×4 or 2×2 lumber for wall cleats, 3/4-inch plywood for side panels (if used), 3-inch wood screws, L-brackets, construction adhesive, caulk, and chosen finish.
Step 1: Measure and cut the countertop. Measure your space width, depth, and height carefully. Cut the countertop material to size. If using butcher block, cut with a circular saw using a fine-tooth blade to prevent splintering. Add any edge treatments (rounding, profiling) before installation.
Step 2: Install the wall cleat. Locate wall studs with a stud finder. Mark a level line on the back wall at the desired countertop height minus the thickness of the countertop material. Attach a 2×4 or 2×2 cleat along this line with 3-inch screws into every stud. This cleat supports the back edge of the countertop.
Step 3: Install side supports. If you have walls on both sides, install a cleat on each side wall using the same method. If one or both sides are open, build side panels from 3/4-inch plywood cut to the height and depth of the countertop. Attach the panels to the rear wall cleat and secure them to the floor with L-brackets.
Step 4: Add front support if needed. For countertops wider than 48 inches, add a center support. This can be a vertical 2×4 or plywood panel between the machines. Alternatively, install a horizontal front rail between the side panels and add L-brackets to support the countertop edge.
Step 5: Place the countertop. Set the countertop on the cleats and side supports. Check for level in all directions. Shim as needed. Secure the countertop to the cleats from below using L-brackets or by screwing up through the cleats into the countertop bottom.
Step 6: Finish and caulk. Apply your chosen finish (paint, polyurethane, or stain). Once dry, caulk the joint between the countertop and the wall with paintable silicone caulk for a clean, sealed edge. If desired, install a backsplash (a 4-inch strip of matching material or tile) along the back wall.
Step 7: Slide machines into place. Carefully slide the washer and dryer under the countertop. Verify the 1/4-inch minimum clearance between the machine tops and the countertop bottom. Reconnect water, drain, and vent connections. Run a test cycle to verify no vibration contact with the countertop.
Cost Breakdown
Here is what a typical washer dryer countertop project costs in 2026, broken down by material choice:
Budget build (painted plywood):
- 3/4-inch plywood sheet: $40 to $70
- 2×4 lumber for cleats: $10 to $20
- Edge banding, screws, brackets: $15 to $25
- Paint and primer: $25 to $40
- Total: $90 to $155
Mid-range build (butcher block):
- Butcher block countertop (25×50 inch): $100 to $250
- 2×4 lumber for cleats and supports: $15 to $25
- Screws, brackets, hardware: $15 to $25
- Finish (polyurethane or oil): $20 to $35
- Total: $150 to $335
Premium build (laminate or solid surface):
- Pre-formed laminate countertop: $80 to $200
- Or solid surface (Corian): $250 to $600
- Support materials: $20 to $40
- Hardware and caulk: $15 to $25
- Total: $115 to $665
High-end build (quartz or granite):
- Quartz slab (fabricated to size): $400 to $1,000
- Professional templating and installation: $150 to $300
- Support materials: $20 to $40
- Total: $570 to $1,340
For most DIYers, the butcher block option offers the best combination of cost, appearance, and ease of installation. It creates a warm, attractive surface that looks great in photos and in person, and it can be completed in a single weekend for under $300.
Washer Dryer Countertop Design Ideas
Beyond the basic countertop, consider these design enhancements to make your laundry room more functional and attractive:
Add a backsplash. A 4 to 6-inch backsplash along the back wall protects the drywall from moisture and gives the installation a finished, built-in look. Use matching countertop material, subway tile, or peel-and-stick tile for a quick upgrade.
Install a hanging rod. Mount a closet rod across the front of the countertop area (between the side panels or supported by brackets on the side walls) for hanging air-dry garments directly from the machines. Position the rod at the front edge of the countertop, approximately 48 to 54 inches from the floor.
Add under-counter storage shelves. If your machines are narrower than the total space width, build a narrow shelf unit in the remaining gap beside one of the machines. This is a perfect spot for detergent, dryer sheets, and laundry supplies.
Include a fold-down shelf. Install a wall-mounted, fold-down shelf above the countertop for additional workspace when needed and compact storage when not in use. This is especially useful in small laundry closets where every inch matters.
Waterfall edge. Extend the countertop material down the exposed side of the machines (if one side is visible) for a seamless, contemporary look. This “waterfall” edge is a popular design element in modern kitchens that translates well to laundry rooms with butcher block or stone countertops.
Built-in sorting bins. Install a pullout hamper system below the countertop beside the machines for sorting whites, colors, and delicates. This keeps laundry organized and off the floor.
Upper cabinets. Pair your washer dryer countertop with matching upper cabinets installed on the wall above. Standard 12-inch deep wall cabinets at 54 to 60 inches from the floor provide excellent storage for laundry supplies while maintaining head clearance for the countertop surface.
Lighting. Install under-cabinet LED strip lights beneath upper cabinets (or a single wall-mounted light) to illuminate the countertop surface. Laundry rooms are often poorly lit, and task lighting above the folding surface makes a significant practical difference.
Frequently Asked Questions
Can I put a countertop directly on my washer and dryer?
No. A countertop should never rest directly on the machines. Washers vibrate significantly during the spin cycle, which would shake the countertop, create noise, and potentially damage both the countertop and the machines. The countertop must be supported independently by wall cleats, side panels, or a freestanding frame, with at least 1/4 inch of clearance between the countertop and the machine tops.
What is the best material for a washer dryer countertop?
Butcher block is the best overall choice for most DIY washer dryer countertop projects. It is affordable ($100-$250), easy to cut and install, attractive, and durable. Seal it with polyurethane for water resistance. For a higher-end look, quartz provides a waterproof, low-maintenance surface but costs significantly more and usually requires professional fabrication.
Can I build a countertop over a top-load washer?
A fixed countertop blocks access to a top-load washer’s drum. You can build a countertop over only the dryer side, install a hinged countertop section that lifts over the washer, or build the countertop high enough to clear the open lid. None of these solutions is as clean as a countertop over front-load machines. If you plan to build a countertop, front-load machines are strongly recommended.
How much does a washer dryer countertop cost to build?
A DIY washer dryer countertop costs $90 to $335 for most builds. A painted plywood top runs $90 to $155 including all materials. A butcher block top costs $150 to $335. Premium materials like quartz or solid surface increase the cost to $500 to $1,300 or more, especially if professional fabrication is required.
Do I need to secure the countertop to the wall?
Yes. The countertop must be securely attached to wall cleats that are screwed into studs. An unsecured countertop can shift, tilt, or fall when weight is placed on it or when machines vibrate during operation. Use L-brackets screwed through the cleats into the underside of the countertop, and caulk the back edge for a clean seal.